Do you have a question about the sparkfun Pro Micro and is the answer not in the manual?
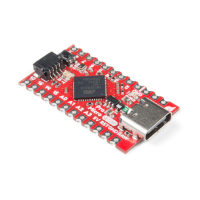
Overview of the Pro Micro's pin layout and pin functions, including power and I/O pins.
Details on the RAW, VCC, RST, and GND pins for powering and resetting the Pro Micro.
Explanation of the Pro Micro's digital and analog I/O pins, PWM, UART, I2C, SPI, and interrupt capabilities.
Description of the Pro Micro's on-board LEDs for power indication and USB data transfer status.
Discusses the two versions of the Pro Micro, their voltage and frequency, and their impact on I/O pin voltage limits.
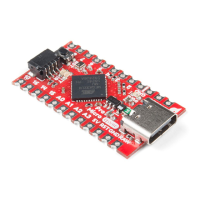
Overview of the Fio v3's pin layout, including its similarity to the Pro Micro and unique features.
Details on the 3.3V power output pins on the Fio v3 and how they are regulated.
Explanation of the Fio v3's RST pin for resetting the board and its active-low nature.
Description of the Fio v3's multi-talented I/O pins, including analog input and PWM capabilities.
Details the various LEDs on the Fio v3, including power, RX/TX, and XBee status indicators.
Explains how to use the Fio v3's built-in LiPo charging circuit and the 'CHG' LED indicator.
Describes the XBee footprint connectors on the Fio v3 and their interface with the ATmega32U4.
Guide for installing necessary drivers for the Pro Micro and Fio v3 on Windows systems.
Instructions for adding Pro Micro/Fio v3 board definitions to the Arduino IDE sketchbook.
Details on installing the Pro Micro on Mac OS X and Linux, including handling the Keyboard Setup Assistant.
Steps to add Pro Micro/Fio v3 board definitions to Arduino IDE for Mac and Linux environments.
Guide to uploading a sketch that controls the Pro Micro's RX/TX LEDs and demonstrates serial output.
Explains the code for controlling RX/TX LEDs and the use of two serial ports (USB and UART) on the Pro Micro.
Explains why the Pro Micro might re-enumerate after uploading code due to its dual serial ports.
Introduces the Arduino Keyboard class and functions for emulating USB keyboard behavior.
Introduces the Arduino Mouse class and functions for controlling mouse movement and clicks.
Lists common troubleshooting topics, including serial port issues and bootloader problems.
Addresses common questions about VIDs/PIDs, COM port usage, and bootloader reinstallation.
Provides steps to resolve issues where the Pro Micro's serial port is not visible in the Arduino IDE.
Explains how to enter bootloader mode on the Pro Micro and Fio v3, including the double-press method.
Guide on how to recover a Pro Micro that has become unprogrammable, often due to incorrect board settings.
Explains Vendor Identification (VID) and Part Identification (PID) and how they relate to Pro Micro and Fio v3 boards.
Details how to change VID/PID values by selecting the correct board in the Arduino IDE.
Explains why the ATmega32U4 board appears twice in Device Manager due to bootloader and sketch modes.
Explains how the Arduino IDE identifies the correct COM port after the Pro Micro resets.
Provides guidance on reinstalling the bootloader if it becomes corrupted or needs resetting.
| Microcontroller | ATmega32U4 |
|---|---|
| Operating Voltage | 5V |
| Input Voltage | 5-12V |
| Digital I/O Pins | 12 |
| PWM Channels | 5 |
| DC Current per I/O Pin | 20 mA |
| SRAM | 2.5 KB |
| EEPROM | 1 KB |
| Dimensions | 1.3 x 0.7 inches |
| Analog Input Channels | 4 |
| Flash Memory | 32 KB (ATmega32U4) |
| Clock Speed | 16 MHz |