3
SETUP 11
SETUP
ASSEMBLING THE SHARPENER
To watch the How-To video, visit sparxhockey.com/assembly.
1 PLACE SHARPENER
Place the sharpener on a sturdy, level surface. Locate the
sharpener so that the vacuum hose can be connected easily
from the sharpener to the vacuum system.
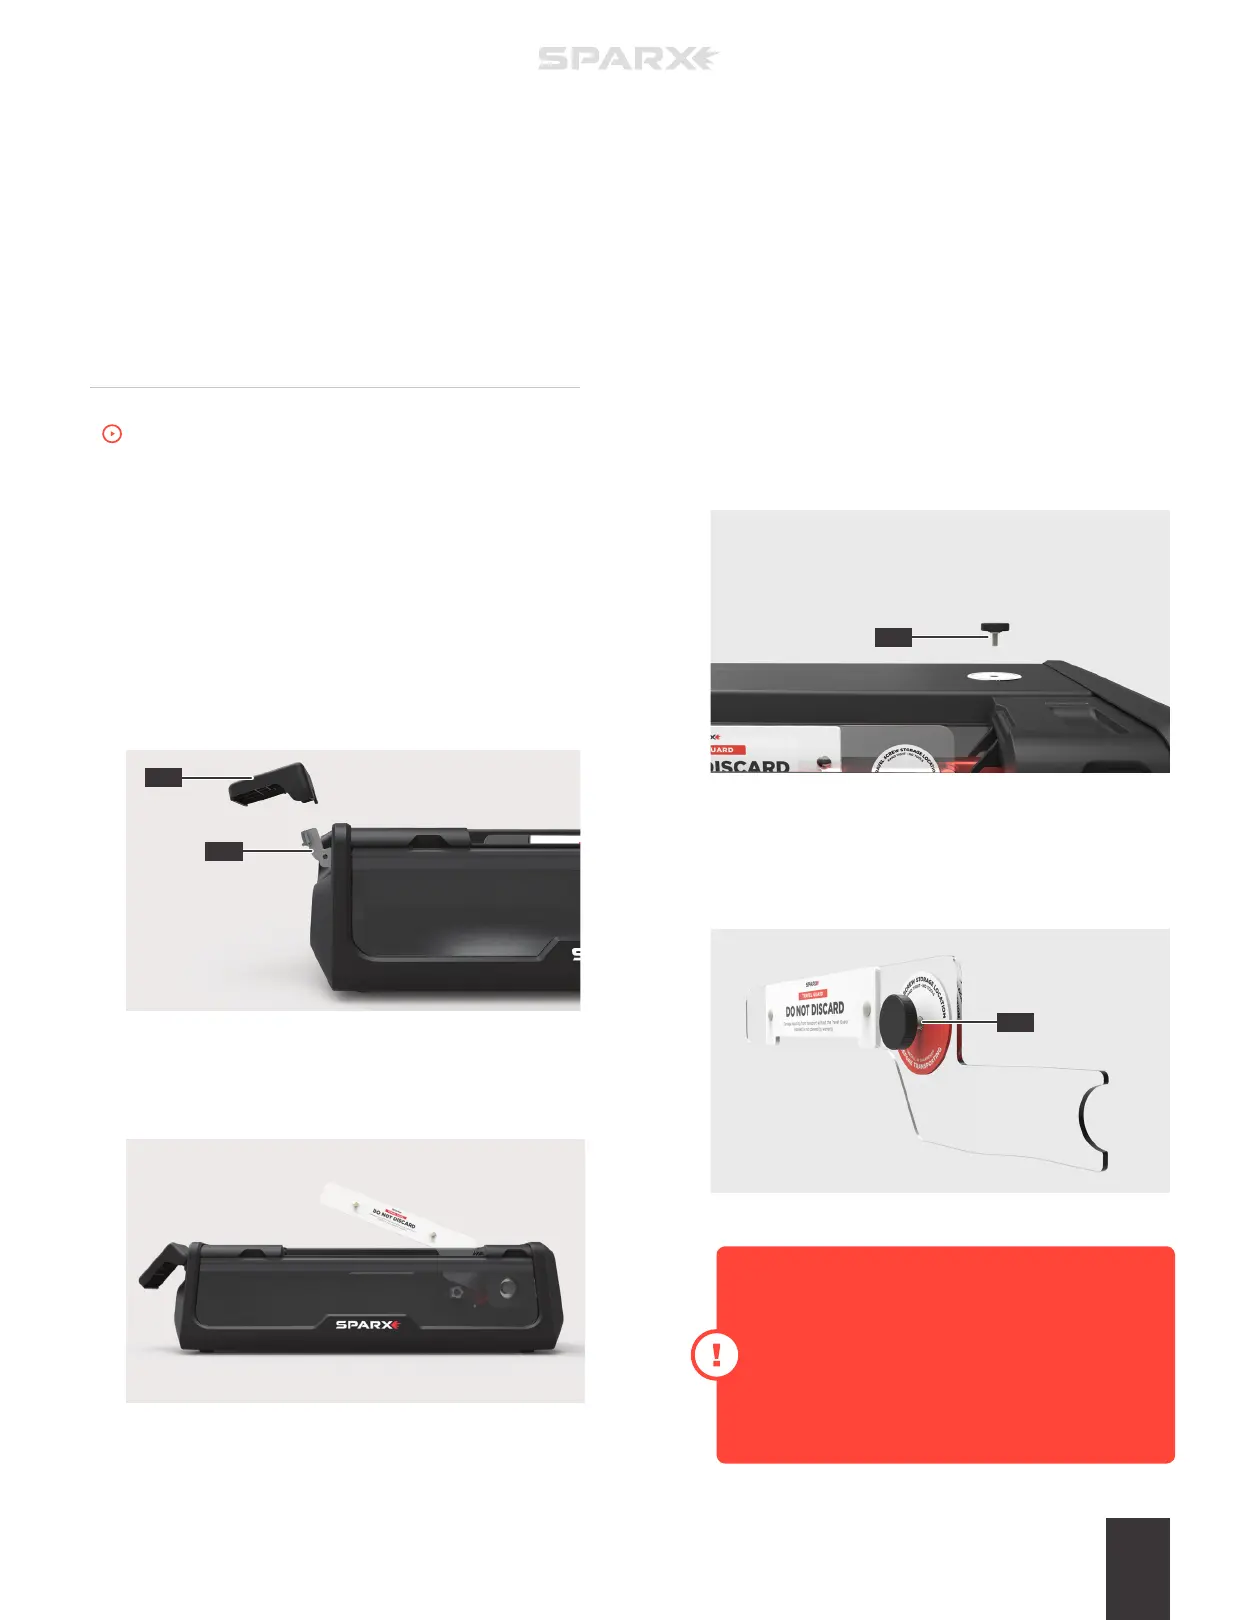
2 INSTALL THE CLAMP LEVER
Slide the Clamp Lever (A) onto the Lever Dock (B). Press the
lever down until it clicks into place. When the Clamp Lever is
engaged, it will lay at a slight angle.
3 REMOVE THE TRAVEL GUARD
Open the Skate Clamp by pressing and holding down the
Clamp Lever. Remove the Travel Guard. Release the Clamp Lever.
Do not discard the Travel Guard. This guard is o
keep t
4 REMOVE THE TRAVEL SCREW
Remove the Travel Screw (A) by turning counter-clockwise until
loose.
5 STORING THE TRAVEL SCREW
Install the Travel Screw into the storage loaction on the Travel
Guard (A) by turning clockwise until hand-tight. Do not over-
tighten.
A
A
A
B
Transporting or moving the Sharpener without
the Travel Guard & Travel Screw installed voids
your Warranty and/or Extended Service Plan.
Always remove the Travel Guard & Travel Screw
before operating the Sparx Sharpener.