SETUP 13
5 INSPECT THE ALIGNMENT
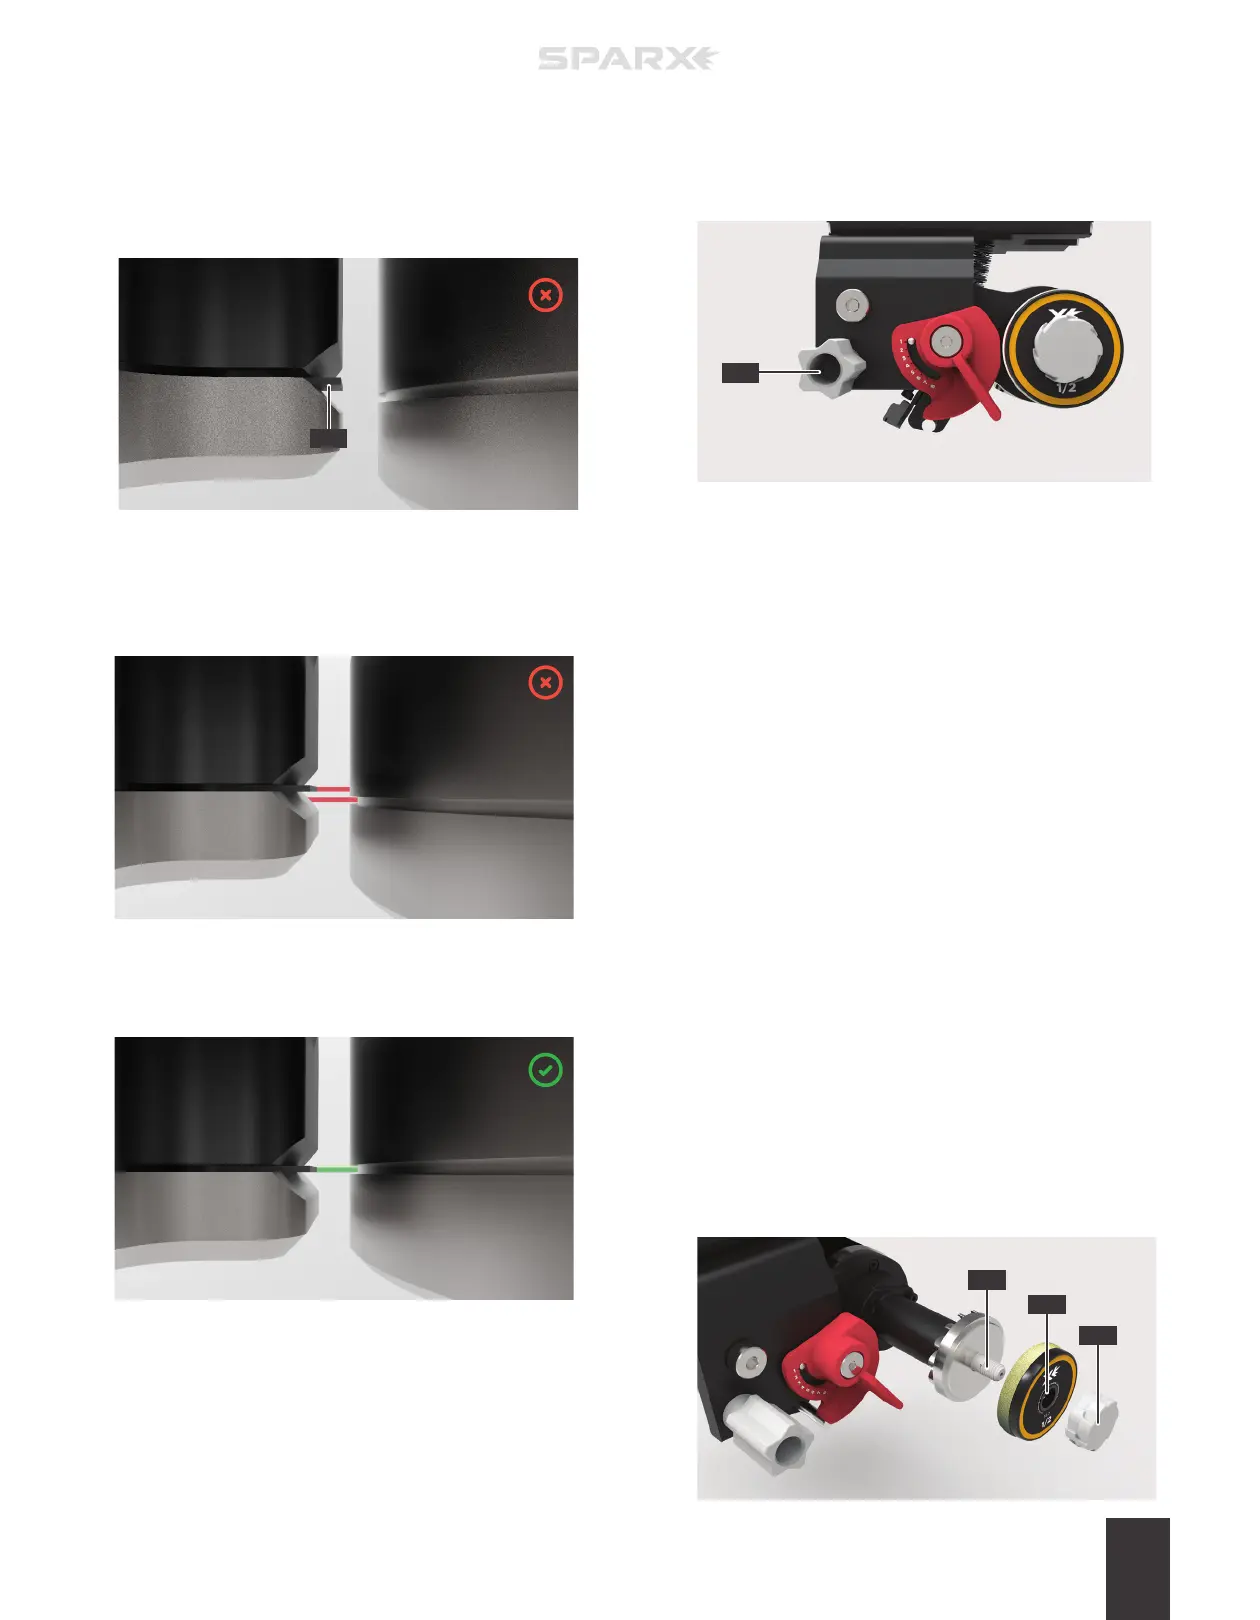
If the indicator tab of the Alignment Tool is not aligned with the
groove on the Alignment Ring (as shown below), move to step 6.
If the indicator tab of the Alignment Tool is aligned with the
groove on the Alignment Ring (as shown below) skip to step 8.
Ensure you are looking straight through the eyepiece directly
above the indicator tab and groove. If you see the indicator tab
side wall (C) when looking through the eyepiece, you are not
directly above the indicator tab and groove. Adjust your line of
sight until you can no longer see the indicator tab side wall.
6 LOCATE THE ALIGNMENT
ADJUSTMENT KNOB
Open the Glass Door and locate the gray
y
Alignment
Adjustment Knob (A) inside of the sharpener.
7 ADJUST THE ALIGNMENT
While looking through the Optical Alignment Tool, turn the
Alignment Adjustment Knob until the groove on the
Alignment Ring (right) lines up with the indicator tab of the
Alignment Tool (left), as shown in step 5. Close the Glass
Door when aligned.
8 END ALIGNMENT MODE
End Alignment Mode by pressing the
c
Alignment Button.
9 REMOVE THE OPTICAL ALIGNMENT TOOL
Press down on the Clamp Lever to open the Skate Clamp.
Remove the Optical Alignment Tool.
10 REMOVE THE ALIGNMENT RING
Open the Glass Door. The Carriage will automatically move
into the install position and the sharpener will play a “ready”
tone. While holding the Grinding Ring Shaft, unscrew the
Thumb Nut and remove the Alignment Ring.
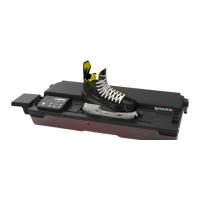
11 INSTALL THE GRINDING RING
While holding the Grinding Ring Shaft (C), slide the Grinding
Ring (B) on the Grinding Ring Shaft (C), label facing out, and
replace and tighten the Thumb Nut (A) until hand-tight. Close
the Glass Door.
A
B
C
A
C