| Installation Guide | 14
1.
Connect the interface connector (Camera Link) to the camera.
2.
Connect the interface cable to the PC.
3.
Insert the power cable to the camera, make sure the red dots are aligned.
4.
Connect power cable to the wall socket.
5.
Camera is on when the Status LED is stable green.
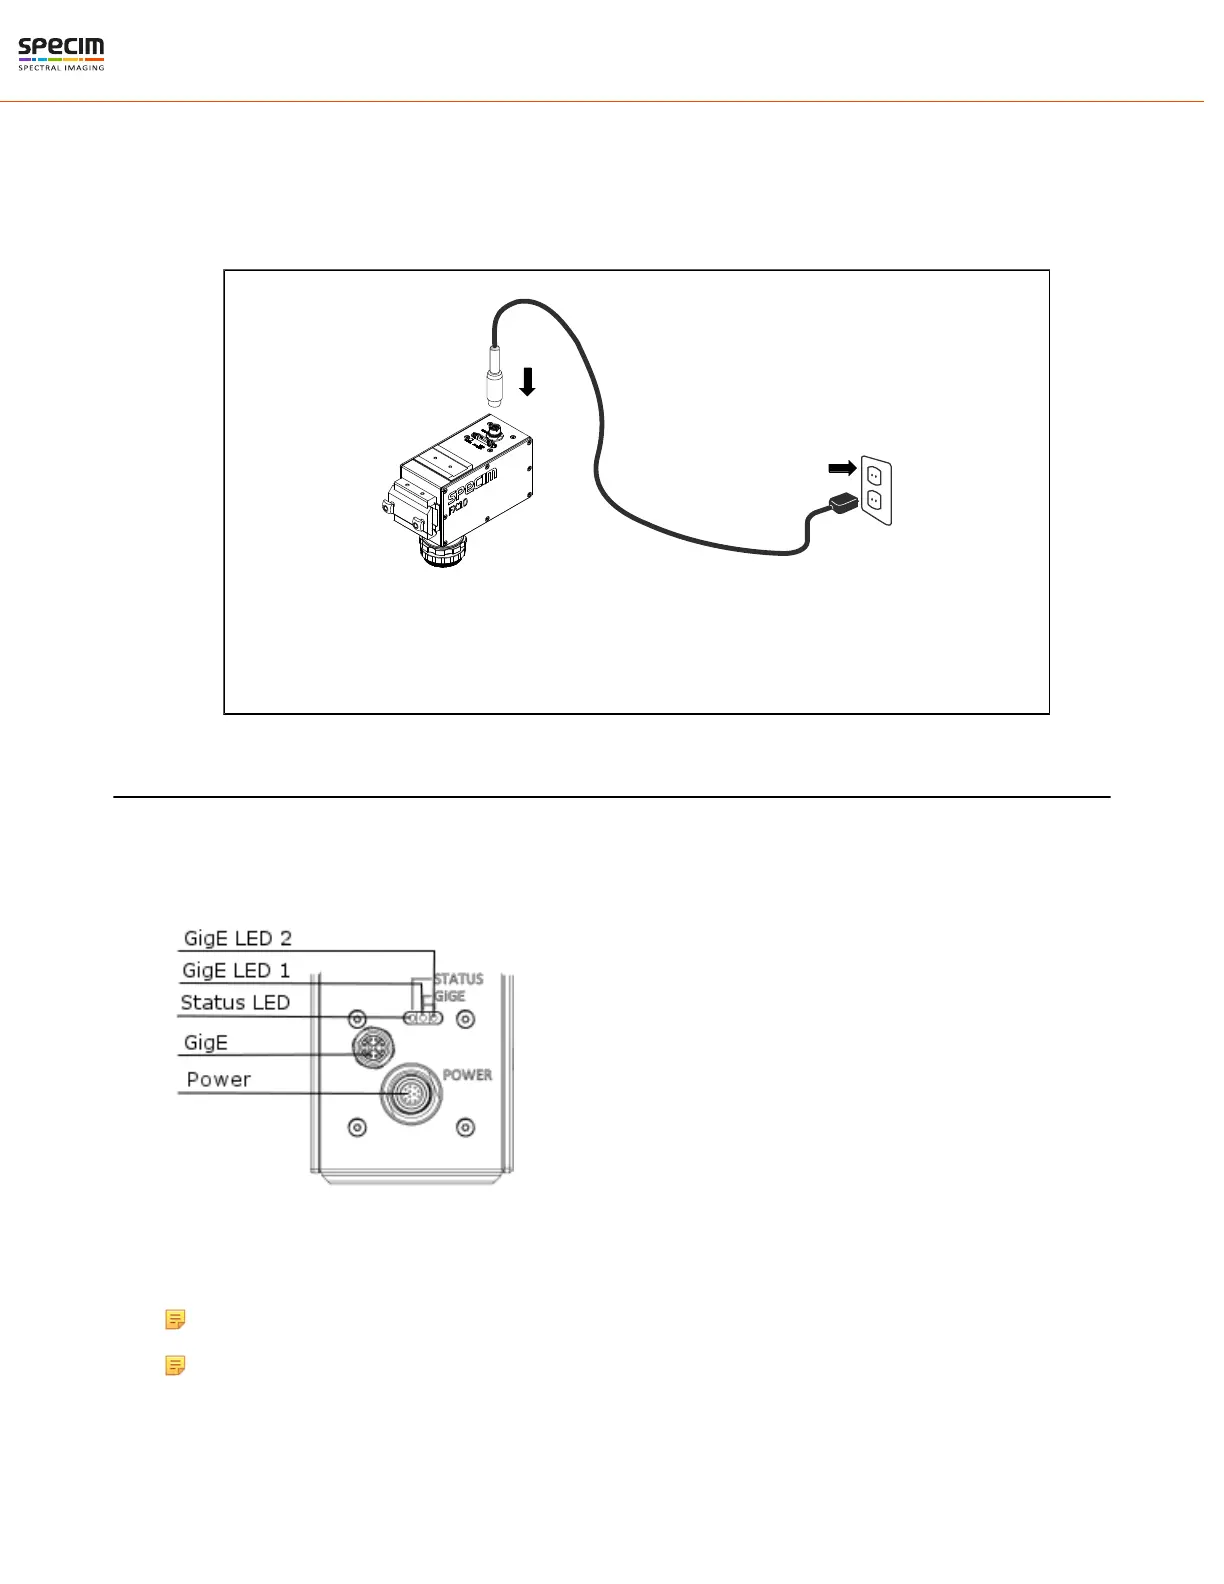
Figure 9: Powering Order
When powering off the camera, pull the power cable first from the wall socket. After removing the
power cord, wait at least 30 seconds before connecting the power cord and starting camera again.
Cabling the GigE Camera
There are three LEDs and two connectors in the camera back panel (on picture below):
• GigE connector
• Power Connector for 12V DC
Figure 10: Back panel connectors
Note: Leave at least 60 mm space behind the camera for cabling.
Note: Make sure that the GigE data cable is connected before powering up the camera.
Connect the cables:
1.
Connect the interface connector (GigE) to the camera.
All rights reserved - Specim, Spectral Imaging Oy Ltd.