11
4 Laser Setup
Position the laser horizontally or vertically on a stable platform, wall mount or tripod
at the desired elevation. The laser automatically recognizes the horizontal or vertical
orientation when switched on.
Position the laser within its self-leveling range (see chapter 30.1). When the laser is not
positioned within the self-leveling range, the manual and leveling indicator LEDs (d and
e) ash simultaneously and a warning sound is emitted. Take the appropriate action to
set up the laser within the self-leveling range.
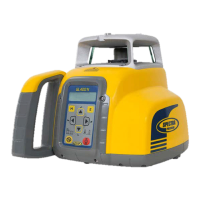
5 Turn On/O the laser
Turn on the laser pressing the power button (a) for one second. The LEDs (b, d and
e) illuminate for one second. The LCD shows ‘Initialization’ (pic 2) and then for one
second the ‘model number’ (pic 3)
Pic 2 Initialization
Pic 3 Model number
The laser starts self-leveling at once. During the self-leveling process, the laser will not
rotate and the laser beam as well as the leveling LED (d) will ash once every second.
When the laser is switched on, it always starts in automatic self-leveling mode. As
soon as it is leveled, the rotor will start to spin and the laser beam will turn on.
The laser always starts with the last used rotation speed and with the last used grade
value (default). If the preference is to start the laser with grade value of zero, see
chapter 18.4 (how to change the default).
The leveling LED (d) will illuminate solid as long as the laser is in automatic mode, but
the shock warning or HI-alert is not active. When the HI-alert is active, the leveling
LED ashes every four seconds and ‘HI’ appears in the display of the laser and remote
control. The laser constantly monitors the level condition as long as the HI-alert is
active.
If a grade value has been dialed in, the unit starts the temperature reference check
while the thermometer symbols are ashing. See pic 4.
Pic 4 Temperature reference check
When the temperature reference check has been nished, the standard display
 Loading...