18
14 Standby Mode
WHY: There might be times when the laser is not used for a period of time (e.g. lunch
break), and the laser can be put in Standby Mode to conserve battery life. Standby
Mode retains the laser settings.
WHAT: In Standby mode, the self-leveling will be stopped and the beam will be turned
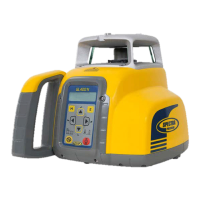
o while the HI-alert is still active. The display shows “– –Standby – –”. The HI/
MAN LED (e) ashes red every ve seconds. The standby mode ends automatically
if the device orientation changes from horizontal to vertical or vice versa. When the
laser is in Standby Mode for more than 8 hours or when the batteries are empty, it
automatically switches o.
HOW: Press and hold the manual button (c) at the laser or remote control for three
seconds to bring the laser into the standby mode. Press and hold the manual button
(c) again for three seconds to deactivate the standby mode and to restore full
operation of the laser.
15 GradeMatch (Y-Axis)
WHY: GradeMatch is designed to match the rise or fall of the ground between two
existing unknown elevations. This will eliminate the need of complex calculations and
will avoid errors.
WHAT: The automatic grade matching function can match the current rise or fall and
will show the value on the display of the laser, remote control or app. The feature will
typically work to a maximum distance of 80 m (240 ft.).
HOW: GradeMatch is available in the Y axis in the horizontal automatic mode only. If
started in manual mode, the laser will switch into automatic mode.
1.) Set up the laser over the rst reference point.
2.) Attach the HL760 or CR700 receiver to a grade rod. Place the rod next to the laser
and adjust the height of the receiver next to the laser until the laser receiver is on-
grade. Now the on-grade position of the receiver has the same elevation as the laser
beam.
3.) Without changing the receiver’s elevation on the rod, position the rod at the second
reference point with the front of the receiver facing the laser.
4.) Use the sighting guides on the top of the laser to align the laser to the receiver.
5.) Press and release the M button (h) and select >>Grade Match<<.
6.) Press and release E button (j) to enter the GradeMatch submenu; conrm Y-axis by
pressing the E button (j) again to start the GradeMatch function (see pic 18).
7.) The laser starts to search for the receiver. The laser as well as the HL760/CR700
display shows a ashing ––GM–– during the time the laser is searching and adjusting
the beam to the on-grade position. When GradeMatch has been completed, the
HL760/CR700 go back to the standard elevation display. The remote control and
laser will display the nal measured grade value. Press the Manual button to exit the
GradeMatch. The laser will return to automatic mode.
8.) When the function GradeMatch is complete, the laser will show the calculated
grade value and will change to standard grade display. The laser will keep the grade
value for the Y-axis. The HL760/CR700 shows the on-grade for the laser. Even when
the receiver has been moved to take measurements, the laser will stay with the grade
 Loading...