2010 Geno/Grinder
Page 11 of 28 SPEX® SamplePrep LLC July 2014
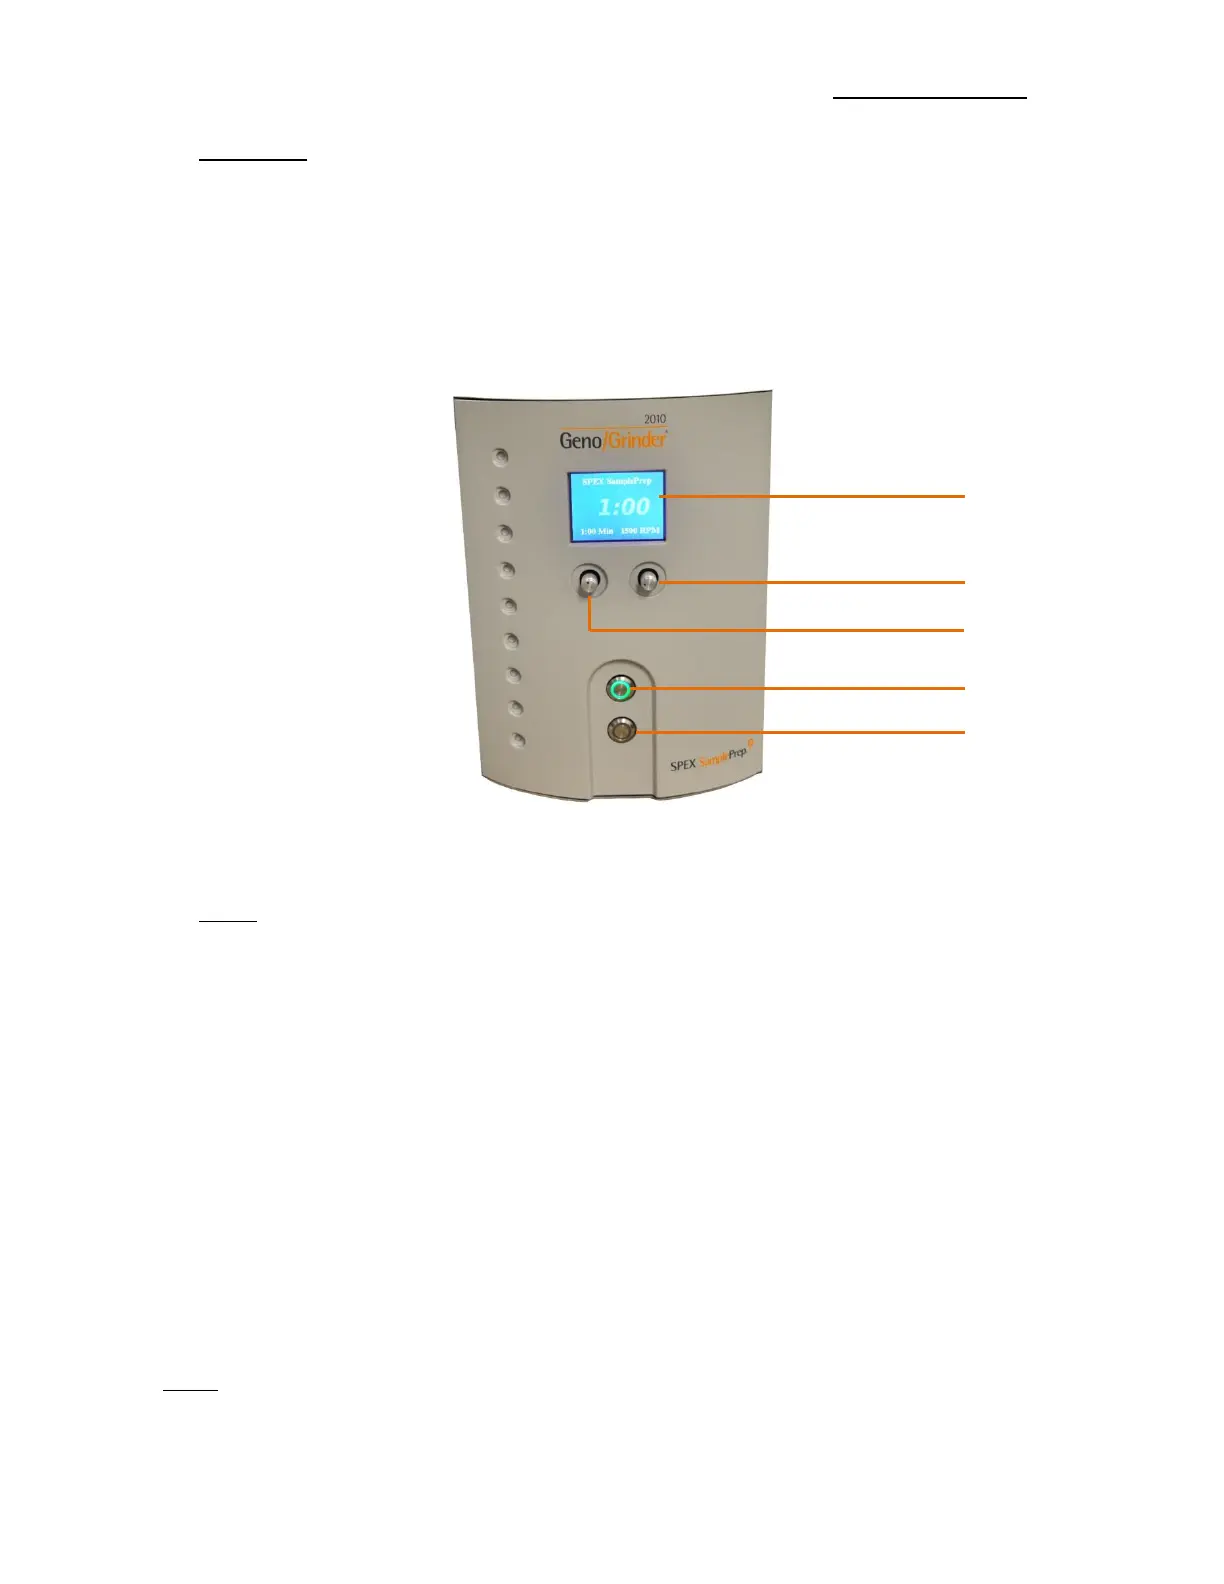
5.0 CONTROLS
The control panel is located on the front of the 2010 Geno/Grinder (Figure 5). Upon start-
up, the SPEX SamplePrep and 2010 Geno/Grinder logos will appear on the display screen.
The run time setting will be displayed on the lower left and the operating rate will be shown
on the lower right. After several seconds, the logos will disappear and will be replaced with
the run time.
5.1 Timer
The display shows the run times in minute:second format. For example, 1:30 represents
one minute and thirty seconds. The run time is adjusted using the Timer Control Knob,
located below the display screen on the left. Press and hold the knob in while turning left
or right to decrease or increase the run time in 5 second increments. When the desired
run time is reached, release the Timer Control Knob. If the knob is turned without pressing
it in, the time setting will not change. The run time setting is saved once the Geno/Grinder
is operated at the new setting. When the Geno/Grinder is turned off, it will revert to the
last saved run time upon start-up. To save a new timer setting, adjust the timer to the
desired run time and press the green START button to operate.
During the run, the screen will continue to display the set time in the lower left-hand
corner. The time remaining in the run will be shown in larger numerals in the middle of the
screen, with countdown in 1 second increments.
NOTE: Because the up-and-down motion of the Geno/Grinder is so energetic, typical
running times range from 10 seconds to 2 minutes. When developing a procedure,
always start with a short running time and increase it only if needed.