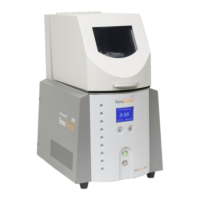
2010 Geno/Grinder
Page 18 of 28 SPEX® SamplePrep LLC July 2014
6.2 Loading the Standard or Large Capacity Clamp (2194 and 2199)
Each of the two clamp lids has a curved strike plate at either end; the strike plate engages
the bar at the top of the matching snap-down latch.
For a titer plate seal to perform its job while the Geno/Grinder is running, the fit of the
clamp must be very snug. The clamps themselves are not adjustable. The fit of the titer
plates in the clamping mechanism is adjusted by adding or removing spacers underneath
the plates. Pairs of spacers are included with the 2194 and 2199 clamps in four thicknesses:
1/32”, 1/16”, 1/8”, and 1/4”. Extra spacers are available if needed.
A divider in the 2194 clamp base plate locates each titer plate precisely. The spacers are
placed on the divider tray, under the titer plates.
When the titer plates are properly shimmed by spacers, the snap-down latches will snugly
engage the curved strike plates on both ends of the clamp lids. Please note that every
snap-down latch incorporates a security lock, which keeps the latch from opening while the
Geno/Grinder is running. The security lock is a tab that must be pushed in for a latch to be
opened.
6.2.1 Titer Plates
1. Place a loaded, sealed titer plate on each side of the clamp base; if processing only
one titer plate, place an empty plate on the other side of the clamp.
2. Now place a clamp lid on the top of each titer plate.
3. Flip the clamp latches up to engage the strike plates on both ends of the lid, and
then push both latches down. If the titer plates are properly fitted to the clamps,
the latches will snap down snugly and the titer plates will be held firmly in place.
4. If the titer plates are loose, unclamp the lids and add spacers underneath the titer
plates. If the titer plates are too tight for the lids to be clamped properly, remove
spacers until the fit is correct.
5. Lift up on the latches to ensure that they have properly locked.
6.2.2 Vials in Holders or Cryo-Blocks
For operation with 15 mL or 50 mL centrifuge tubes, use of the large clamp assembly is
required. A single large clamp lid is used in place of the two small lids provided with the
standard clamp assembly.
1. Place the capped tubes into the tube holder or cryo- block.
2. Place the tube holder on the bottom plate of the large clamp and set the clamp lid
on top of the tubes. If less than a full rack of centrifuge tubes is used, be sure to
place an equal number of tubes in the front and rear of the clamp, to ensure that
the load is balanced and tightly clamped. Empty tubes can be used as place holders
if an uneven number of samples are run.
3. Clamp the lid in place. If the fit is not snug, remove the lid and add spacers beneath
the tubes until the lid fits securely when clamped in place. Test latches to ensure
they are locked by pressing upward on latch.