Getting Started
Procedure 8: Set the Chassis IP Address
44 | Getting Started with Spirent TestCenter
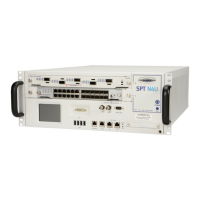
Setting the IP Address using Web Client (SPT-N4U, SPT-N11U, or SPT-N12U)
The built-in web server allows reconfiguring of the chassis IP address settings.
To set the IP address using a web client:
1 Open a web client on the controller PC and enter the default IP address in the address
bar (
http://192.168.0.100) and press Enter on the keyboard.
This launches the Welcome screen.
2 Click on the link titled Reconfigure the Chassis.
This launches the Chassis Configuration screen.
3 Click the Configure button.
4 Click in the IP Address text box to enter the address and then press Enter.
5 Repeat Step 4 for the IP Gateway Address and IP Netmask, if necessary.
6 Click the Submit button.
The settings will be applied and the controller will automatically reboot.
Note: It may take up to several minutes for the new IP address to take effect.
Tip: Refer to the Chassis Commands section in the Spirent Hardware Reference for
information about Spirent chassis commands. This resource is available on the Spirent
Customer Service website. See “Spirent Hardware Reference (DOC10031)” on page 7.