Getting Started
About the Virtual Spirent LabServer
Getting Started with Spirent TestCenter | 13
About the Virtual Spirent LabServer
The Spirent vLS (Virtual LabServer) together with Spirent TestCenter Session Manager
(client software), eliminate the need for a dedicated test management console computer
and supports team collaboration during testing.
Virtual LabServer installation instructions are in Appendix A, “Install and Configure
Spirent Virtual LabServer.”
Summary of Installation Procedures
The instructions provided in this manual support the installation of chassis and test
modules currently in production, and the installation of current application software.
Instructions for installation and configuration of the Spirent vLS are also included.
Follow these procedures to complete the installation of your Spirent system.
Check System Requirements and Package Contents
1 Check the system requirements (page 15).
2 Verify contents of the accessory package (page 16).
Install Spirent TestCenter Applications
3 Follow the installation instructions provided for your operating system to install
applications.
•Windows OS (page 18)
•Linux (page 20)
4 Optionally, use chassis and appliance firmware support (dual boot) (page 24)
Set up Tcl, or other automation environment
Setup instructions for each environment are in readme format, located in the
<Spirent_Install_Dir>/API folder with sub-directories matching the language name.
For example:
/home/user/Spirent_TestCenter_[x.xx]/Spirent_TestCenter_Application_Linux/API/Tcl
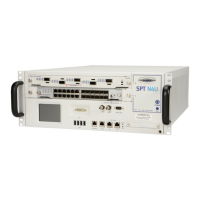
Set up the Spirent chassis
5 Connect the Spirent chassis to a PC for initial IP address configuration and software
management, and to your LAN (page 26).
6 Install the ferrite block onto the Ethernet cable (page 32).
7 Connect power to the chassis (page 34).
Warning: You must use the power cord included with your chassis.