Slipping-Walking Belt: Remove the motor shroud and operate the machine slowly at 1 to 2 mph
(2 to 3 kph). While observing the tailroller, walk on the belt and try to slow it down by gently
applying pressure with your feet while holding the handrails. If only the walking belt, and not the
tailroller, slows down, tighten the walking belt by turning both the right and left tailroller
adjustment bolts clock- wise 1/4-turn. Repeat this adjustment until the walking belt no longer slips;
ensuring that you turn both tailroller bolts an equal number of turns. Re-install the motor shroud.
If the headroller and the walking belt both slow down, tighten the drive belt as described under
“Slipping-Drive Belt”, below.
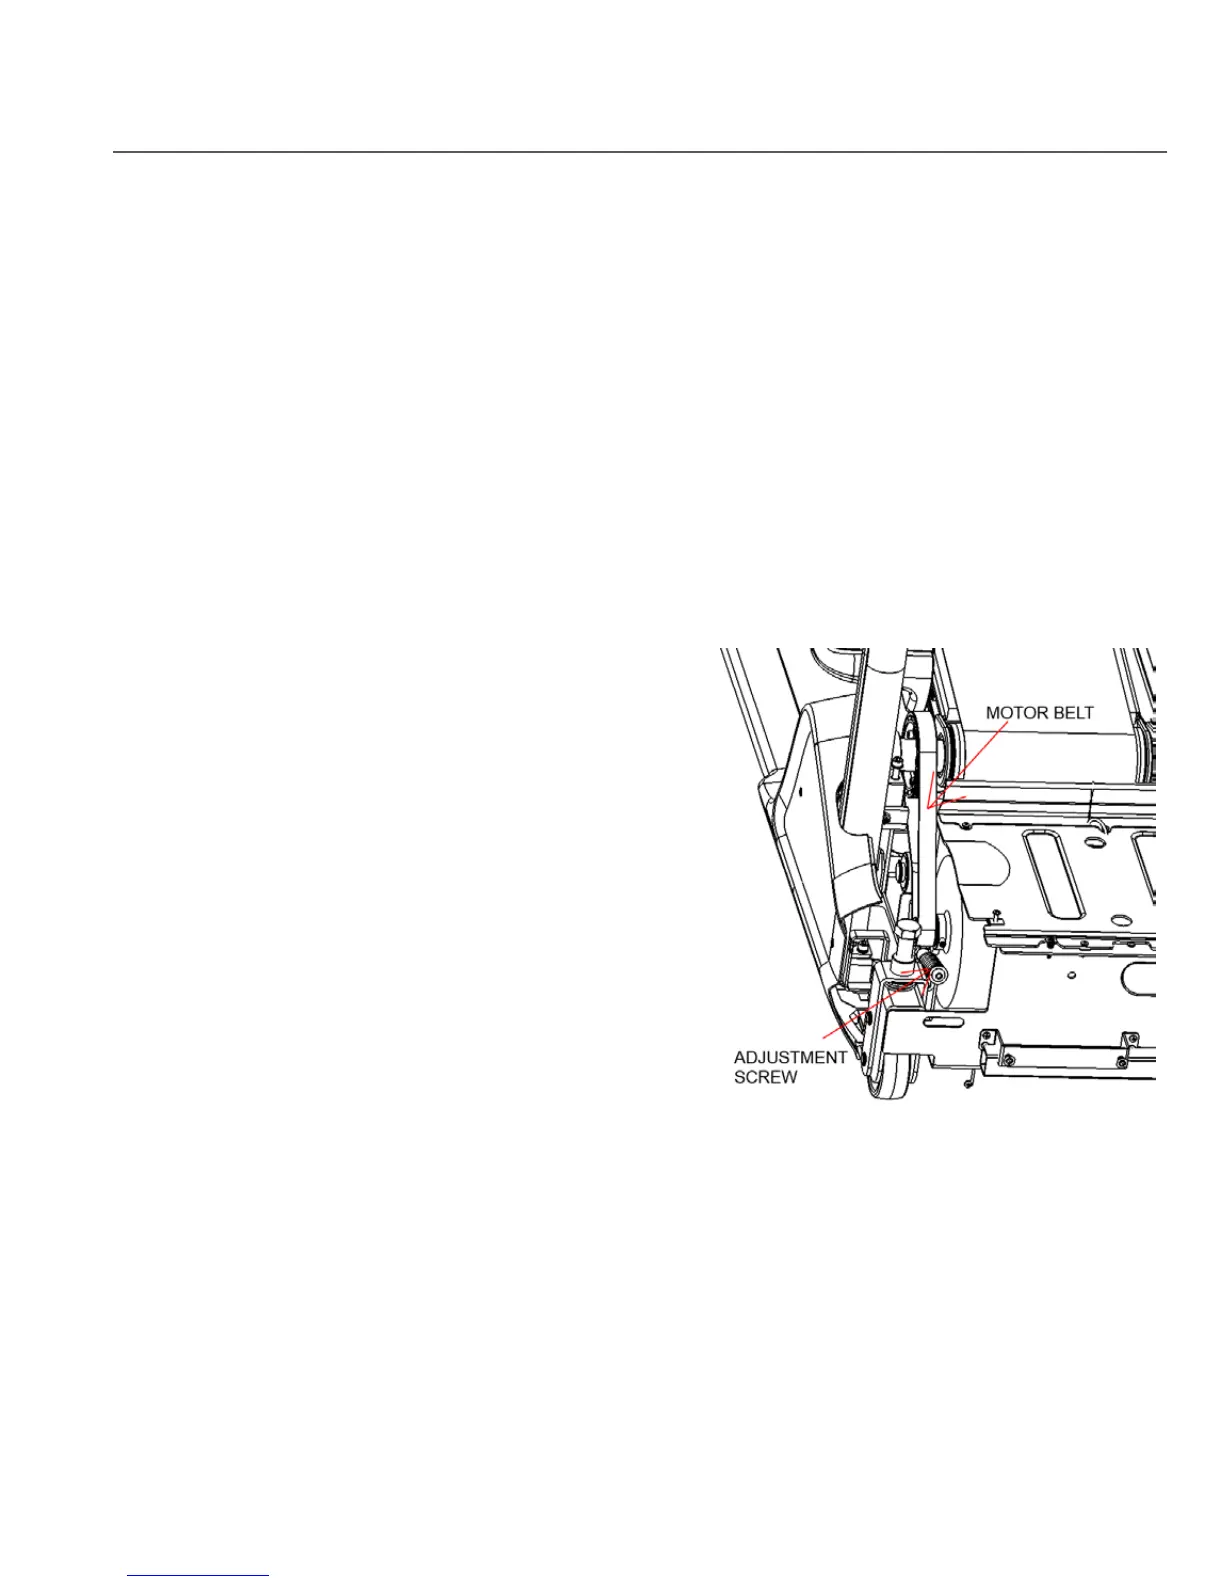
Slipping Drive Belt: The drive belt tensioning
system is designed for minimal adjustment
throughout the life of the belt. To check if the drive
belt tension needs to be adjusted, do the following
1.
Run Tread Climber at 2 mph (3kph) and try and
stop the belt by applying foot pressure while
holding onto the handrails. If the walking belt and
roller stop, but the motor continues to turn, the
drive belt tension needs a
djustment.
2.
Remove the motor shroud.
3.
Release belt tension by releasing the belt
tensioner.
4.
Move the spring to the second hole on the
tensioner swing arm.
5.
Re-tension with the tensioner.
6.
Reinstall motor shroud.
TOOLS & MATERIALS
Clean Towel (1)
Paint Stick or Ruler (1)
Diluted All-purpose Cleaner (409), or Bristle Brush