MONTHLY MAINTENANCE
WARNING: To prevent personal injury, always turn the machine off and unplug the power cord before
performing maintenance inside the motor compartment.
■
Remove the motor shroud and vacuum around the motor and its ventilation holes. Avoid bumping or
damaging parts normally protected by the shroud.
■
Check the traedle belt tension so the treadles operate freely without making excessive noise.
ADJUSTMENTS
The walking belt and its headroller, drive belt, tailroller, and walking deck are designed to be self-centering,
slip-free, and smooth operating without the need for frequent adjustments. Walking belt sideward
movement, slipping, or grinding after extended use, or thumping during initial use, may be corrected by
the following procedures. Note, each belt must be adjusted separately:
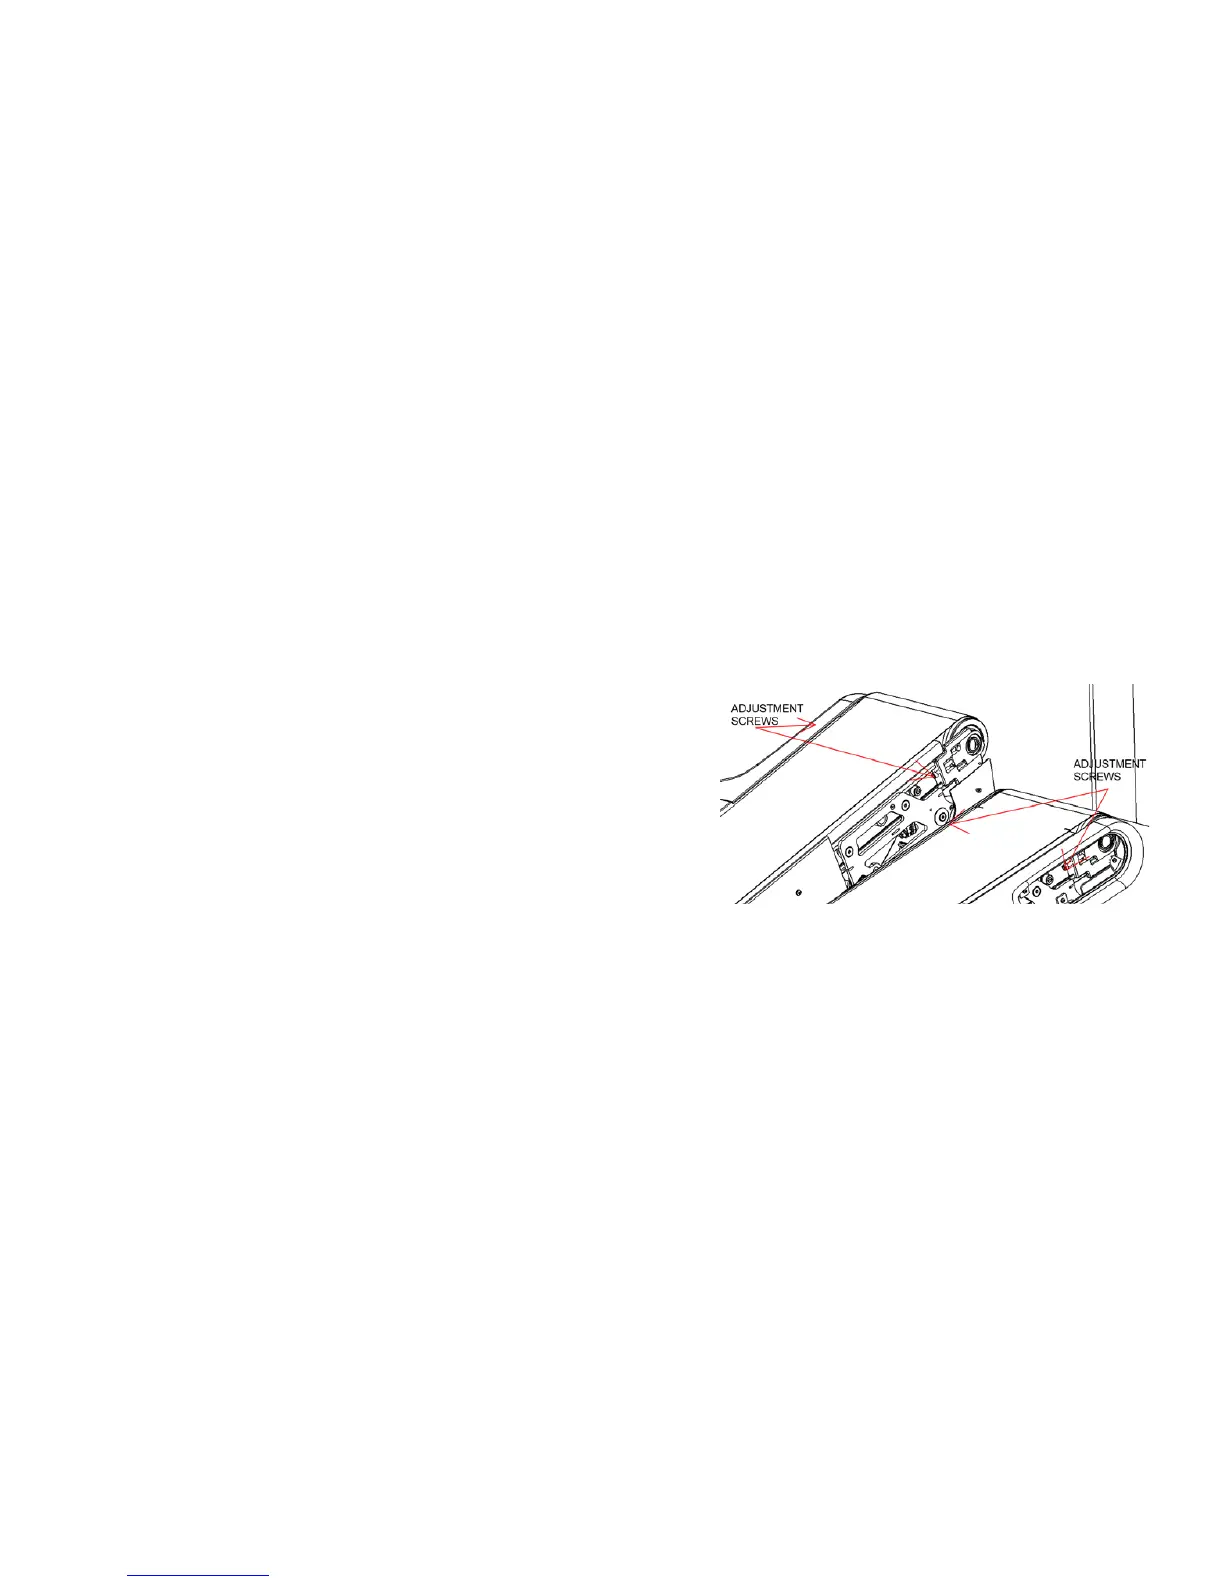
Adjust TRACKING: If the walking belt is not centered on the tailroller and is either too far left or right,
adjust tracking using the follow- ing steps:
1.
Turn the Tread Climber on. Increase Tread Climber speed
to 3.0 mph (5.0 kph).
2.
Adjust tracking by turning the left Allen screws
(located at the front s
ide of the
head roller) with a 1/4" Allen wrench in 1/4-turn
increments.
If the walking belt is tracking to the left, turn the
screws clock-wise in 1/4 turn increments.
If the walking belt is tracking to the right, turn the left
screw counter-clockwise in 1/4 turn increments.
3.
NOTE: ONLY USE THE LEFT SCREW FOR TRACKING
ADJUSTMENT.
4.
After the walking belt appears to be tracking properly,
increase the Tread Climber speed to 4.0 mph (6.7 kph)
and verify that the belt stays centered.