7
INSTRUMENT OVERVIEW
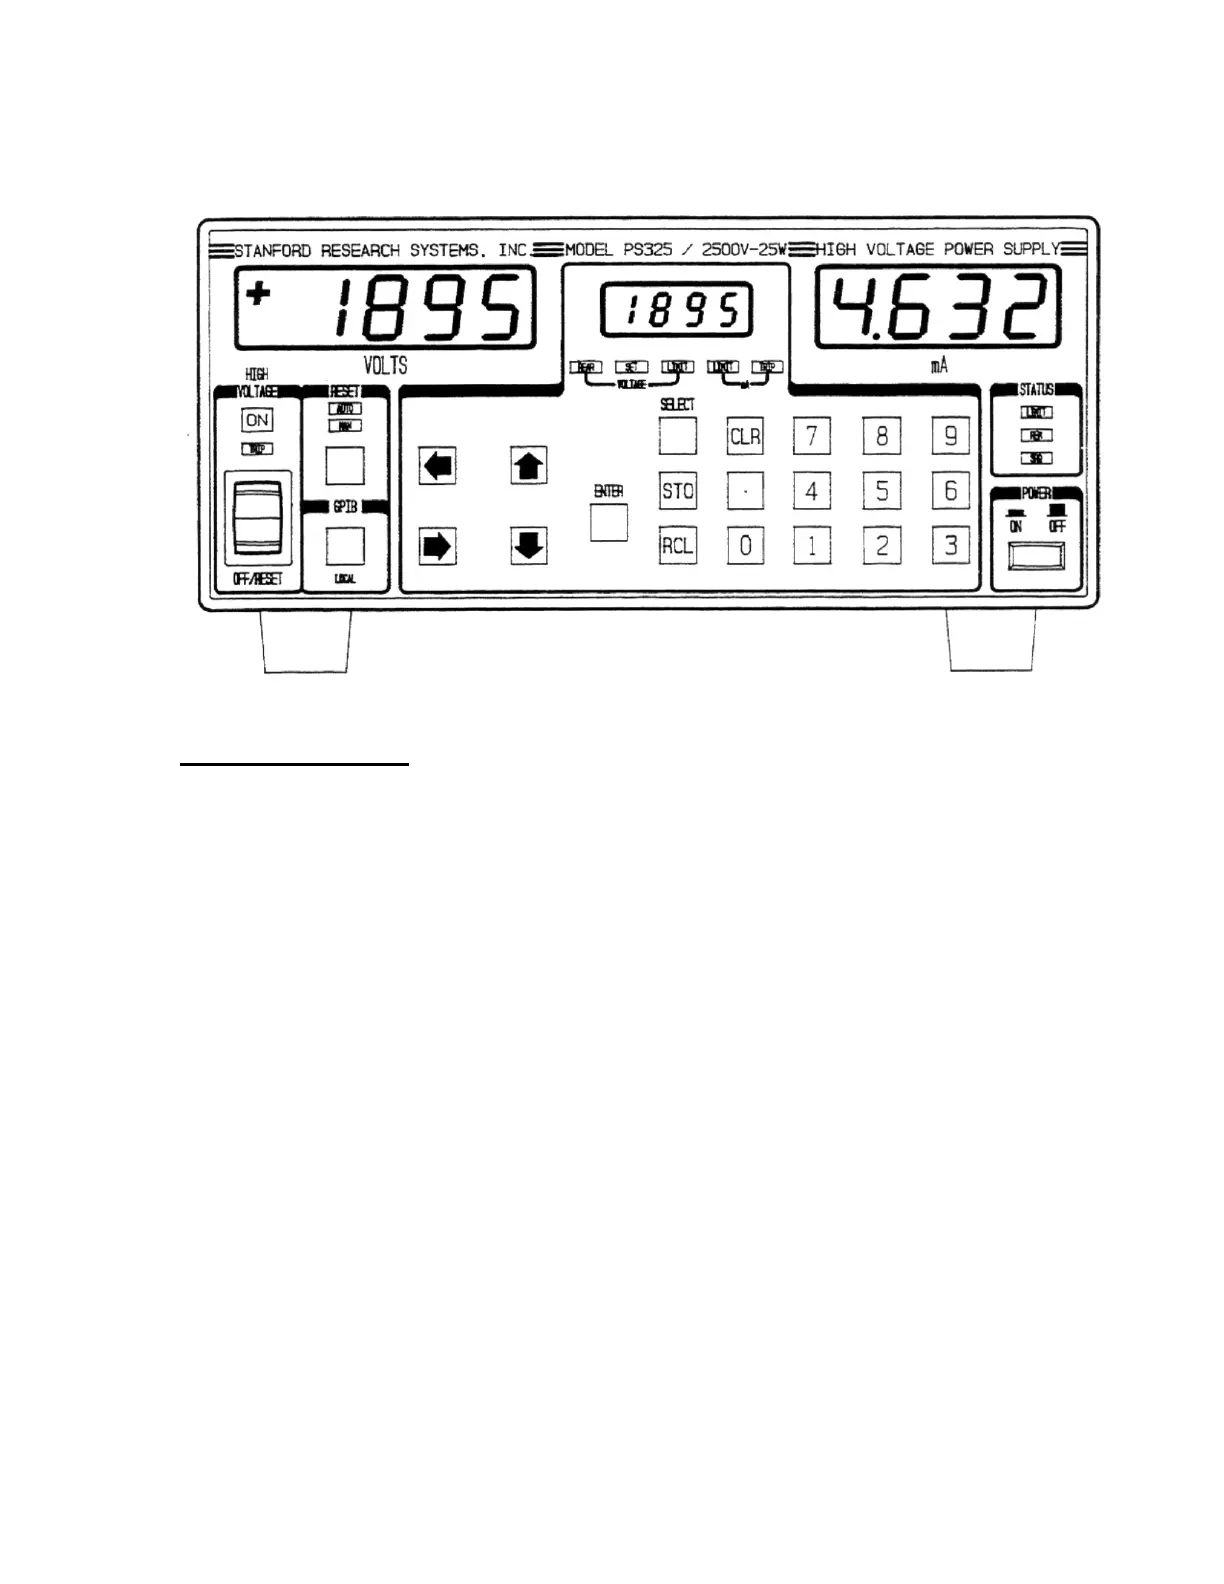
Front Panel Summary
Power Button
The PS300 series are turned on by depressing the
POWER button. The unit always powers up with
the high voltage OFF. All instrument settings are
stored in nonvolatile memory and are saved when
power is turned off. The model number (310, 325,
or 350), firmware version, and serial number are
displayed when power is turned on. If an error
appears on power on, then the stored settings were
lost and the default settings are used. If the default
settings are desired, hold down the CLR (clear) key
while turning on the power.
High Voltage Enable Switch
This is a three position switch that performs several
functions. In the down position, the high voltage is
off and all trips are cleared. In this position the
high voltage is locked OFF and cannot be turned
on by computer control. The up position is
momentary and turns on the high voltage for
manual or rear panel analog control. In the middle
position the high voltage is enabled (but not
necessarily on) and can be turned on by computer.
The large red LED above the switch indicates that
the high voltage is on; the yellow LED below it
indicates a trip has occurred.
LED Displays
The two large displays show output voltage and
current to four significant places. Polarity is
displayed on the left of the voltage display. The
smaller center display shows the value of the
parameter that is being entered or adjusted. That
parameter is indicated by the row of LEDs directly
below the center display.
Select, Enter, and Clear
The SELECT key is used to choose which
parameter is being displayed in the center display.
The ENTER key enters the parameter shown in the
center display. The clear (CLR) key erases the
value in the middle display and recalls the last
value that was entered. To adjust a value, the
SELECT key is pressed until the appropriate LED
is lit. When the value is being changed, that LED
will flash to indicate that the value in the center
display is not the current unit setting. If an
incorrect value is entered, press CLR (clear) to start
over. When the desired value is in the center
display, pressing the ENTER key updates the unit's
actual setting and stops the LED's flashing.