Component Replacement
Padlock Service Manual 2–15
DISASSEMBLING AND ASSEMBLING PADLOCKS
Disassembling
the 11B, 21B,
21JB, and 41B
Padlocks
To disassemble the 11B, 21B, 21JB, and 41B Padlocks, perform the
following steps:
1. If there is a dust cover assembly on the lock, unscrew the screw and
remove the dust cover with the rubber seal and dust cover hinge.
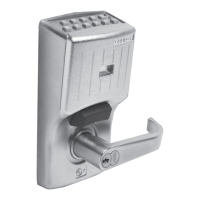
2. With the padlock in the locked position, insert the control key into
the core and rotate the key to the right. Remove the core and throw
member from the core receptacle, as shown in Figure 2.10.
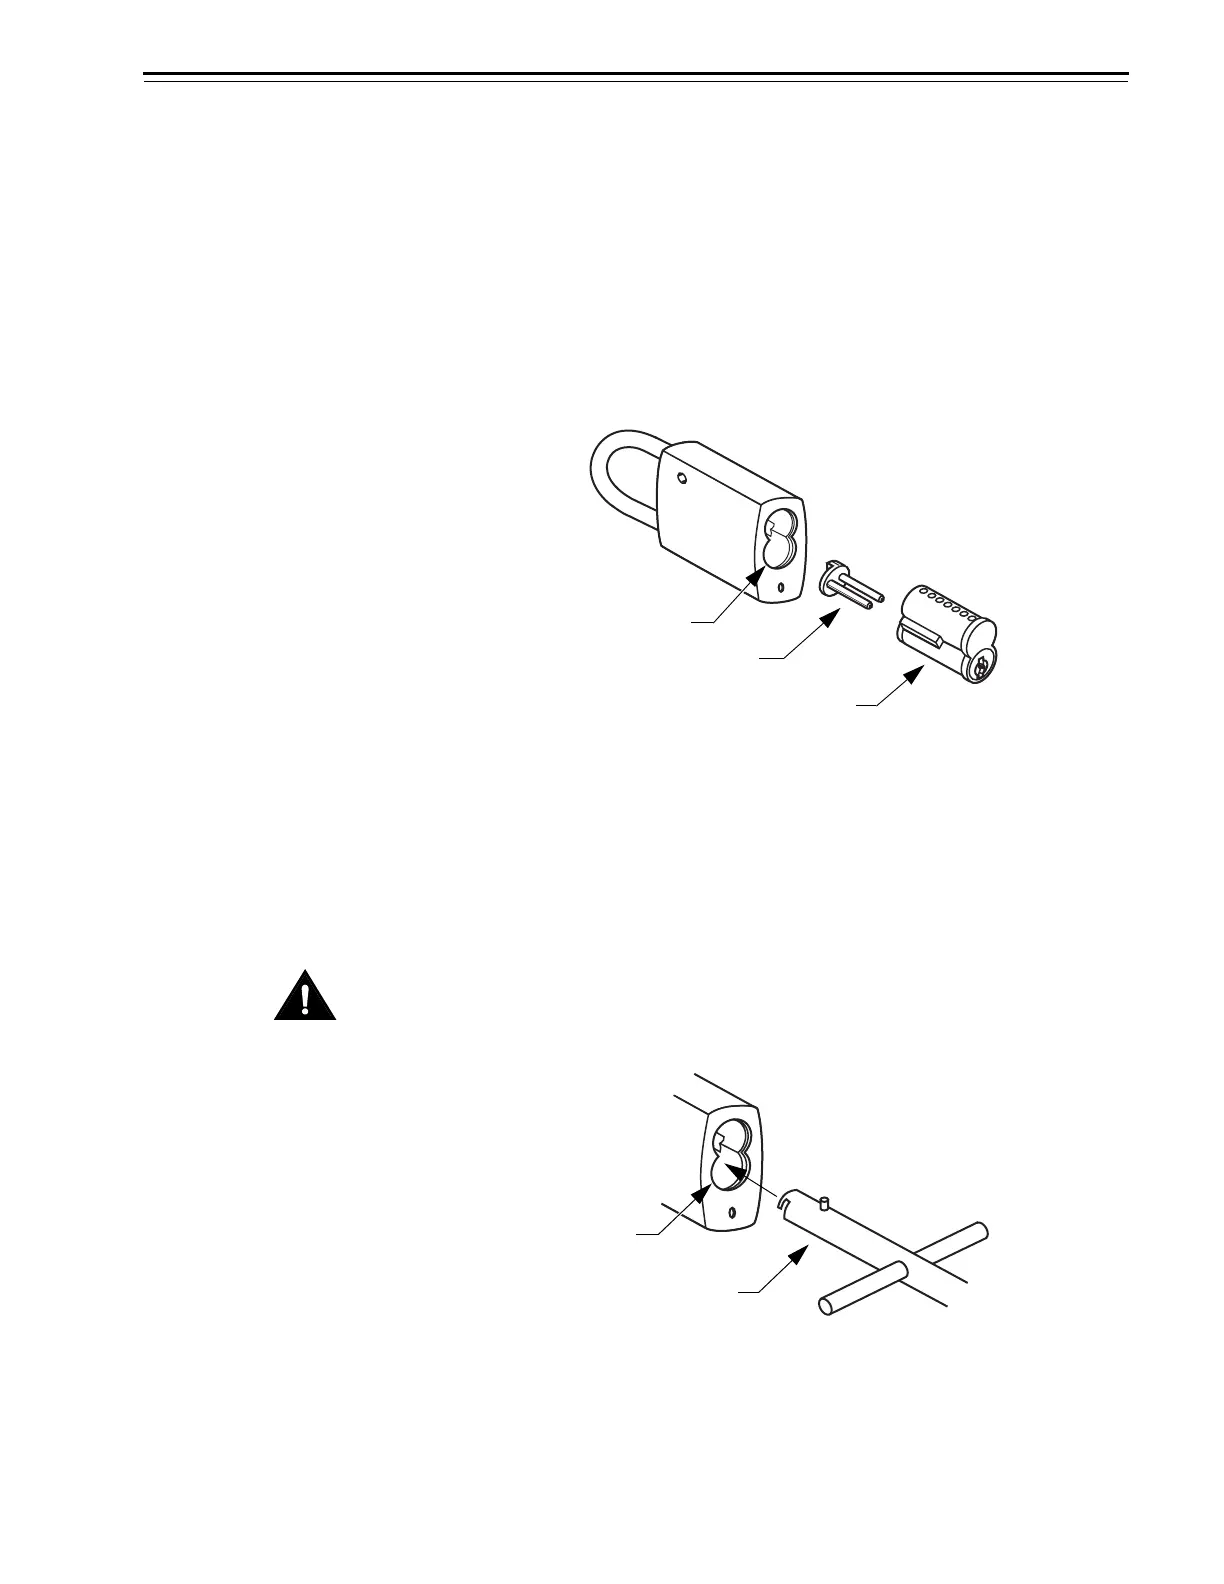
3. With the padlock in the locked position, insert the disassembly tool
into the bottom core receptacle lobe, as shown in Figure 2.11, until
it touches the locking cam.
Note: The assembly tool guidepost allows the tool to be inserted
only one way.
Caution
When performing Step 3, be sure to hold the shackle. The shackle
could eject from the case while you’re removing the locking cam.
Figure 2.10 Removing the core and throw member
Core receptacle
Core
Throw member
Figure 2.11 Inserting the disassembly tool
Disassembly tool
Bottom core
receptacle lobe
 Loading...