28
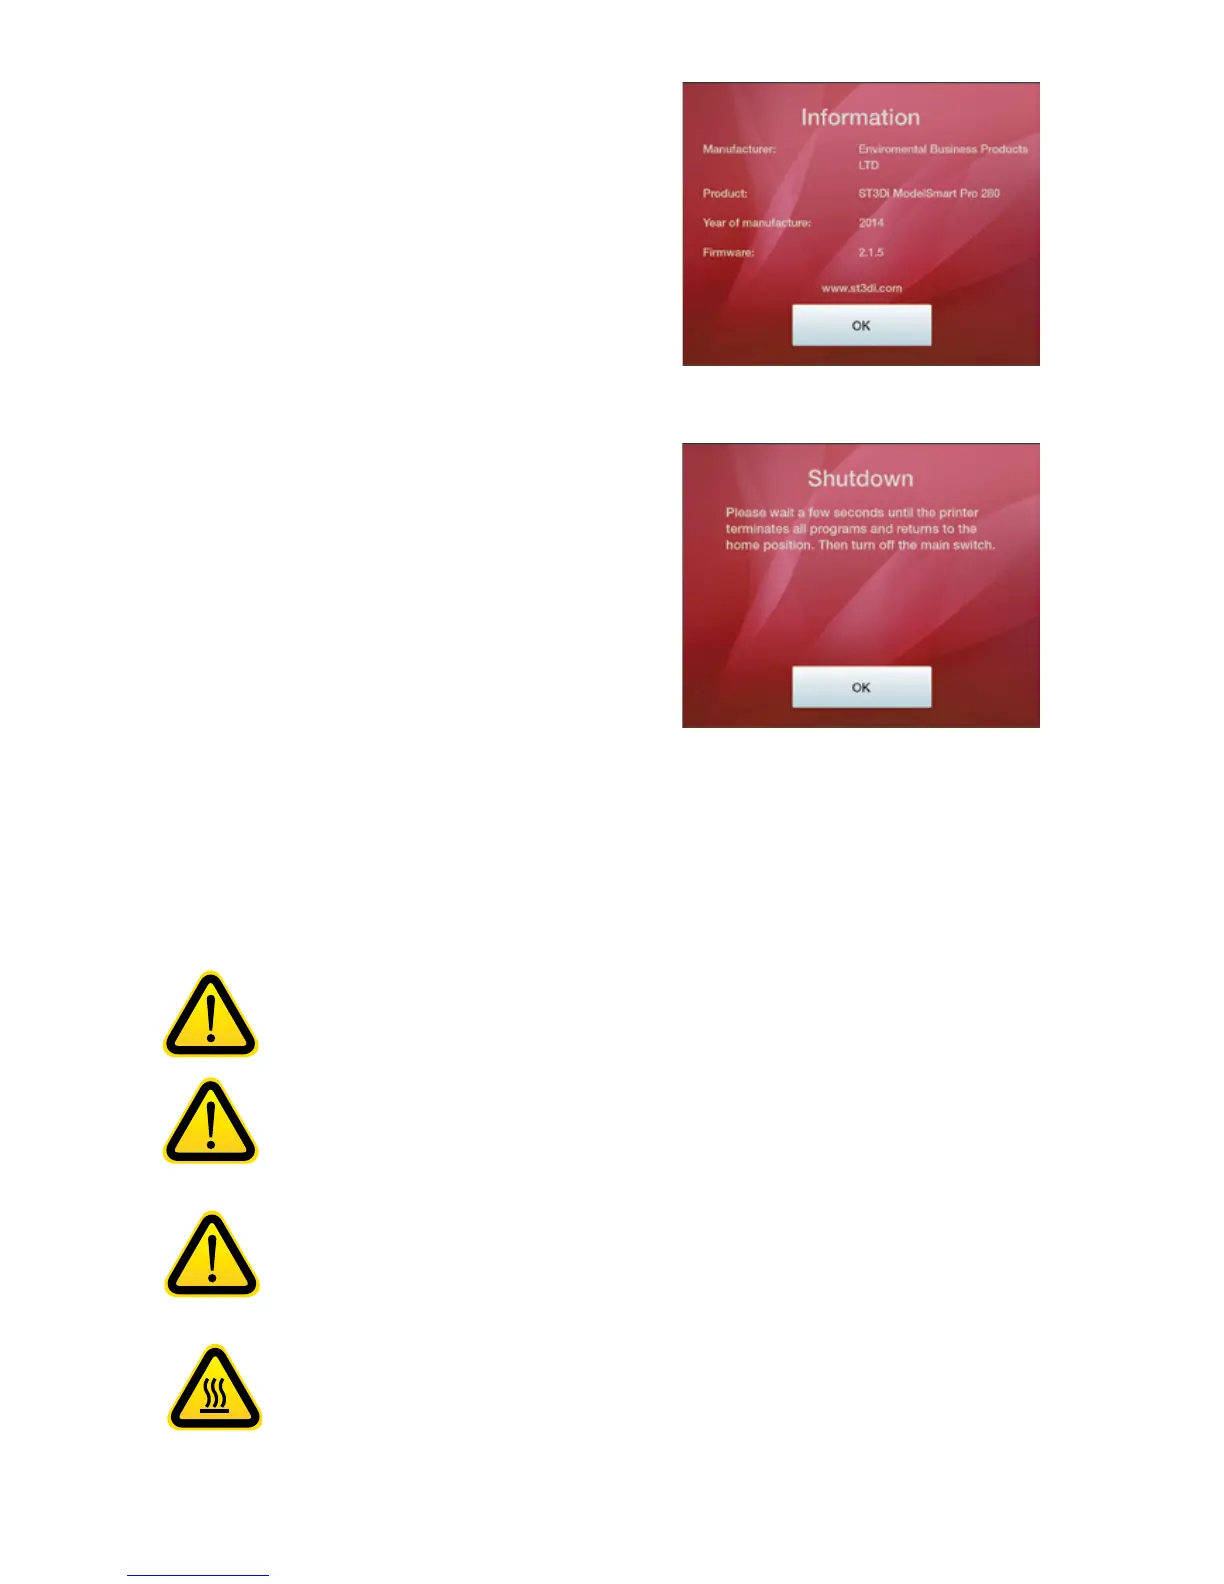
INFORMATION
The ‘informaon’ buon will provide you with
manufacturer details as well as conrming which version
of the Firmware you have installed
SHUTDOWN
The ‘Shutdown’ buon informs you that you should
wait unl all programs are terminated and the printer
has returned the extruders and the print bed to their
Home Posion before turning the printer o at the main
switch.
It is important that your ST3Di 3D printer is kept clean at all mes in order to ensure connued consistency in your
prints. Please follow the simple points below to help maintain your printer.
Keep the exterior of your printer clean by using a damp cloth to remove any dust or dirt. Ensure
that the printer is switched o before you clean and be careful not to get water near any of
the electrical components. Please take extra care if wiping down the LCD screen as too much
pressure or water in the display could cause damage to the touchscreen funconality.
It is important to ensure that the extruder remains clean and free from any residual lament
prior to each print otherwise the nozzle could get blocked and the print may not be successful.
To do this, please ensure that the extruder has completely cooled before you open the printer
and remove the residual material by hand. If you have any further challenges removing this
residue please contact the ST3Di team via our Contact Form.
Please ensure that you do not leave any item, model or residual material underneath or
around the print bed, or anywhere inside the printer when prinng as these could obstruct the
movement of the printheads and print bed which could possibly result in a failed print.
To clean the glass print bed, please remove carefully aer each print. Ensure that your model
and any remants of lament material have been removed, and then carefully wipe the bed with
a clean cloth and warm water. This should remove any residual adhesive from the Z Axis sheets.
Please ensure that the bed is free from any adhesive, lament or other residue and that it is dry
before applying a new Z Axis sheet prior to prinng. For how to apply and remove please see
our instruconal video.
CLEANING AND MAINTENANCE