7
1. Remove the printer from the double lined box. Please
note that two people are required to remove the printer
from the box.
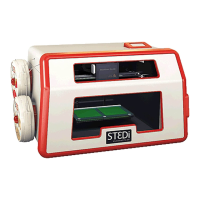
2. Open the printer door and remove the following items
from the internal packaging:
a. Glass bed
b. Filament Cartridge(s)
c. Filament Cartridge holder(s)
d. Power Cable
e. 24V power adapter
f. USB Cable
g. 4 screws for the lament holder (x2 for the ModelSmart
Pro 280)
h. Filament tubes (x2 for the ModelSmart Pro 280)
i. Z Axis Sheets
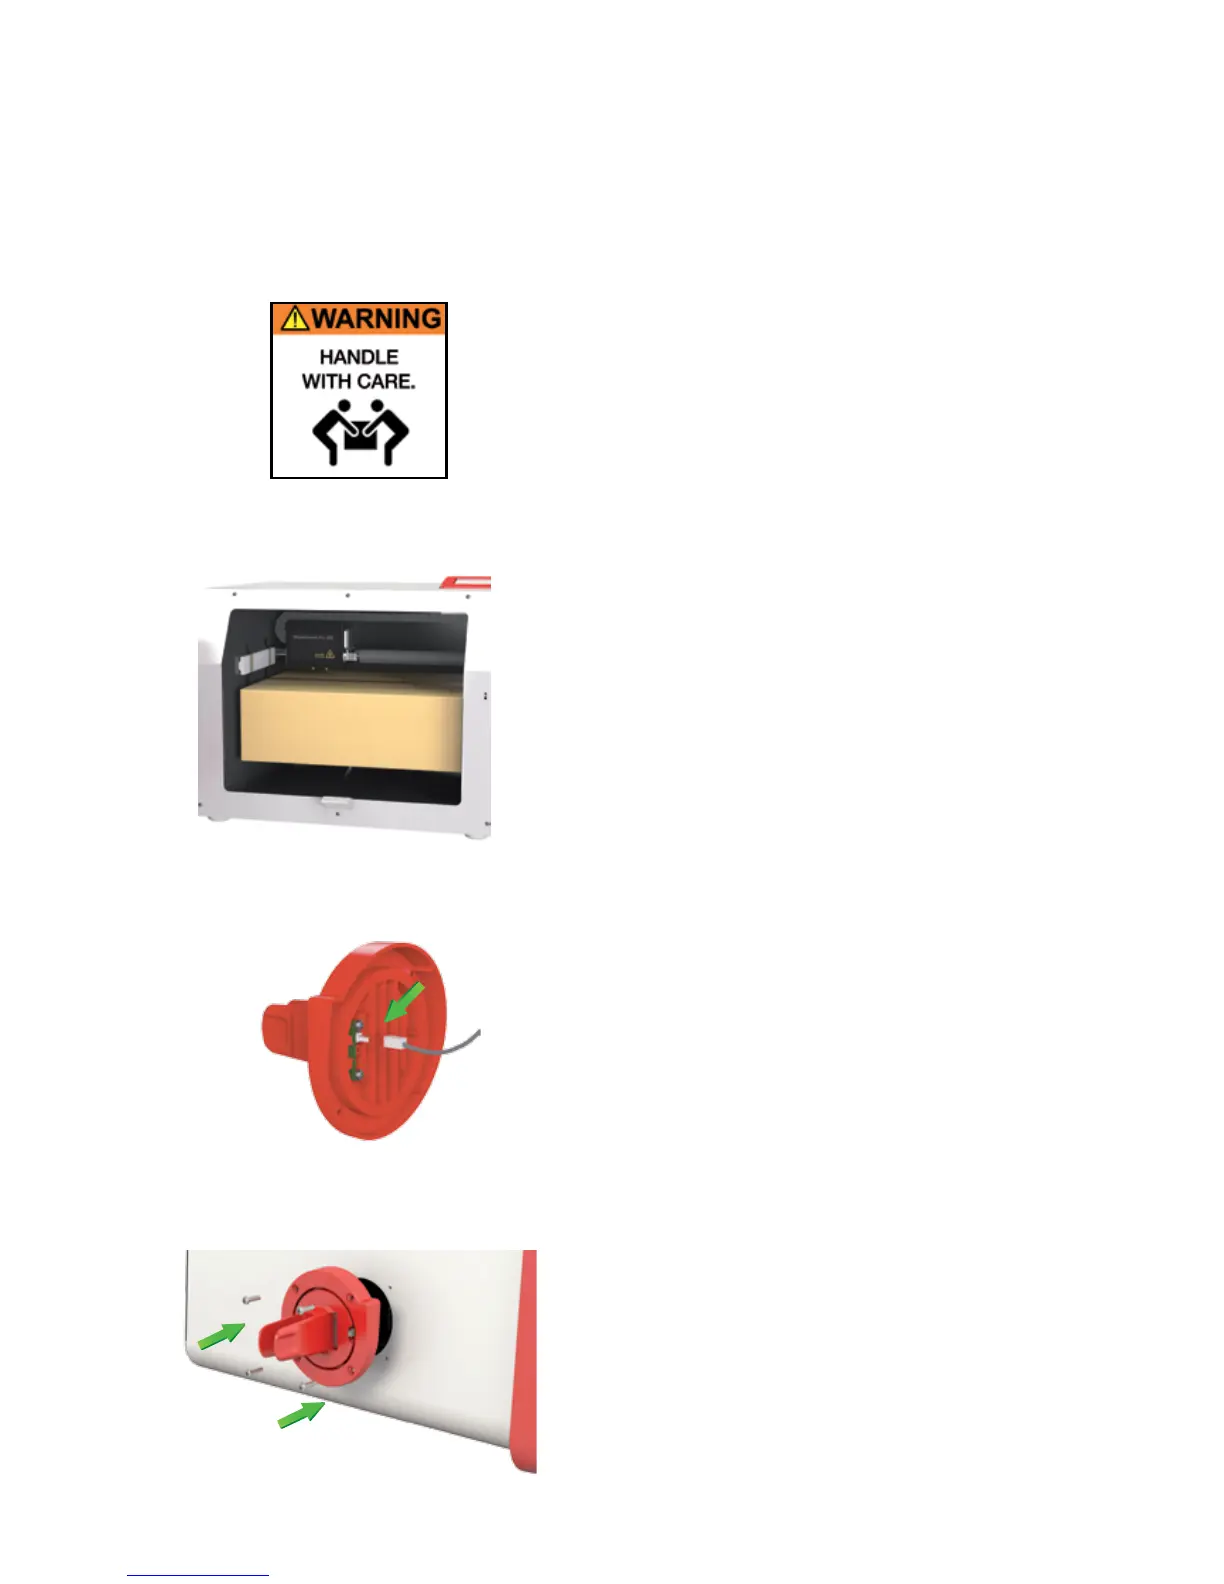
3. Set up the lament holder cable(s):
a. Connect the A1 cable to the rear of the lament
cartridge holder. Please refer to the illustraon for
details and correct orientaon.
b. Repeat as necessary for the ModelSmart Pro 280 by
connecng the B1 cable to the rear of the second lament
holder.
4. With the 4 screws provided aach the lament cartridge
holder (x2 for the ModelSmart Pro 280).
Important note: hand ghten only.
SET-UP
Please follow the steps below to get your ST3Di 3D printer ready for prinng. Before you start, please note that
two people are required to remove the printer from the box. Once removed from the box please ensure that your
printer is posioned on a at and stable surface, this helps to minimise vibraon and produce more accurate prints.