Technical Information 40.2010 Page 29
TI_40_2010_13_01_02.fm
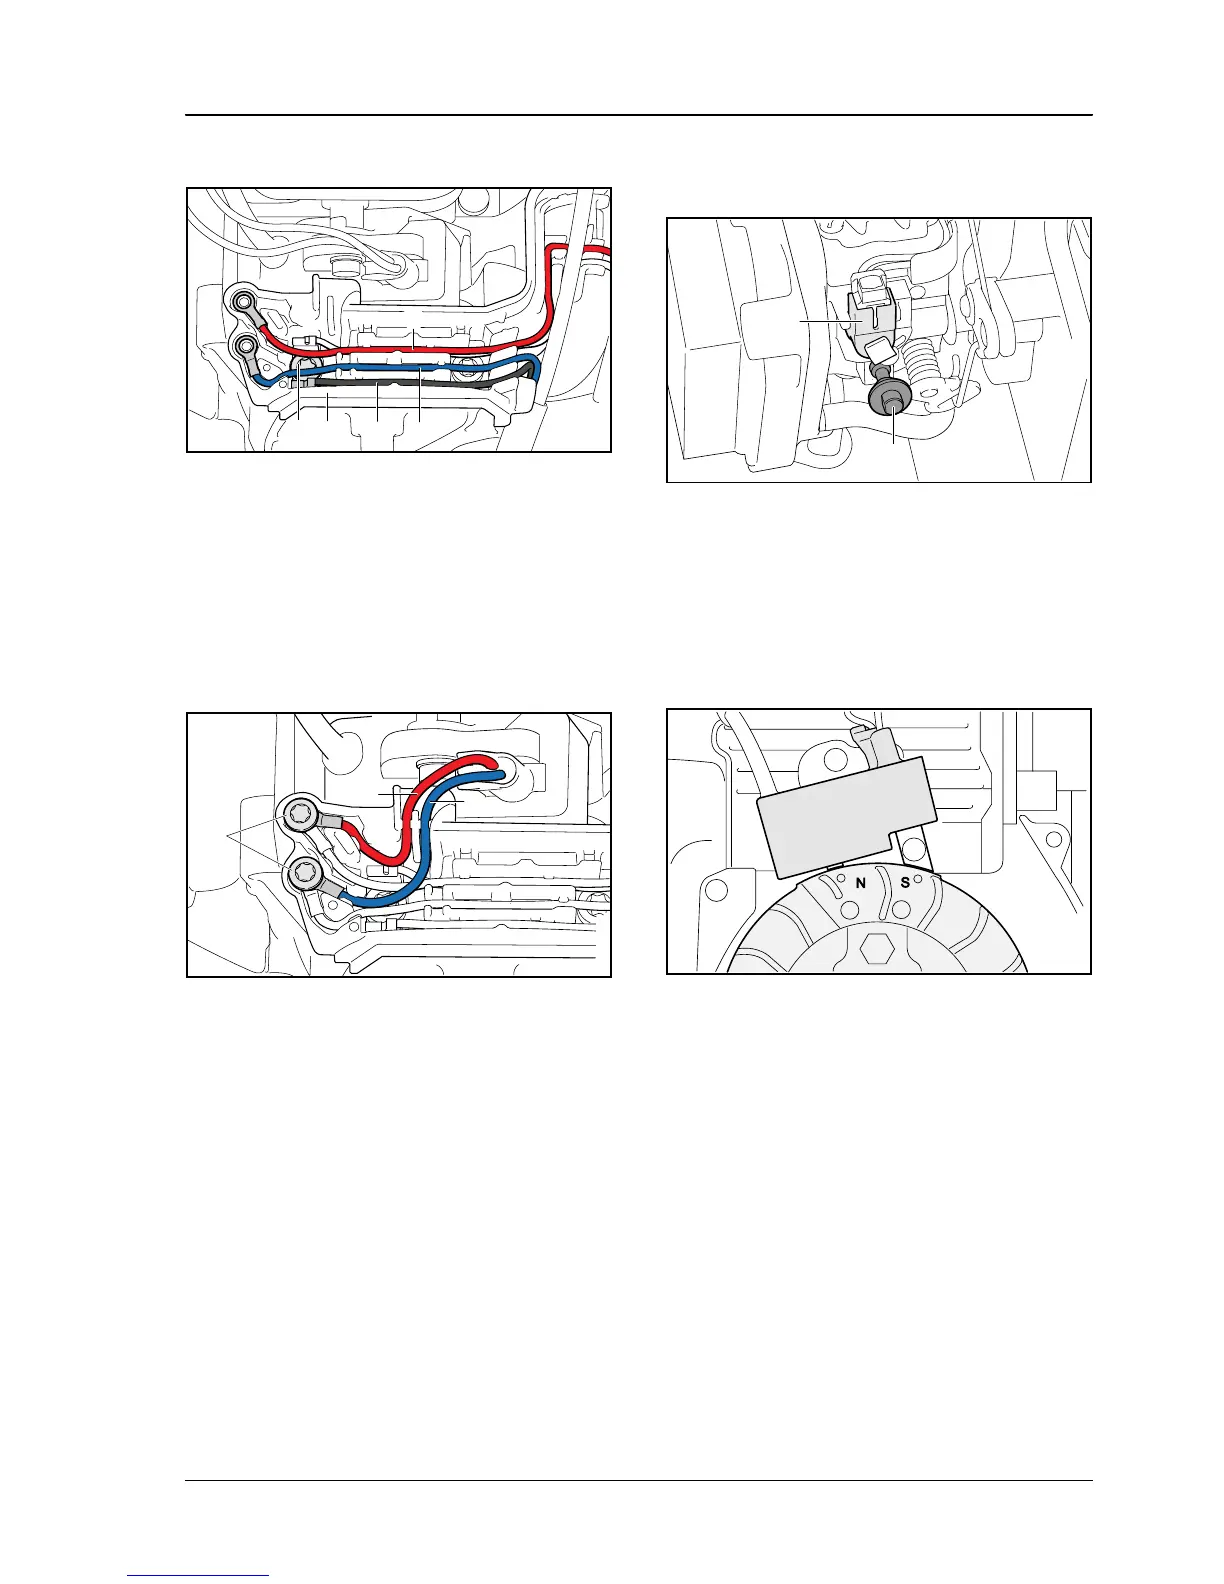
. Insert black lead (4) (throttle cable) in the guide
– connector tag and terminal socket on the black
lead are welded and cannot be separated
. Fasten cable lugs and cable holder (1) to the
clutch housing with screw (5)
. Insert blue lead (6) (throttle cable) in the guide –
crimped side of the cable lug facing down
. Insert red lead (7) (switch gear) in the guide –
crimped side of the cable lug facing down
. Insert red lead (8) (control unit) in the guide –
crimped side of the cable lug facing down
. Insert blue lead (9) (control unit) in the guide –
crimped side of the cable lug facing down
. Tighten screws (10)
9.9 Service work on carburetor
Position of the special bolt (1) must not be changed,
because otherwise the factory default setting will no
longer be correct and this can lead to impaired
engine performance.
Solenoid valve (2) must not be dismantled.
9.10 Setting the flywheel air gap
Set the air gap between the arms of the control unit
and the pair of magnetic poles marked "N"/ "S" on
the flywheel – use setting gauge 0000 890 6400
(see b 7.1)
Air gap: 0.30 mm (+0.05 mm/-0.10 mm)
7
1
4
5903TI025 KN
6
5
10
9
8
5903TI026 KN
2
1
5903TI027 KN
5903TI028 KN
 Loading...