125MS 661, MS 661 C-M
: Take out the screws (1) and
remove the generator (2).
: Pull off the insulating tube (3).
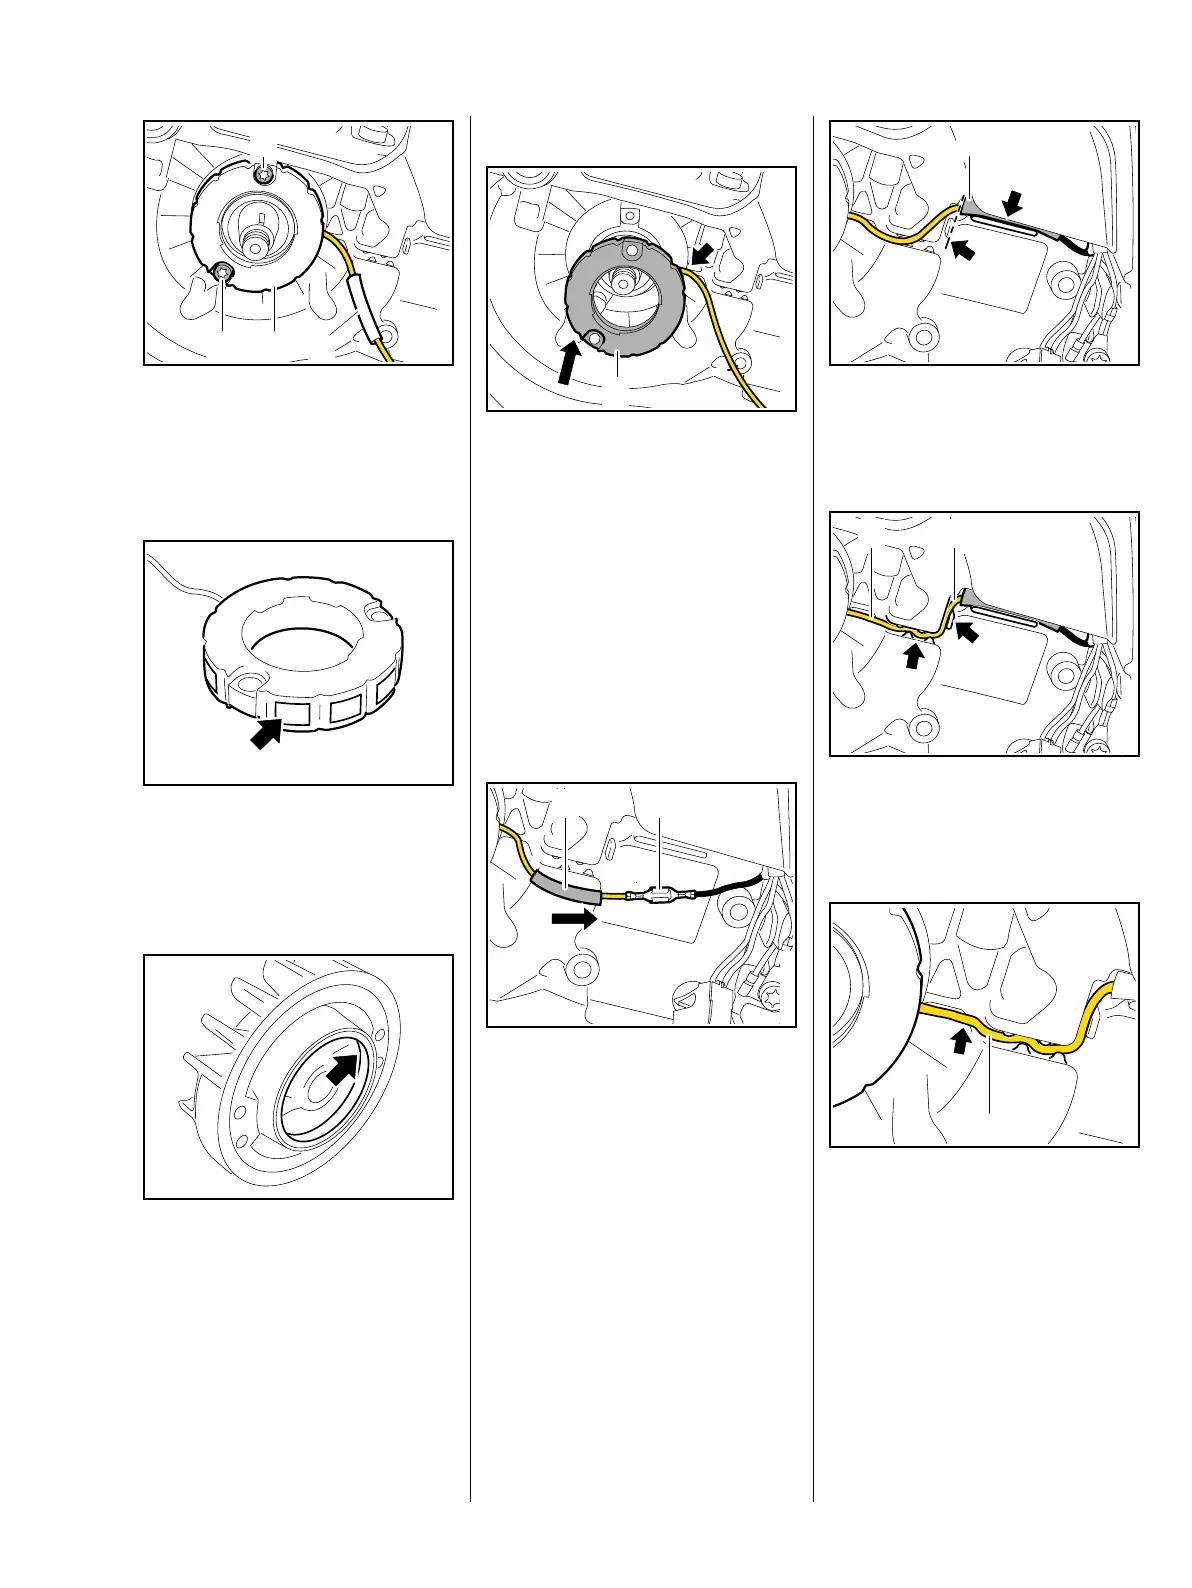
: Inspect the generator and poles
(arrow) for cracks or other
damage. If damage is found,
replace the generator.
: Inspect the magnet ring (arrow) in
the flywheel for cracks or other
damage, replace if necessary.
1166RA390 TG
1
1 2 3
0001RA448 TG1166RA391 TG
Installing
: Position the generator (1) with
the wire (arrow) facing the
crankcase.
– Check that the generator is
properly seated.
– Fit the screws and tighten them
down firmly.
– Push insulating tube onto
generator wire.
: Reconnect the pin and socket
connector (1) and center the
insulating tube (2) on the
connector (1).
1166RA392 TG
1
1166RA393 TG
12
: Push the insulating tube (1) with
pin and socket connector into the
guide (arrow).
: Push the generator wire (1) into
the guides (arrows)
– loop (2) allows for movement.
The compensating length of wire (1)
must be properly seated in the
recess (arrow).
The flywheel must not touch the
generator wire
– this could cause a break in power
supply.
– Reassemble all other parts in the
reverse sequence.
1166RA394 TG
1
1166RA395 TG
12
1166RA157 TG
1
 Loading...