18 TS 350
Mounting the abrasive Wheel
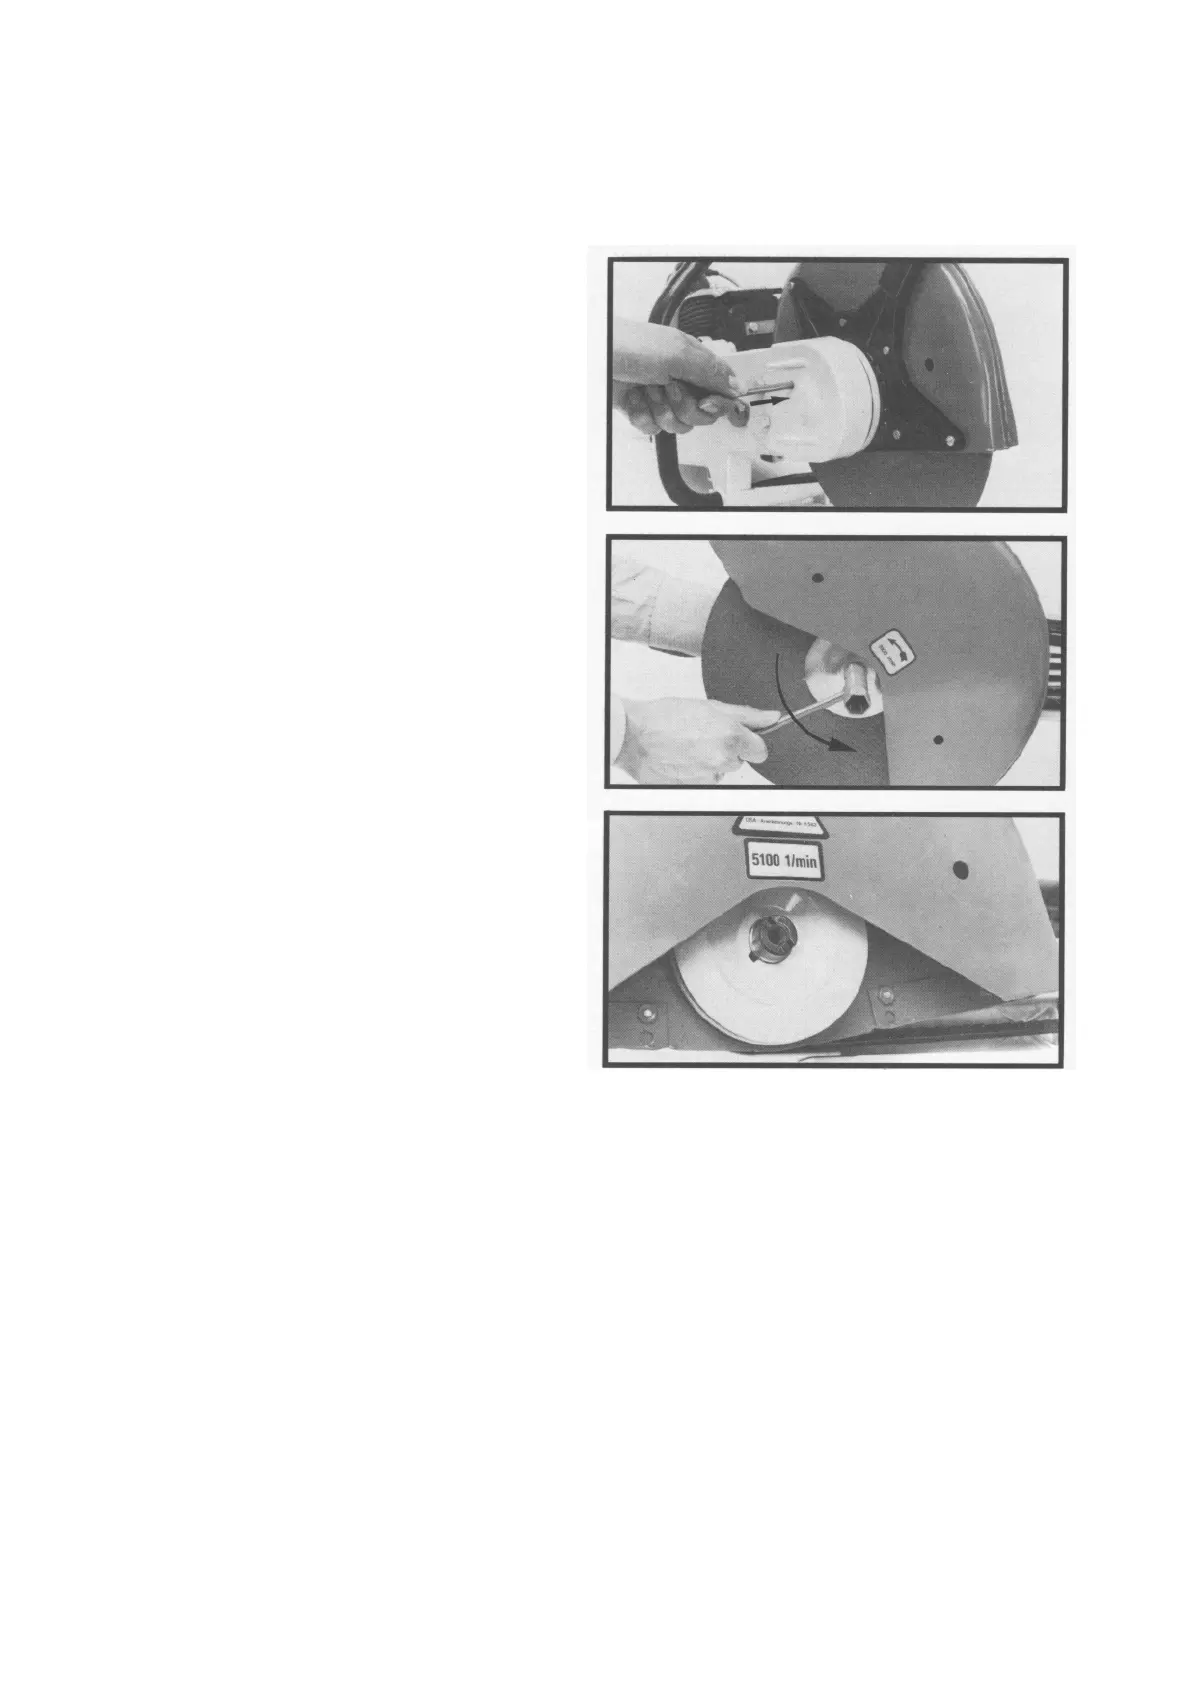
The engine must be switched off and the arbor blocked
before mounting or removing the abrasive wheel. To do
this, push the locking pin squarely through the hole in the
V-belt guard. If one of the V-belt pulley spokes is in the
way, use the combination wrench to turn the arbor until the
locking pin can be inserted.
Slacken off and remove the M 10 hex. head screw with the
combination wrench (17 mm) and take it off the arbor
together with the front thrust washer.
The cutting wheel can now be pulled off the arbor and
taken out of the guard. This operation is made easier if the
blade guard is turned so that its lower edge is vertical.
Before fitting the new abrasive wheel, check that the rear
thrust washer is positioned so that the notch in its center
hole engages over the lug on the arbor.
Mount the new abrasive wheel in the reverse sequence to
that described above. Make sure that the locking tab on
the front thrust washer engages in one of the two slots in
the arbor. Use combination wrench to securely tighten the
M 10 hex. head screw.
Pay attention to arrows for direction of rotation when fitting
a diamond abrasive wheel.
If a wider kerf is required (e. g. for installing induction
loops in road surfaces), two diamond abrasive wheels
can be used side by side. In such a case it is essential to
ensure that the segments of both wheels are positioned
exactly next to one another.
Important! Two composite wheels must never be used
simultaneously, for they may break and cause injuries
as they wear down unevenly.
Top: Blocking the arbor
Center: Removing hex. head screw
Bottom: Rear thrust washer correctly positioned
 Loading...