Do you have a question about the Stihl TS 440 and is the answer not in the manual?
Details on other documents relevant to this service manual.
Explains symbols used in the manual for better understanding.
Safety measures regarding protective gloves during repairs.
Safety measures regarding safety goggles during repairs.
Importance and recommendation for using genuine STIHL spare parts.
Information on different types of screws and their handling.
Steps to prepare the cut-off machine before starting repair work.
Lists tools and aids required for V-ribbed belt service.
Step-by-step guide to remove the rear V-ribbed belt.
Step-by-step guide to install the rear V-ribbed belt.
Step-by-step guide to remove the front V-ribbed belt.
Step-by-step guide to install the front V-ribbed belt.
Lists tools and aids for servicing clamping arms.
Step-by-step guide to remove the rear clamping arm.
Step-by-step guide to install the rear clamping arm.
Step-by-step guide to remove the front clamping arm.
Step-by-step guide to install the front clamping arm.
Lists tools and aids for servicing belt pulleys.
Step-by-step guide to remove the middle belt pulley.
Step-by-step guide to install the middle belt pulley.
Step-by-step guide to remove the front belt pulley.
Lists tools and aids for servicing the connecting piece and guard.
Step-by-step guide to remove the connector.
Step-by-step guide to install the connector.
Lists tools and aids for brake band service.
Step-by-step guide to remove the brake band.
Step-by-step guide to install the brake band.
Lists tools and aids for brake lever service.
Step-by-step guide to remove and dismantle the brake lever.
Step-by-step guide to assemble and install the brake lever.
Information on available interactive video tutorials for brake service.
Lists tools and aids for brake service.
Steps to remove the front belt pulley.
Steps to install the front belt pulley.
Guide to remove connector, brake band, and brake lever.
Step-by-step guide to install a new brake lever.
Step-by-step guide to install a new brake band.
Step-by-step guide to install the connector.
Step-by-step guide to install new V belts.
Lists tools and aids for flywheel service.
Step-by-step guide to remove the flywheel.
Step-by-step guide to install the flywheel.
Lists tools and aids for generator service.
Step-by-step guide to remove the generator.
Step-by-step guide to install the generator.
Lists tools and aids for electromagnet service.
Step-by-step guide to remove the electromagnet.
Step-by-step guide to install the electromagnet.
Lists tools and aids for electronic module service.
Step-by-step guide to remove the electronic module.
Step-by-step guide to install the electronic module.
Lists tools and aids for solenoid valve service.
Step-by-step guide to remove the solenoid valve.
Step-by-step guide to install the solenoid valve.
Lists tools and aids for control panel service.
Step-by-step guide to remove the control panel.
Step-by-step guide to install the control panel.
Lists tools and aids for cable routing.
Guide to remove wiring harness connecting control panel and electronic module.
Guide to install wiring harness for control panel and electronic module.
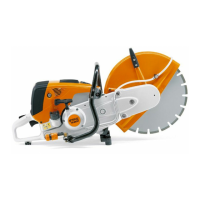
| Engine Power | 3.2 kW |
|---|---|
| Cutting Wheel Diameter | 350 mm |
| Maximum Cutting Depth | 125 mm |
| Arbor Size | 20 mm |
| Cutting Depth | 125 mm |
| Vibration Level Left/Right Handle | 3.9/3.9 m/s² |
| Displacement | 66.7 cc |
| Fuel Capacity | 710 cc |
| Fuel Tank Capacity | 710 cc |