TS 4408
5.3 Installing the rear clamping arm
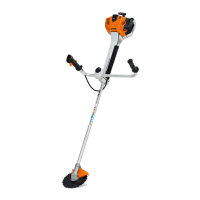
N Insert torsion spring (4).
N Hook pin (arrow) into torsion spring (4).
N Slide on clamping arm (3).
N Screw on nut (2).
N Install E-clip (1).
N Turn clamping arm (3) by the hexagon
counterclockwise as far as it will go and hold.
N Tighten nut (2).
N Install the rear V belt, @ 4.3.
N Install “starter cover with rewind starter”, @ 4.3.
N Fit guard, @ 4.3.
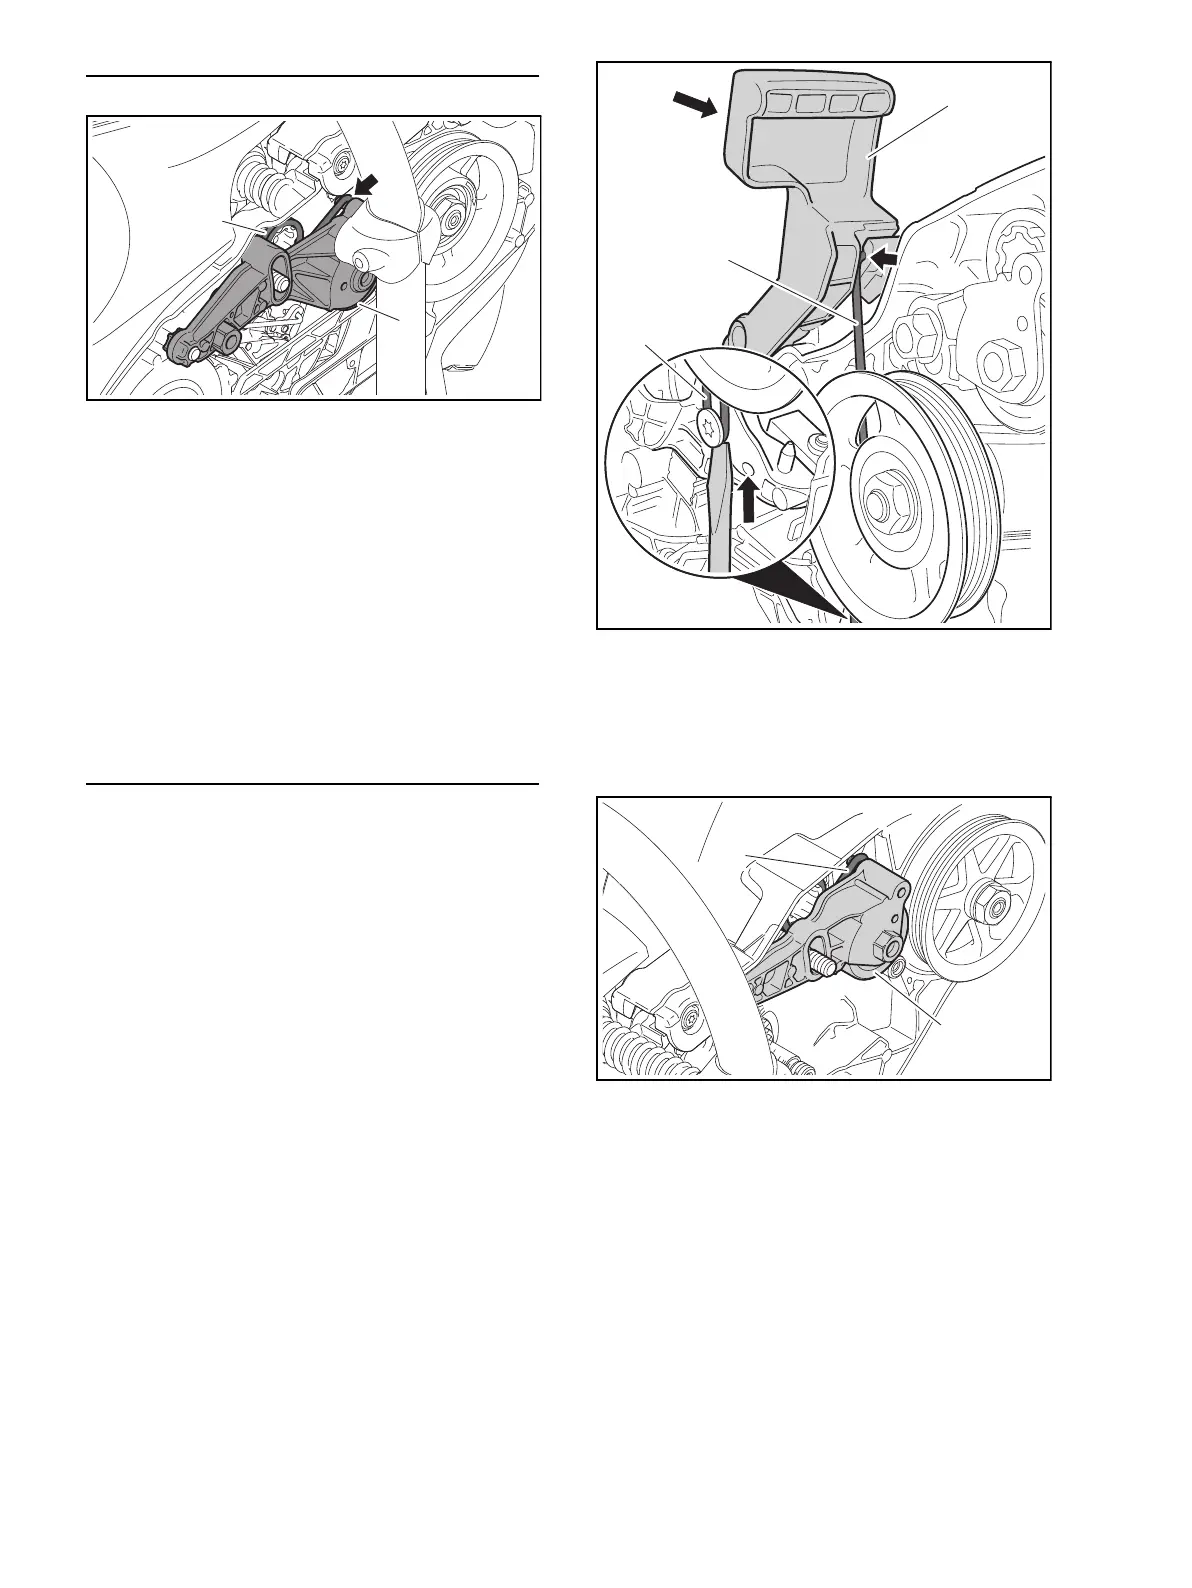
5.4 Removing the front clamping arm
N Prepare for repair, @ 3.1
N Remove guard, @ 4.2.
N Remove “starter cover with rewind starter”, @ 4.2.
N Remove the rear V belt, @ 4.2.
N Remove the front V belt, @ 4.4.
N Remove the middle belt pulley, @ 6.2.
N Undo nut (10).
N Remove screws (11).
N Remove the holding-down clamp (12).
N Push tension rod (13) upward and hold it there.
N Push the brake lever (9) gently downward. The
tension rod (13) will detach from the brake lever (9).
N Remove E–clip (5).
N Undo nut (6).
N Pull off clamping arm (7) and remove torsion
spring (8).

 Loading...