Using the Oven Programmer/Timer
Timer Operation
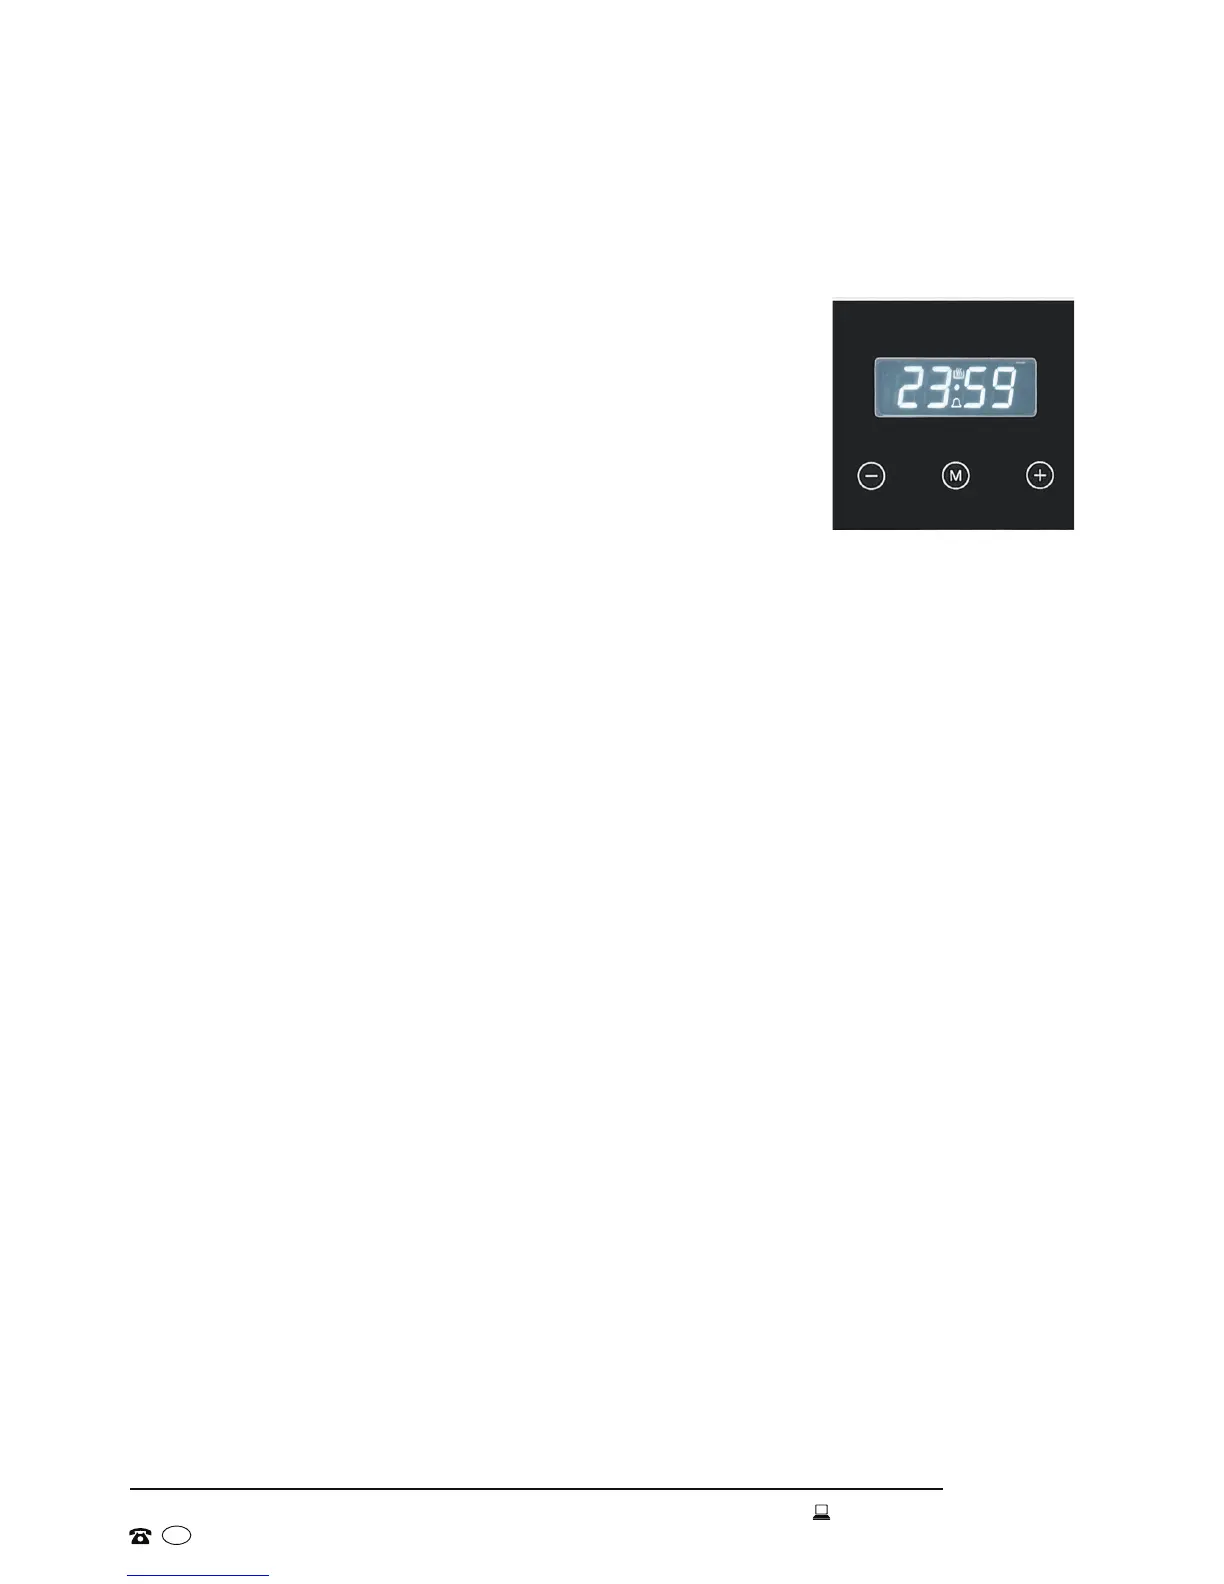
Your new electric oven has a digital timer with an easy
to read LED display and 3 control buttons for easy
operation (Fig. 7).
The timer has three different functions. You can use it:
(a) as a minute minder, or
(b) to set the cooking duration, or
(c) to set the cooking end time, or
(d) to set the cooking start time and end time.
Detailed descriptions of all functions are provided on the
following pages.
Manual Operation Mode
When your appliance is connected to the mains supply for the rst time,
the numbers on the timer display will ash. Before you can select a cooking
function or set a temperature, you must set the appliance into manual
operation mode.
• Press and hold the MANUAL [ M ] button for 3 seconds to set the oven
into manual operation (standby) mode.
Setting the Clock
After setting your oven for manual operation, the Time Adjustment symbol will
start ashing on the display, prompting you to set the time of day.
• Use the PLUS [ + ] and MINUS [ - ] buttons to adjust the time that appears
in the display to the current time of day. When the correct time is displayed,
release the PLUS [ +] and MINUS [ - ] buttons and wait for 5 seconds. The
Time Adjustment symbol will then stop ashing and the time is set.
• To readjust the time on the display, press and hold the MANUAL [ M ] button
for 3 seconds to turn off the timer. Then press and hold the MANUAL [ M]
button again to turn on the timer. The Time Adjustment symbol will start
ashing and you can set the time as described above.
Using the Time Adjustment [ + / - ] Buttons
• Press briey for minute-to-minute progression.
• Press and hold to move quickly through the digits.
Instructions
Fig. 7