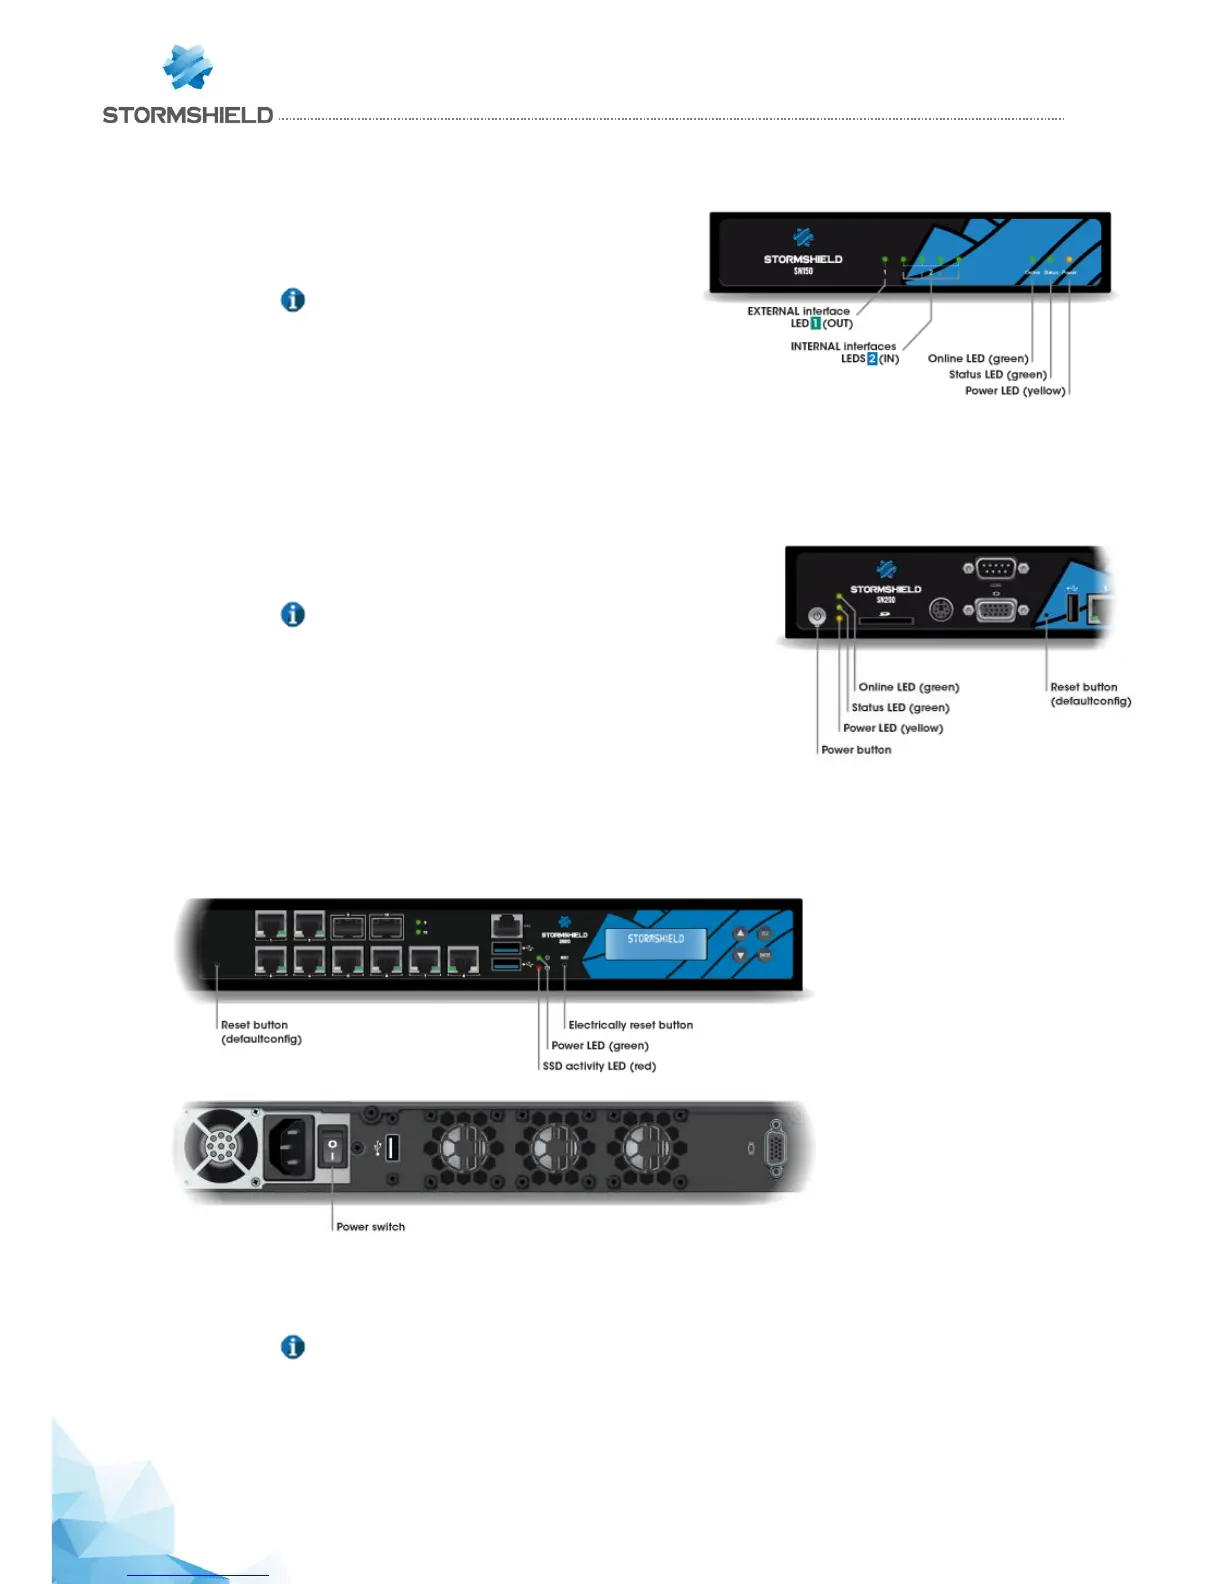
Starting up the SN150
Once your Firewall has been plugged into the mains, it will
automatically start up. Wait a few minutes for all 3 LEDs –
Online, Status and Power to light up.
NOTE
If necessary during startup, you can insert a USB
key containing a configuration. Console mode
will display the following message: “Please insert
your USB token to continue”.
The lit Online LED will indicate the end of the product’s startup phase.
Starting up SN200, SN300, SN500, SN700 and SN900 models
Press once on the Power button then wait several minutes for the 3
LEDs Online, Status and Power to light up.
NOTE
When you hear 8 consecutive beeps, you will be able to
insert a USB key containing a configuration if necessary.
Console mode will display the following message:
“Please insert your USB token to continue”.
Two consecutive beeps and the lighted up Online LED indicate the end
of the product’s startup sequence.
Starting up SN910
Plug your Stormshield Network Firewall into the mains power supply and make sure the power switch is set
to the position “ON”. Your Firewall will then start running automatically, Power LED will light up. Then wait
several minutes.
NOTE
When you hear 8 consecutive beeps, you will be able to insert a USB key containing a
configuration if necessary. Console mode will display the following message: “Please insert
your USB token to continue”.
Two consecutive beeps indicate the end of the product’s startup sequence.