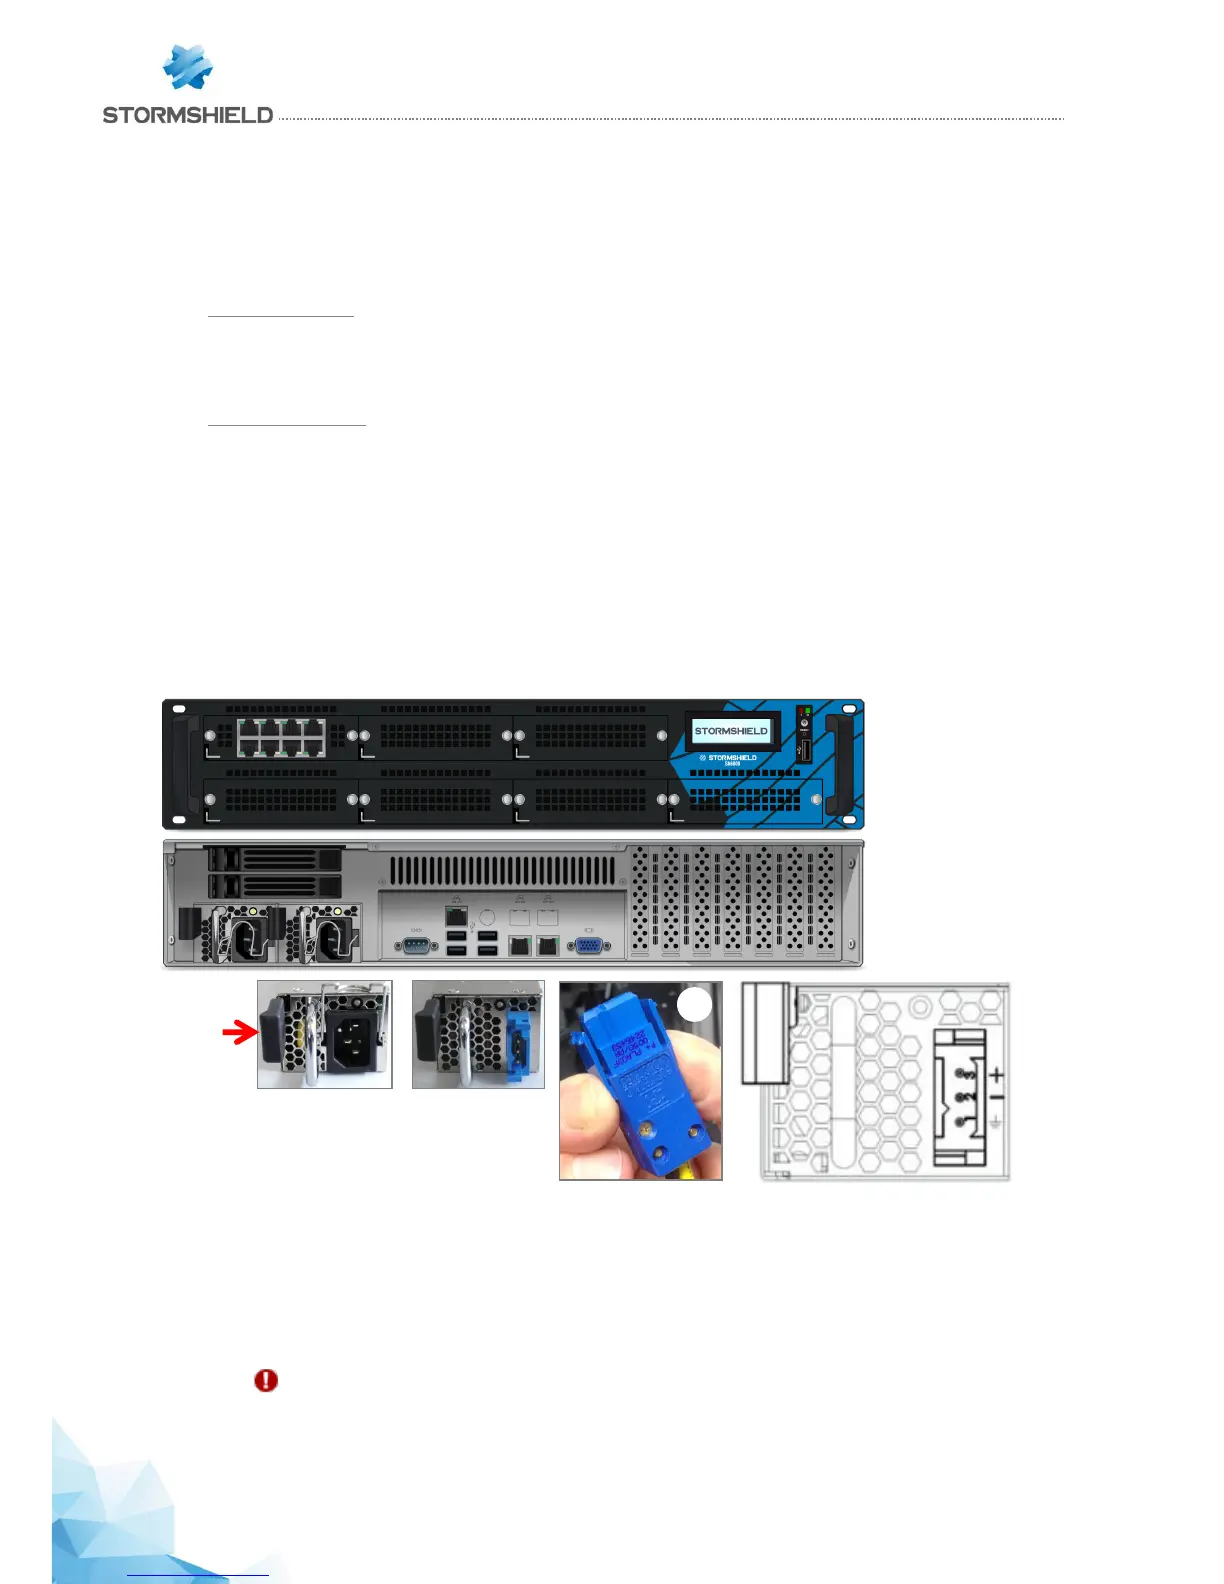
Each PSU module is equipped with a light showing its state (two colours: green/red for the AC mains
module, blue/red for the 48VDC module):
Module working correctly
- module connected to a power source but not installed in a firewall: green (AC mains)/blue (48VDC).
SN3000 (halted):
- module installed but not connected to a power source, and the other module is installed and
connected: green (AC mains)/blue (48VDC), blinking.
- module installed and connected to a power source: green (AC mains)/blue (48VDC), blinking.
SN3000 (running):
- module installed and connected to a power source: green (AC mains)/blue (48VDC), not blinking.
- module installed and not connected to a power source: red, blinking (+ buzzer).
Module not functioning correctly
- module connected to a power source: red, not blinking.
SN6000
1. Disconnect the module from the electrical supply,
- AC mains supply: disconnect the mains cable
- 48VDC supply: disconnect the supply cable from the module - squeeze the connecter vertically
1, and pull.
2. Remove the module: push the release lever sideways toward the extraction handle, and pull
the handle. Take hold of the case of the module and remove it completely.
CAUTION: the module's metal case serves as a heat sink and its temperature can reach +60°C
at full power. It is therefore advisable to use a glove to hold the case.