PART 1 • English
4
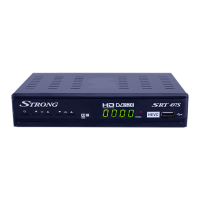
2. TV SCART To connect to your TV set using a SCART cable.
3. S/PDIF COAX To connect to the input of your digital audio amplifier.
4. Power Cord Your receiver requires a mains voltage of 100~240 V AC (Auto-
selectable), 50/60 Hz ±5%. Make sure to check the power specification
before connecting your receiver to the wall outlet.
2.3 Remote Control Unit
Fig. 3
1. q Turns the receiver On/Stand-by
2. ! Mutes audio output of the receiver
3. 0~9 Changes channel and controls numeric functions
4. FAV Opens the available favourite list if previously configured
5. RECALL Toggles between the two the last watched channels
6. AUDIO Opens the audio language(s) and mode selection.
7. SUBTITLE Opens the subtitle language(s) selection
8. INFO Shows the information banner
9. MENU Displays the main menu and returns to the previous level of menu
10. EPG Opens the EPG (Electronic Program Guide) in TV mode.
11. EXIT Exits from any menu and sub-menu or cancels the
progressing function
12. pq Switches to the previous/next program in TV mode. Moves the cursor
upwards/downwards in menu mode
13. OK In TV mode it displays the channel list according to the chosen mode.
In menu mode activates the highlighted menu item.
14. tu Increases/decreases the volume level in TV mode. Changes settings
for specific menu items in menu mode
15. TEXT Opens the Teletext language(s) selection
16. 2 Freezes your live audio and video, press again to cancel
17. COLOURED BUTTONS
For Teletext and further menu functions
18. TV/RADIO In viewing mode toggles between TV and radio mode
2.4 Default PIN code: 0000
2.5 Installing the Batteries
Fig. 5
Remove the battery cover from the remote control and put 2xAAA size batteries inside the compartment.
The diagram inside the battery compartment shows the correct way to install the batteries.
1. Open the cover
2. Install batteries
3. Close the cover
 Loading...