INSTALLATION: MERCHANDISER SET-UP, ELECTRICAL SET-UP, OPTIONAL REMOTE SYSTEM
1. Merchandiser Set-Up
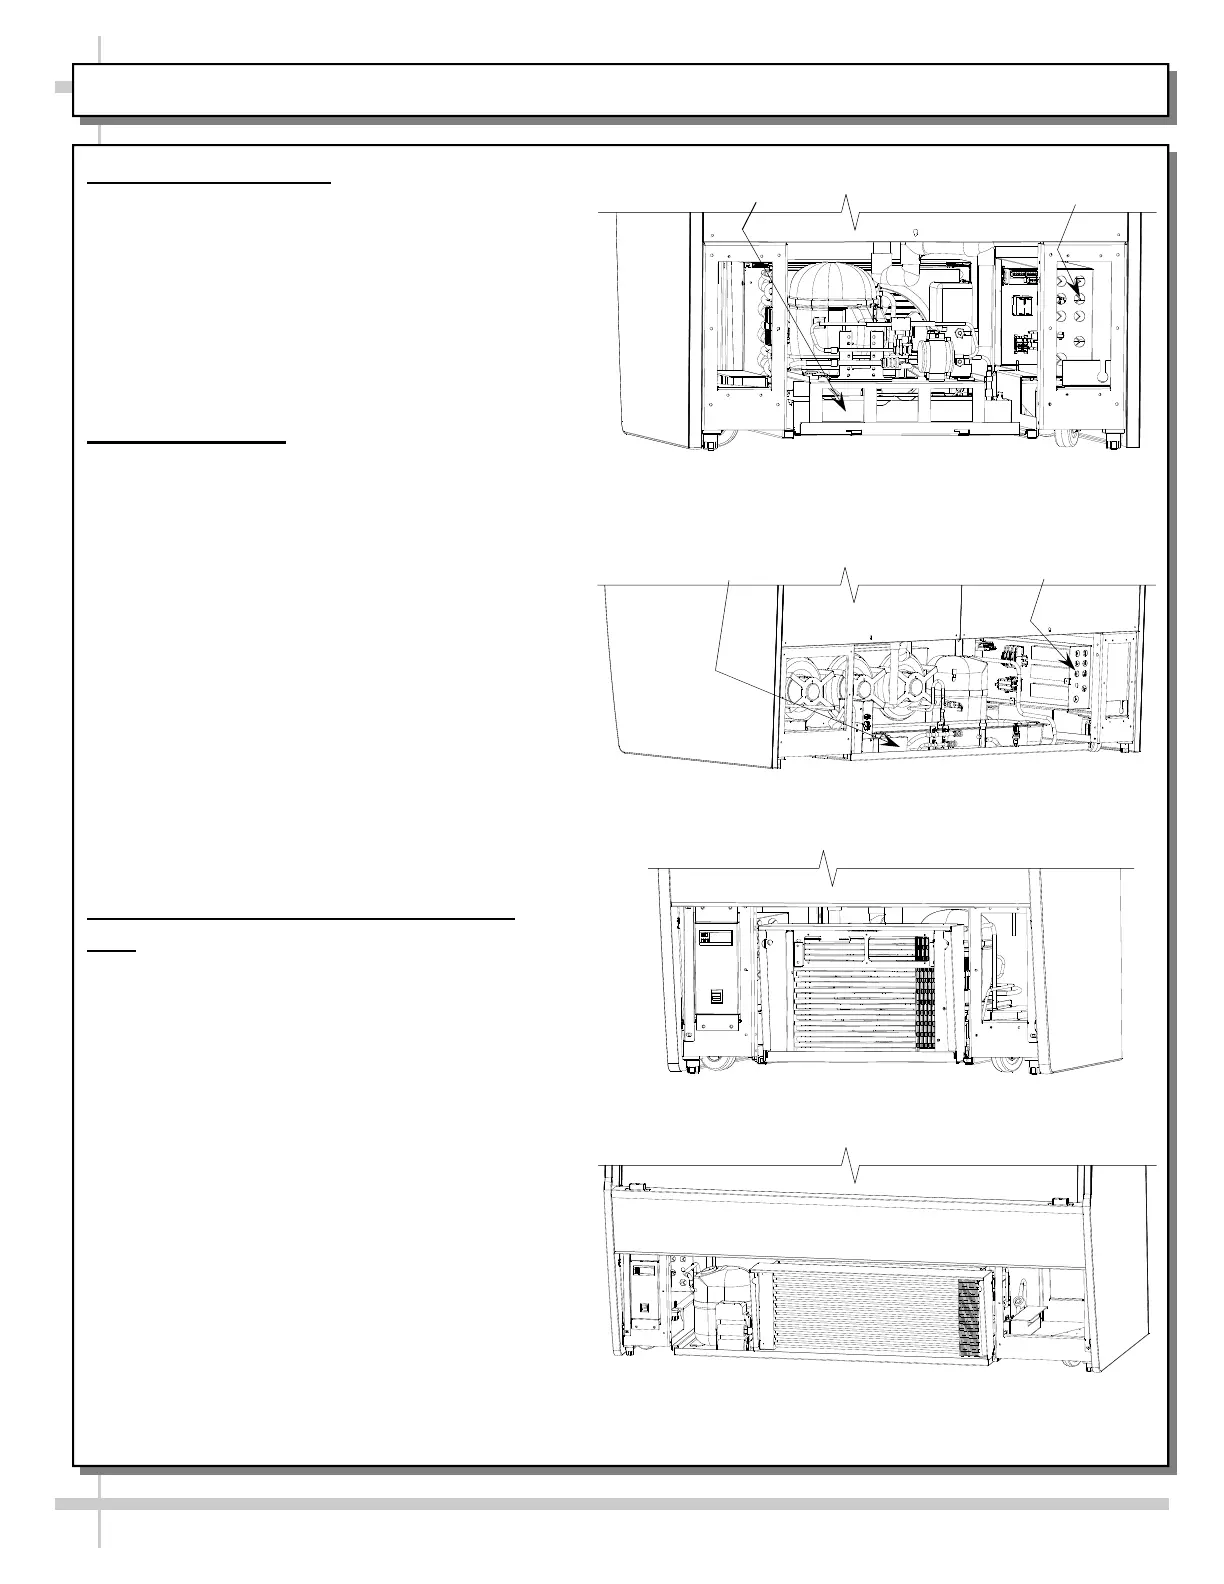
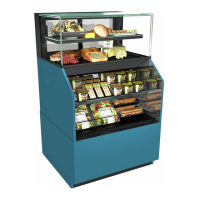
Remove the rear lower grille.
Ensure that the manufacturer provided hot gas
evaporator pan is installed under the
condensate drain.
Ensure that overflow evaporator pan is
plugged into the receptacle inside base.
Reinstall the rear grille after confirming the
above.
2. Electrical Set-Up
With Power Cord:
For your safety, equipment is furnished
with a properly grounded cord
connector. Do not attempt to defeat the
grounded connector.
Plug cord into certified electrical outlet with
ground. See Overview/Warnings sheet for
more specifics.
Without Power Cord:
Note: Servicing to be accomplished by a
certified electrical contractor.
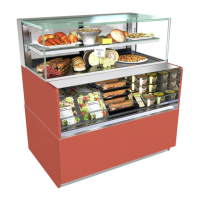
Electrical Leads
Remove cover from the left lower rear
of the unit.
Electrical leads connections are
provided in the junction box.
3. Optional Remote Refrigeration System
Note: Servicing units is to be done by
refrigeration / electrical contractors only.
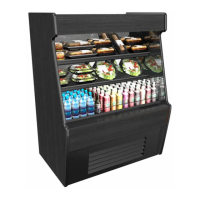
Electrical leads
Remove lower rear panel.
Electrical lead connections are located
in electrical/ballast box.
Refrigeration stub-ups
Refrigeration stub-up connections are
provided on underside of the tub inside
the base of the unit.
Remove lower rear and/or front panel.
The evaporator stub-up connections
are located on the right hand side of
the unit.
6
Front Refrigeration Access After Front Grille Removed
(Model CO37R Shown Above)
Front Refrigeration Access After Front Grille Removed
(Model CO67R Shown Above)
Rear Refrigeration Access After Rear Grille Removed
(Model CO37R Shown Above)
Rear Refrigeration Access After Rear Grille Removed
(Model CO67R Shown Above)
Electrical Leads
(If No Power Cord)
Electrical Leads
(If No Power Cord)
Hot Gas
Condensate Pan
Hot Gas
Condensate Pan