12
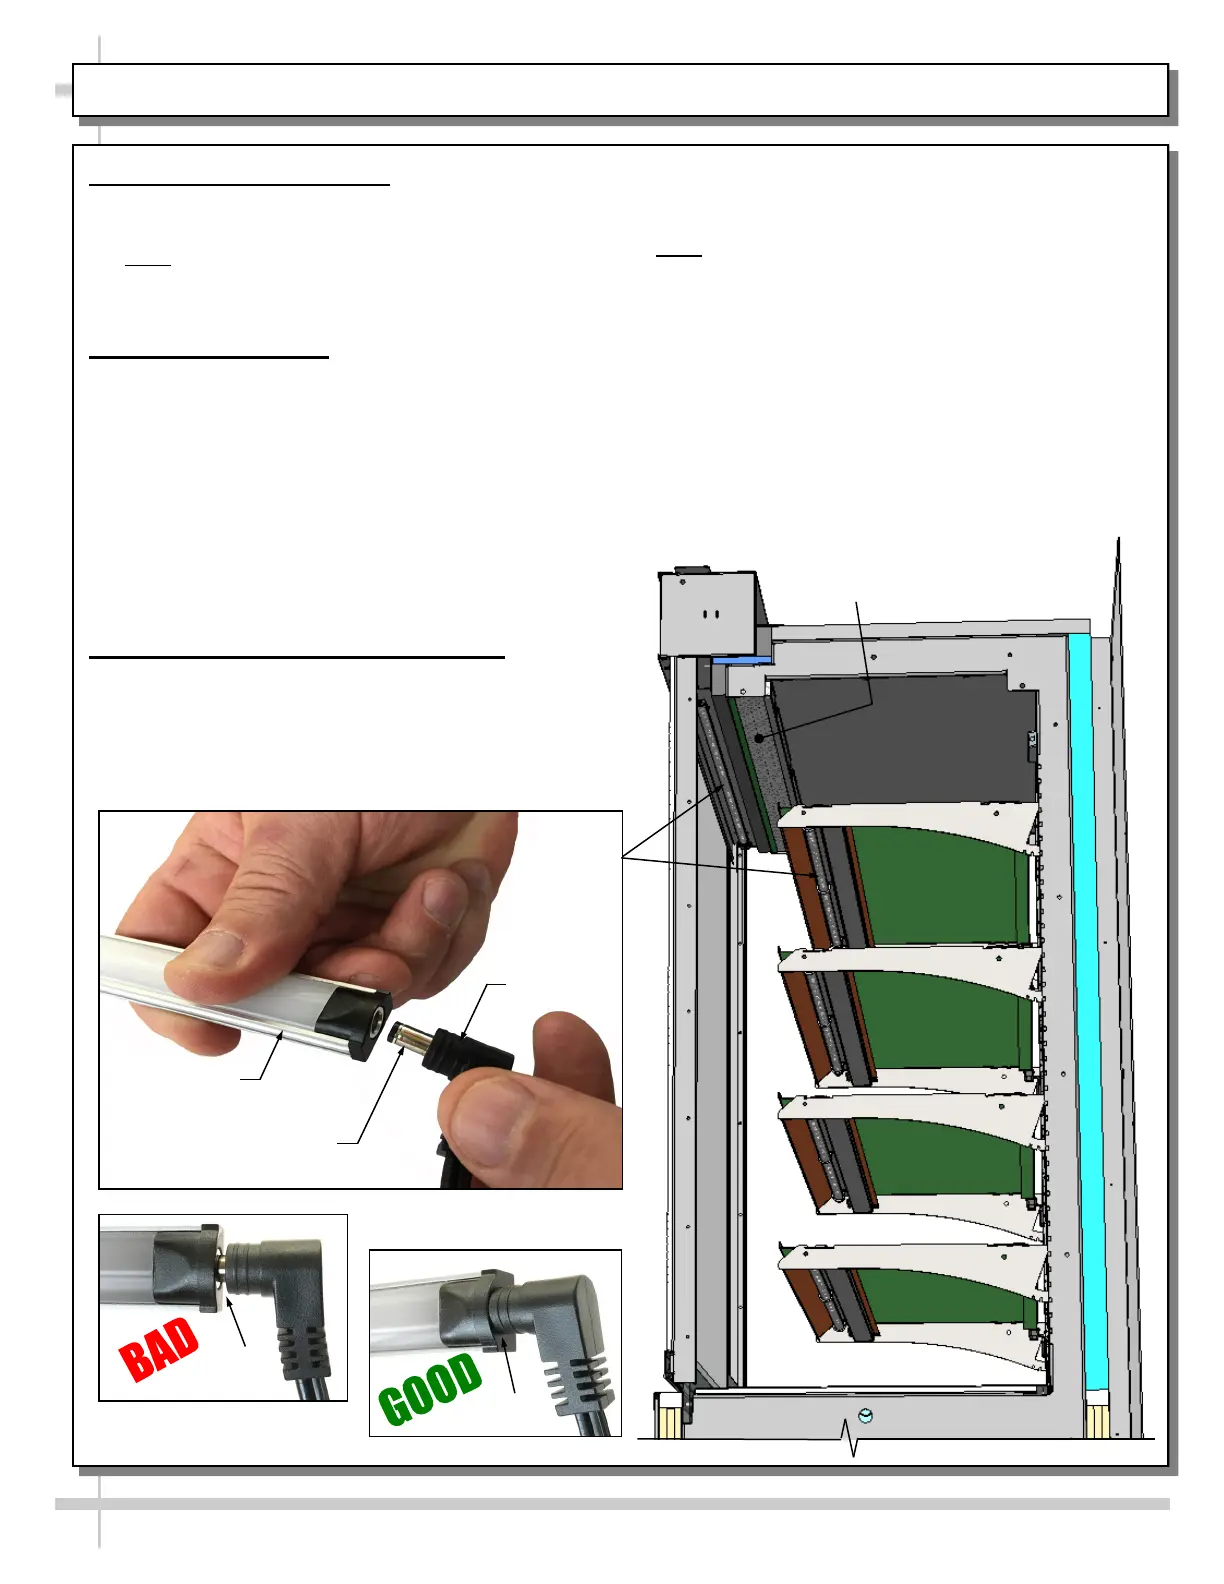
HONEYCOMB AIR DIFFUSER / LED LIGHT FIXTURES / LED LIGHT REMOVAL & REPLACEMENT
1. Honeycomb Air Diffuser
• Honeycomb is located in discharge air duct.
• See illustration below.
• Note: Depending upon model chosen,
illustrations shown below may not exactly reflect
every design feature or option as yours.
2. LED Light Fixtures
• Warning! Disconnect power before providing
maintenance and service to unit.
• When replacing LED lights, you must replace
with similar lights.
• Light switch is located at customer-left of case
under header, behind honeycomb.
• Turning on light switch will turn on ALL lights
in entire case.
• LED lights are located at both header and
shelving of case (as illustrated at right).
3. LED Light Removal / Replacement
Removal of lamp:
• LED lights rarely require change-out.
• Contact Structural Concepts’ Technical Service
Department for replacement parts (see the
Technical Service section of operating manual).
Honeycomb
Air Diffuser
LED Light
Plug
LED’s Barrel
Shaped Insert
No Gap
Gap
Replacement of lamp:
• To replace LED Light Fixture, disconnect
existing light from its brackets.
• Note: LED Light and Plug must be connected in a
specific manner or they will not work.
• Make certain that oval form of plug connects to
oval form of LED end cap.
• Check that ALL of the light plugs are properly
connected to the LED lights.
• Plugs must be inserted ALL THE WAY into the
LED light orifices (with no gap) to work properly.
• See illustrations below for BAD vs GOOD
connection practices.