9
INSTALLATION, CONT’D: OVERFLOW CONDENSATE PAN / PLUG IN UNIT / MAIN POWER SWITCH
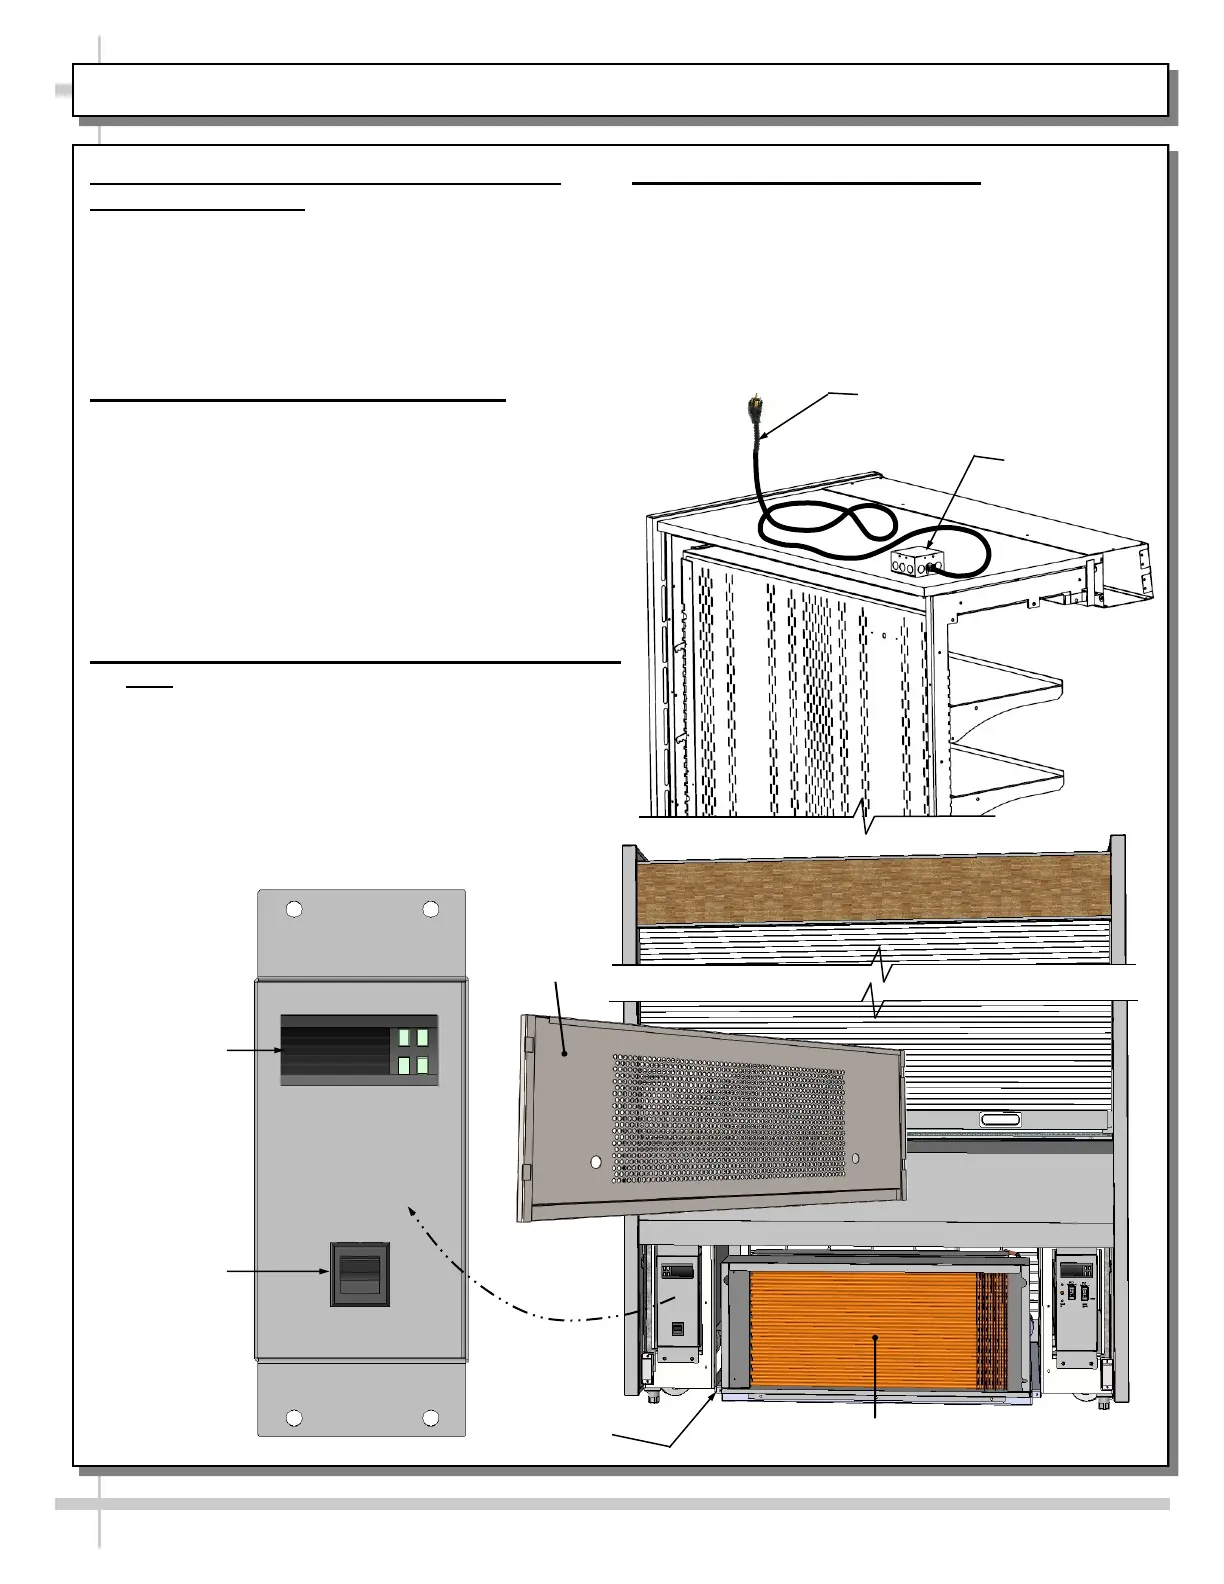
10. Sliding Condenser Package Out From
Underside Of Case
• At shipment, removal of compressor pan shipment
screws (at front of case) may be necessary to
access condenser package.
• See illustration below-right.
• Condenser package base rests on plastic glides.
• Slide condenser package out from under case.
11. Overflow Condensate Pan Check
• Caution! If case runs without proper
connection, water will overflow pan and drain
onto floor causing damage!
• Overflow condensate pan can unplug from its
electrical outlet during shipment!
• Before turning case on, check that power cord
from overflow condensate pan is plugged in.
• See TROUBLESHOOTING section in operating
manual for additional information.
12. Merchandiser Power Cord Route & Plug-In
• Note: Depending upon floor layout and power
source location, cord may be routed through rear
of case below OR through 4x4 J-box atop.
• See illustration at top-right for view of case with
power cord routed atop case (through 4x4 box).
Main Power
Switch
Programmable
Controller
13. Turning On Power To Case
• Plug in power cord.
• Main power switch may be accessed by
removing front grille.
• Main power switch is located on electrical box
below controller. See illustration at lower-left.
Shipment
Screw (Typ.)
--- Electrical Box ---
Front
Grille
Condenser Package
Power Cord and Plug
J-Box Atop Case