EENN
www.stryker.com 2971-109-0 01 REV B 1-43
Service
Solenoid valve replacement
Tools required:
• Zipper pull tool or equivalent
• Torque driver
• ESD system
Procedure:
1. See (Foot box cover access on page 1-40).
2. Properly ground yourself (see Protecting against Electrostatic Discharge (ESD) on page 1-33).
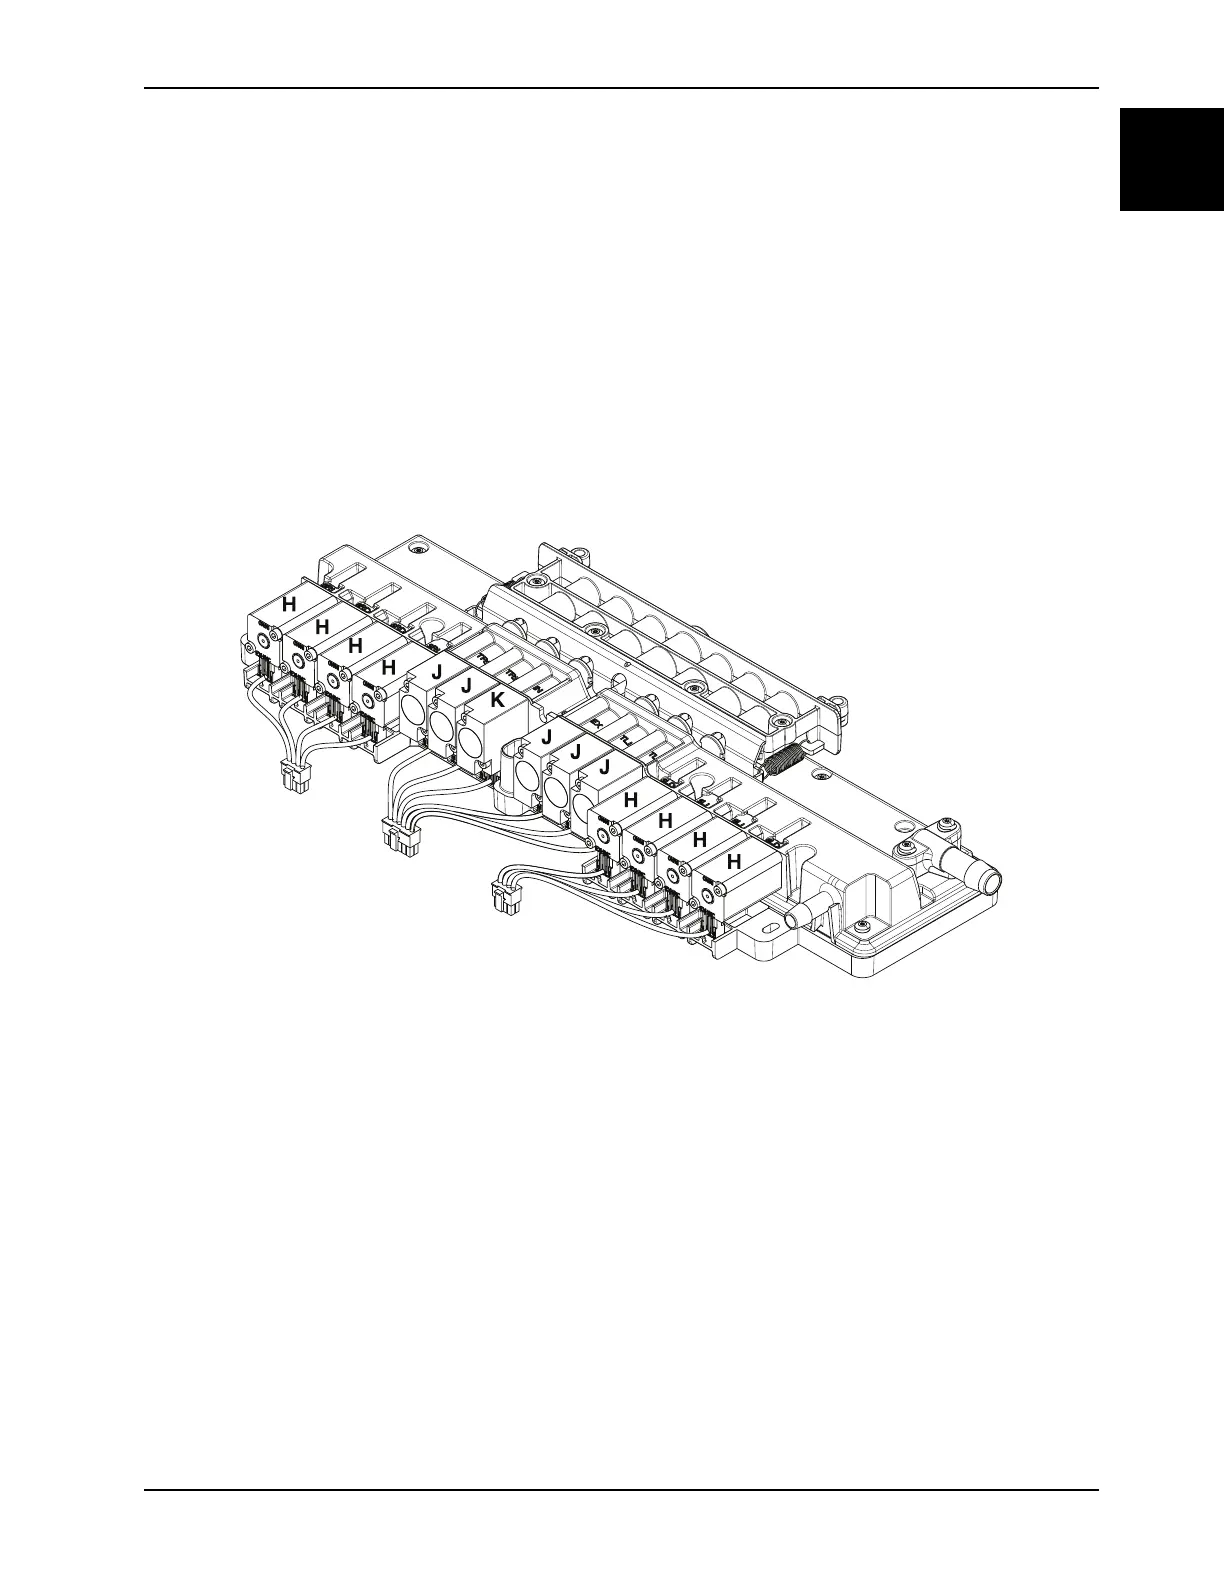
3. Using the supplied torque driver, remove the two screws that secure the solenoid valve (H, J, or K) to the manifold
assembly (Figure 1-19 on page 1-43). Save the screws.
Note:
During installation tighten the screws equally. Use the supplied torque driver and torque the screws to 4.4 in-lb.
Figure 1-19: Solenoid valve
4. Remove the solenoid valve.
5. Disconnect the connector for the solenoid valve.
Note: Inspect the replacement solenoid valve to make sure that the O-ring is in place. If the O-ring is not in place,
transfer the O-ring from the removed solenoid valve to the supplied solenoid valve.
6. Discard the solenoid valve.
7. Reverse steps to reinstall.
Notes
• During reinstall, make sure to align the Velcro® patches.
• After installation, remove the zipper pull tool or equivalent from the zipper.
• Make sure that the watershed covers the zipper.
8. Verify proper operation before returning the product to service.