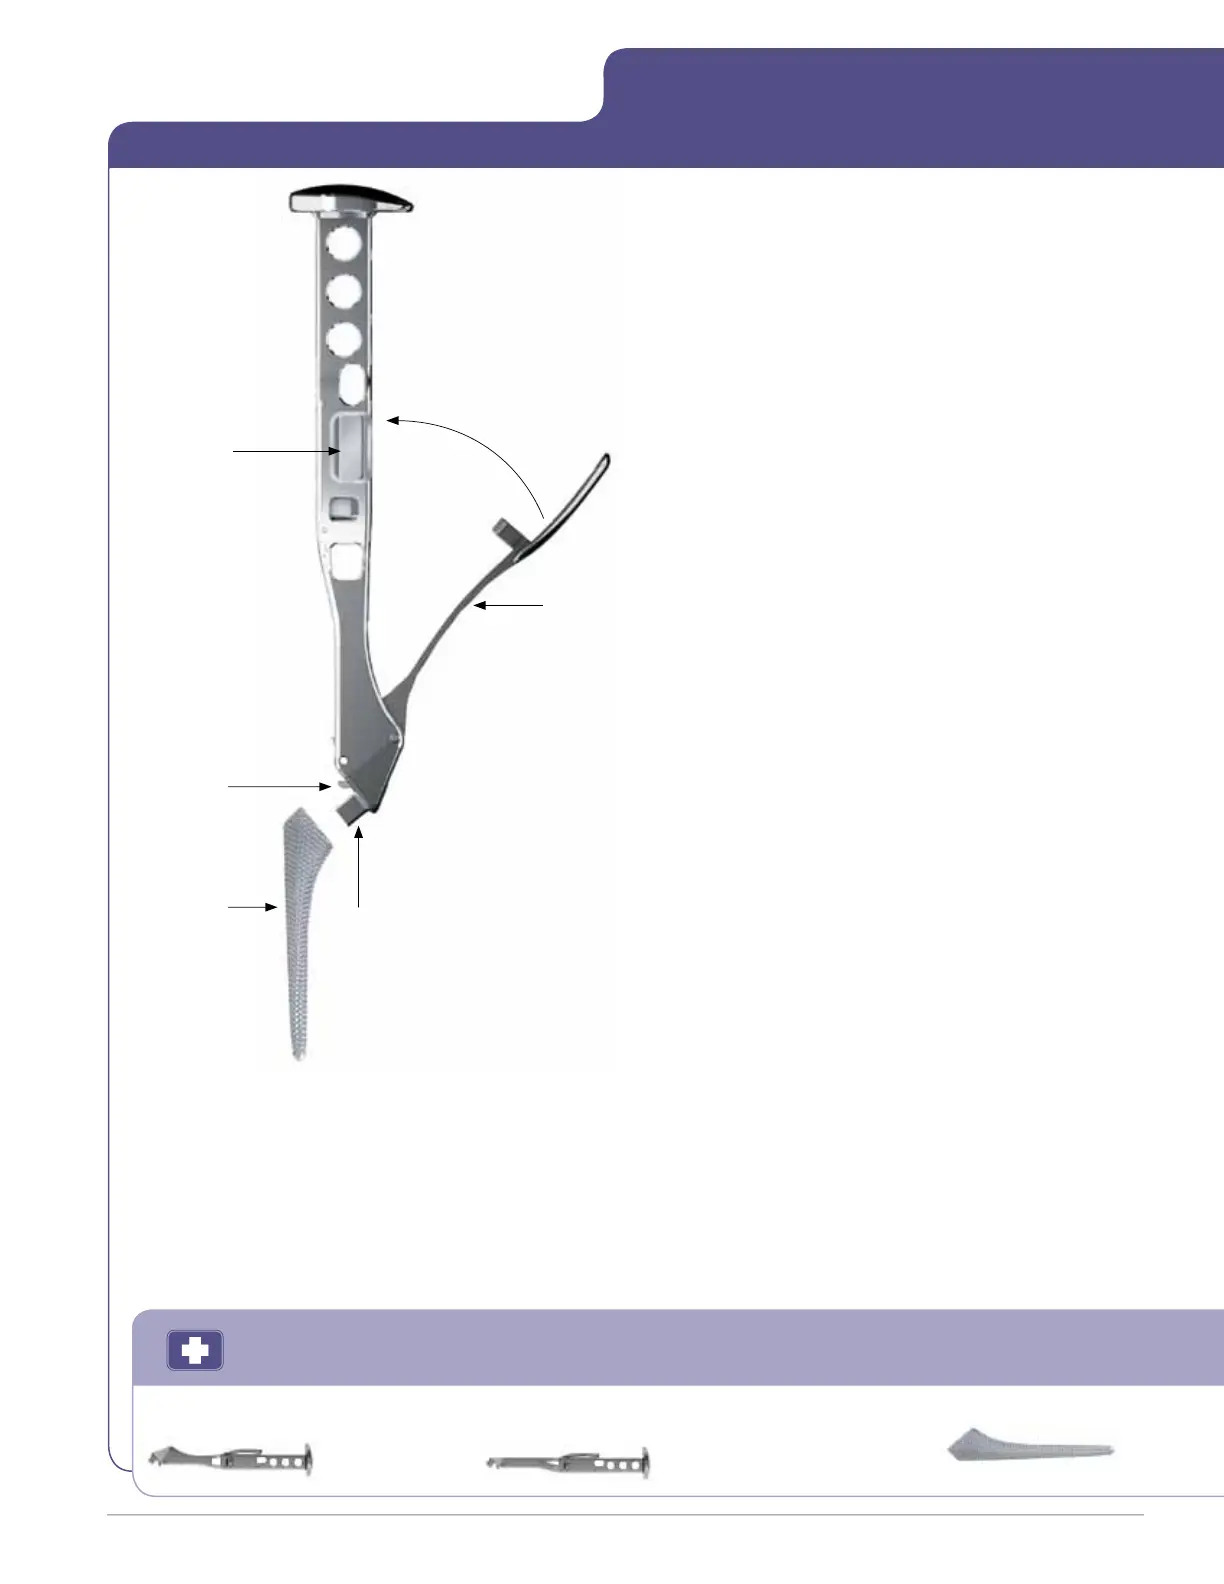
Figure9
Quick
Release
Button
Locking
Hook
Broach
Alignment
Tab
Locking
Arm
thebroachhasaxialandrotational
stability.Withpropercorticalcontact,
thebroachshouldnottwistor
moverelativetothefemur.Ifthereis
movement,alargersizebroachmay
beneeded.
Generally,ifabroachsinksbelowthe
leveloftheneckresection,advance
tothenextlargerbroach.Iftheneck
resectionisdeemedhigherthan
desired,removethebroachand
performanewneckresectionata
lowerlevel.
Uponreachingthenalsizeand
depthofthebroach,detachthe
broachhandlefromthebroach,
leavingthebroachfullyseatedinthe
femoralcanal.
AssembletheBroachtotheBroach
Handlebyinsertingthealignment
tabonthedistalendoftheBroach
HandleontotheBroach.Closingthe
lockingarmuntilanaudibleclickis
heardsecurestheBroachontothe
BroachHandle.
Usingamalletwithshort,controlled
strokes,beginbroachingand
sequentiallybroachupuntilthe
desiredsizeisreached.Throughout
broaching,continuetoensureneutral
alignmentofthebroachtothelong
axisofthefemur.
Correcttwillbedenotedbya
change in pitch, tactile resistance, or
whenthebroachceasestoadvance.
Verifyasecuretandensurethat
8 SECUR-FIT
®
ADVANCED SURGICAL TECHNIQUE
Instruments
Secur-Fit Advanced Broach Handle
1601-1100
Secur-Fit Advanced Low Profile
Broach Handle 1601-3100
Secur-Fit Advanced Broach Size 4-12
1601-10XXA
BROACHING
STEP 4
 Loading...