Do you have a question about the Stryker SmartPump Rx and is the answer not in the manual?
A tourniquet is indicated when it is necessary to reduce blood flow and/or when greater visualization of the operating field is imperative or desired.
A tourniquet is not suitable for ligatures or cauterization to stop hemorrhages and should never be applied without consideration of the local anatomy.
Excessive pressure or prolonged application could potentially cause vascular complications, neuromuscular or neurological injuries, and pain.
Extreme care must be taken when using tourniquets. Minimum cuff pressure and application time should be used.
The SmartPump is designed for use in a non-sterile zone of a surgical operating room, 6 feet [1.83 m] horizontally 8 feet [2.5 m] vertically.
The SmartPump is a dual channel tourniquet pump designed to temporarily impede blood flow in a patient's extremity for a blood-free surgical zone.
The internal battery is charged automatically whenever the SmartPump is plugged into an AC power source.
The procedure timer and cuff target pressure may be set using simple, intuitive steps.
The large, backlit LCD displays elapsed cuff inflation time and cuff pressure (mmHg) in real-time.
Lists various accessories for the SmartPump, such as Roll Stand with Pole and Tubing, with their reference numbers.
The SmartPump's primary power source is AC power, with the internal battery as a backup.
The internal battery provides back-up power for up to five hours if AC power is interrupted.
Alerts the user when the internal battery is low, requiring connection to AC power for charging.
Describes how the internal battery is charged automatically when connected to AC power.
Details the function of each button on the SmartPump's control panel, including ON/OFF, Set/Save, TIME, PRESSURE, INFLATE, DEFLATE, and DEFAULT DISPLAY.
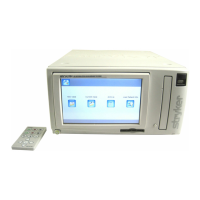
Illustrates the SmartPump display screen, showing active cuff status, time, pressure, and indicators.
Explains the meaning of status indicators (Default Display, Ready, Battery Charge, IVRA Lock, Time Format, Deflation) and alarm indicators.
Instructions on how to securely mount the SmartPump onto the roll stand pole using the adjustment knob.
Specifies the power requirements for the SmartPump, including voltage, amperage, and frequency.
Steps for initial setup, including mounting, connecting power, and initiating the system self-test.
Details the factory preset default time (1 hour) and target pressure (250 mmHg) for the SmartPump.
Explains the procedure timer, its display, and how it can be set in increments.
Details the default target pressure and the adjustable range from 100 to 475 mmHg.
Procedure for changing the default time and pressure settings on the SmartPump using the Set/Save and Default Display buttons.
Instructions for connecting the cuff to the fill line connector on the SmartPump's control panel.
Steps to turn on the SmartPump and initiate the system self-test, including checking for errors.
Instructions for adjusting the cuff inflation timer and target pressure using the Set/Save buttons.
How to change the time display format between HH:MM (hours and minutes) and MINUTES.
How to adjust the alarm volume using the Alarm Indicator Mute button and +/- buttons.
Options for minimizing the display of unused cuff settings to simplify viewing, and how to restore the full display.
Instructions for setting the SmartPump's real-time clock for time and date using specific button combinations.
Details how the SmartPump inflates cuffs to target pressure and tracks time and pressure.
Explains the IVRA Lock feature that prevents accidental deflation of an active cuff.
Press the Inflate button on the selected side to inflate the cuff to the target pressure.
Illustrates the pressure gauge states: Under Target, Target Pressure, and Over Target.
How to monitor elapsed procedure time and cuff inflation pressure on the display screen.
Describes alarms and indicators when the inflation timer reaches the target time.
Explains how the SmartPump maintains real-time cuff pressure and compensates for minor changes automatically.
How to deflate a cuff by pressing the Deflate button and what occurs during deflation.
Instructions for using the optional SmartPump Tourniquet Report Printer to print a summary of tourniquet activity.
Instructions for using the SmartPump to support Bier Block procedures with its dual channel controls.
How to respond to alarms, including muting and correcting conditions, and information on service codes.
Techniques for switching a cuff to the other side as 'backup' when an inflated cuff is at risk.
Procedure and cautions for cleaning the SmartPump, including what not to use.
Annual checks for proper operation, including examining components and testing functionality.
A checklist for recording the results of annual maintenance tests, including visual inspection and pressure calibration.
Lists service alarms and their corresponding codes and descriptions when the SmartPump requires service.
Details the model, size, weight, equipment type, and approvals for the SmartPump.
Details AC input, facility power, and internal DC supply module specifications.
Details the display type, timer, and pressure display specifications.
Specifications for the air pump, flow, pressure transducers, operating pressure, and maximum pressure.
Specifications for cuff pressure accuracy, range, and cuff timer range and adjustment.
Specifications for operating/storage environment, optional printer tray, and stand components.
Information on RF emissions compliance and guidance for the electromagnetic environment.
Information on electromagnetic immunity, test levels, compliance levels, and recommended separation distances.
Table of recommended separation distances for portable and mobile RF communications equipment.
| Device Type | Infusion Pump |
|---|---|
| Manufacturer | Stryker |
| Category | Medical Equipment |
| Battery Type | Lithium-ion |
| Battery Life | 8 hours |
| Display | Color touchscreen |
| Connectivity | Wi-Fi, Ethernet |
| Infusion Modes | Continuous, Intermittent, PCA, TPN |
| Volume Range | 0.1 - 9999 mL |
| Rate Range | 0.1 mL/h to 1200 mL/h |
| Alarms | Occlusion, Air-in-line, Low battery |
| Compatible Sets | Stryker SmartPump Sets |