General Use Procedure 26
Setting Time and Date
The SmartPump’s real-time clock tracks Time and Date. Time/Date is
maintained by its internal battery.
NOTE: The real-time clock does not automatically adjust for daylight
savings time changes.
To adjust Time and Date, the SmartPump must be in the ‘ready’ mode
without an inflated cuff. It is not possible to change the Time or Date if
a procedure is underway.
Button Explanation
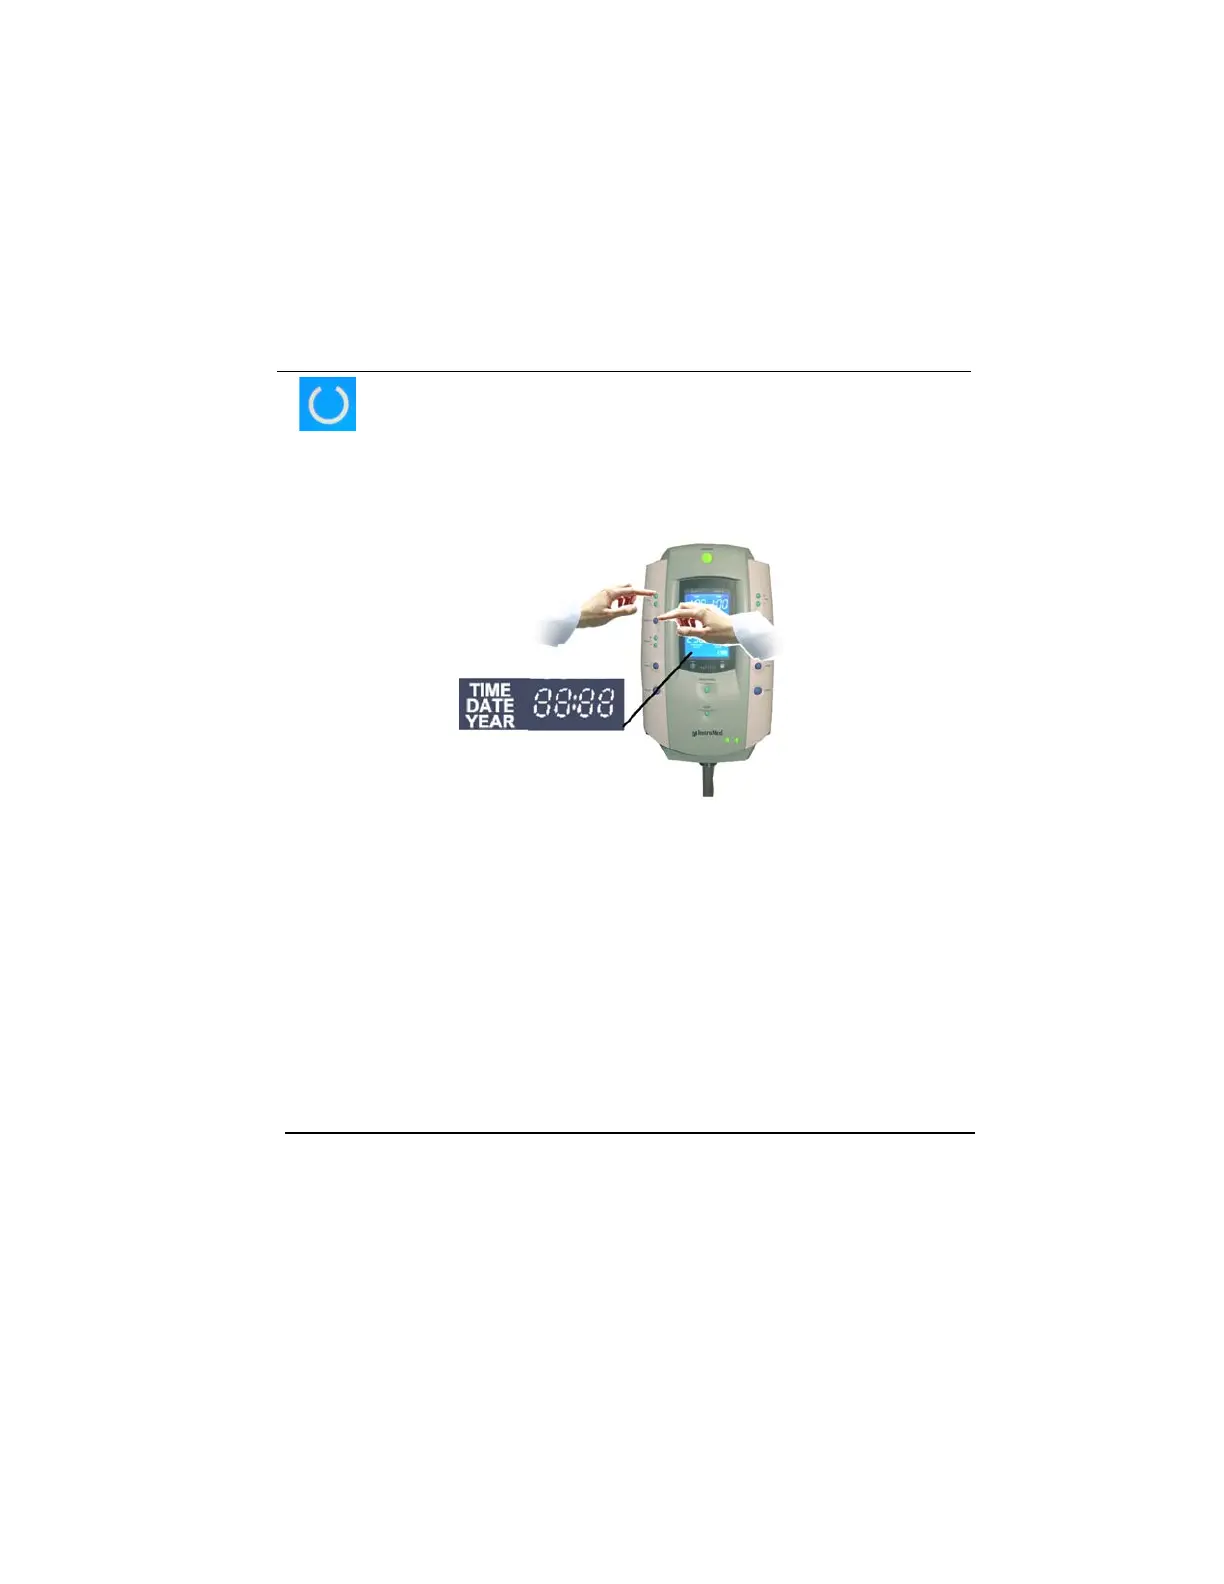
1. Confirm the SmartPump is in the ‘ready’ mode.
2. Simultaneously press and hold Set/Save and + Time buttons
on the left side of the SmartPump for four seconds. Release
both buttons. The current time value (HH: MM, 24 hour
format) will appear in the bottom left corner of the LCD, with
the hours value blinking.
For example, the hour’s value is 12 (noon) (time is in 24-hour format).
12:34