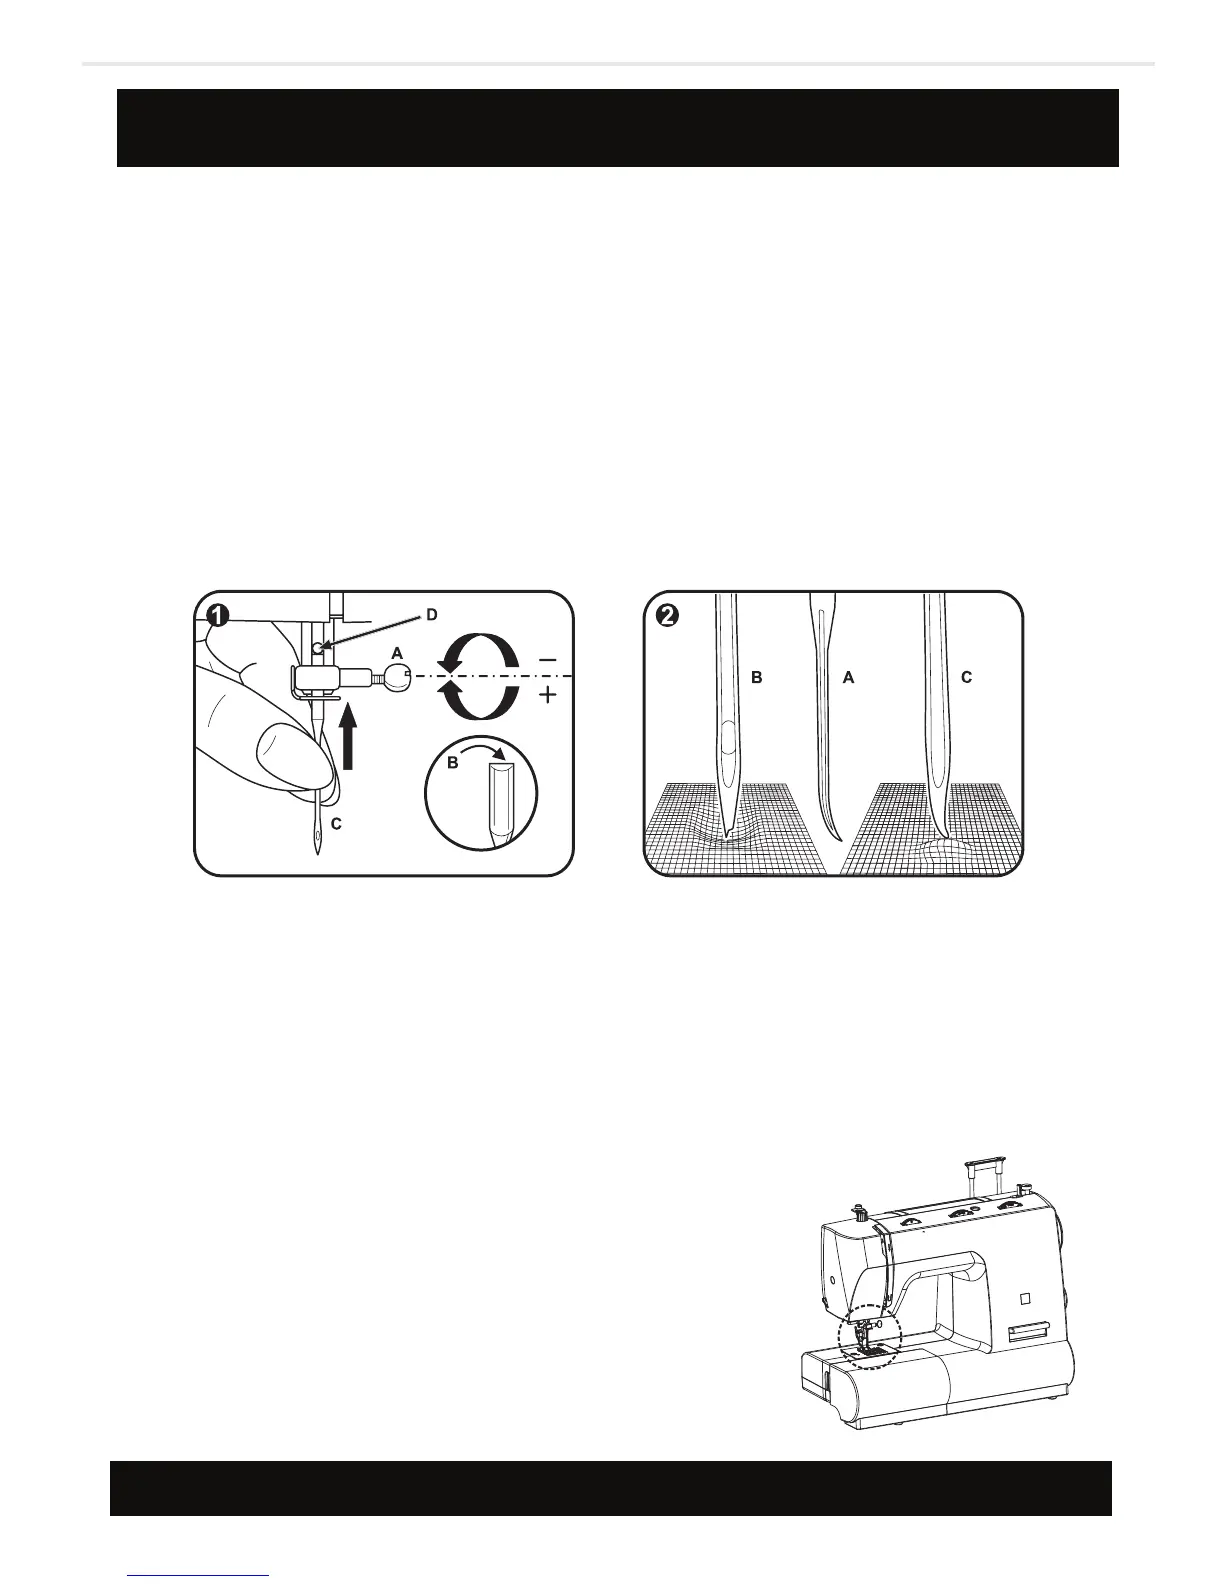
Changing the needle
Turn power switch to (O) “0” before inserting or removing the needle.
Replace the needle at the rst sign of thread breakage or skipped
stitches. Select the correct type and size of needle for the fabric to be
sewn. Turn the balance wheel towards you until the needle is at
highest position. Loosen the needle clamp screw (A) and tighten again
after inserting the new needle. (1)
The at side of the needle shaft should be facing away from you (B).
Push the needle up (C) into the needle clamp as far as it will go (D).
Tighten the needle clamp screw rmly. The sewing needle must always
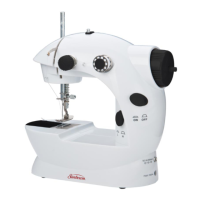
be straight and sharp for smooth sewing. Replace the needle (2) if it is
bent (A), blunt (B) or the point is damaged (C).
CAUTION:
14