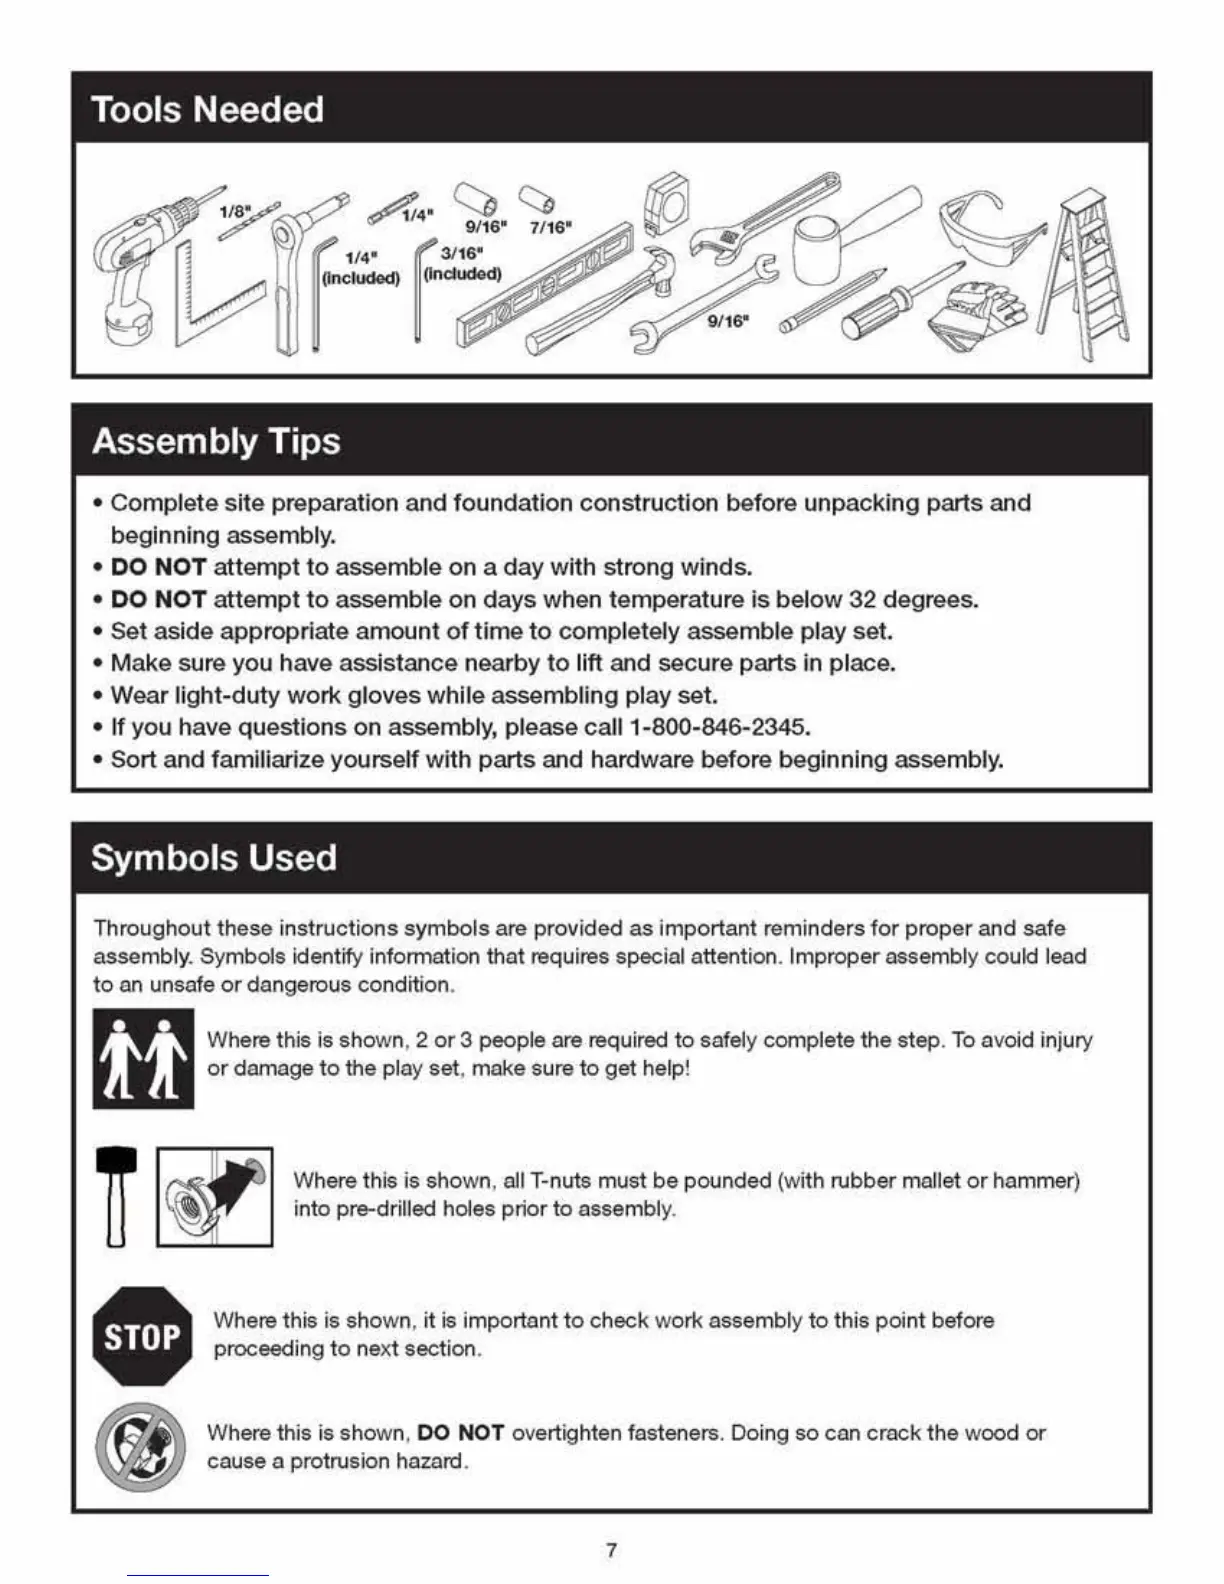
Tools Needed
~
4
'
Sf.,.
C:,
6.
ncluded)
(lnclud<>d)
f
1/4"
f
3116
"
Assembly Tips
• Complete site preparation and foundation construction before unpacking parts and
beginning assembly.
• DO NOT attempt
to
assemble on a day with strong winds.
• DO NOT attempt
to
assemble on days when temperature is below 32 degrees.
• Set aside appropriate amount
of
time
to
completely assemble play set.
• Make sure you have assistance nearby
to
lift and secure parts in place.
• Wear light-duty
work
gloves while assembling play set.
• If you have questions on assembly, please call1-800-846-2345.
• Sort and familiarize yourself with parts and hardware before beginning assembly.
Symbols Used
Throughout these instructions
symbols
are provided as important reminders
for
proper
and
safe
assembly. Symbols identify information that requires special attention. Improper assembly could lead
to
an unsafe
or
dangerous condition.
m Where this is
sho
wn, 2
or
3 people are required
to
safely complete the step. To avoid injury
LU
or
damage
to
the play
set
, make sure
to
get help!
~
~
Where this is shown, all T-nuts must
be
pounded (w
ith
rubber mallet
or
hammer)
u
~
into pre-drilled holes prior
to
assembl
y.
CD
Where this is shown,
it
is
important
to
check w
ork
assembly
to
this point before
I •
proceeding
to
next section.
A Where this
is
shown, DO NOT overtighten fasteners. Doing so can crack the
wood
or
~
cause a protrusion hazard.
7