SunFounder PiCrawler Kit
5. At this point you will see the servo arm rotate to a specific position (0°). If the servo arm does not return to 0°,
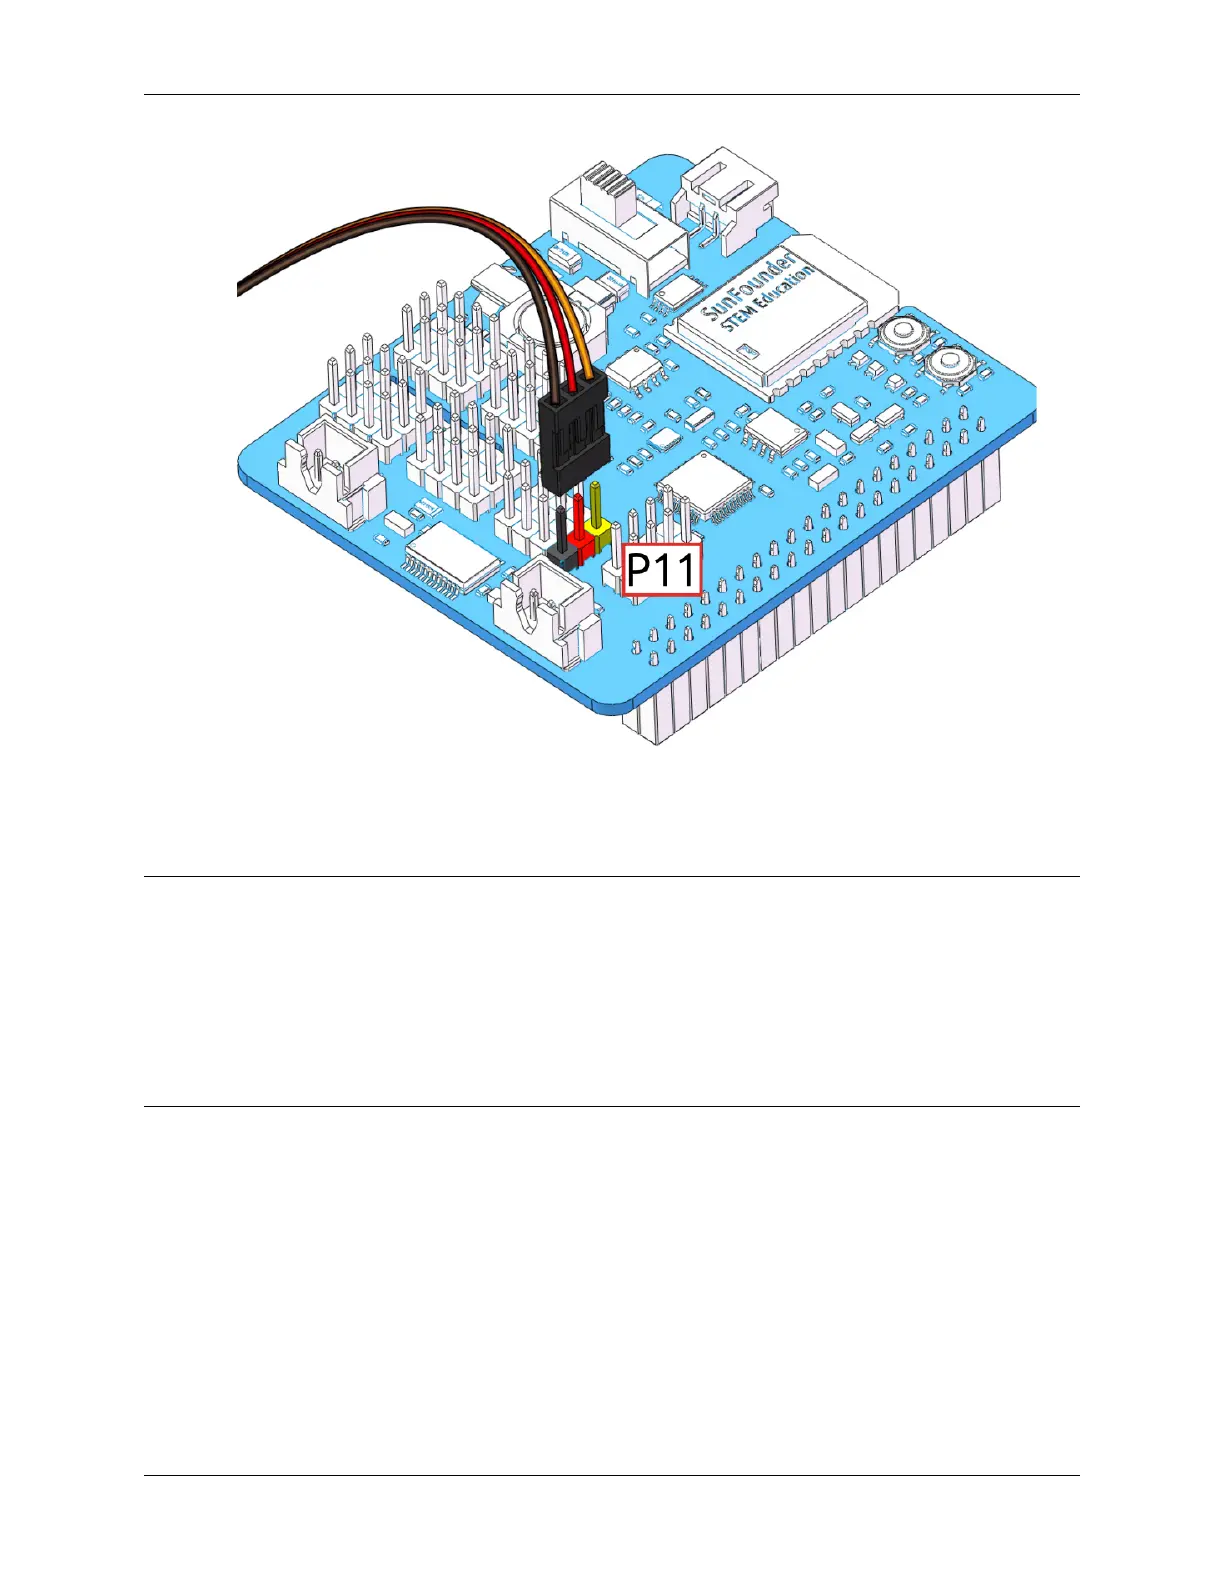
press the RST button to restart the Robot HAT.
6. Now you can continue the installation as instructed on the assembly foldout.
Note:
• Do not unplug this servo cable before fastening this servo with the servo screw, you can unplug it after fastening.
• Do not turn the servo while it is powered on to avoid damage; if the servo shaft is inserted at the wrong angle,
pull out the servo and reinsert it.
• Before assembling each servo, you need to plug the servo cable into P11 and turn on the power to set its angle
to 0°.
• This zeroing function will be disabled if you download a program to the robot later with the EzBlock APP.
4.1.2 Install and Configure EzBlock Studio
As soon as the robot is assembled, you will need to carry out some basic operations.
• Install EzBlock Studio: Download and install EzBlock Studio on your device or use the web-based version.
• Connect the Product and EzBlock: Configure Wi-Fi, Bluetooth and calibrate before use.
• Open and Run Examples: View or run the related example directly.
4.1. Quick Guide on EzBlock 87