3
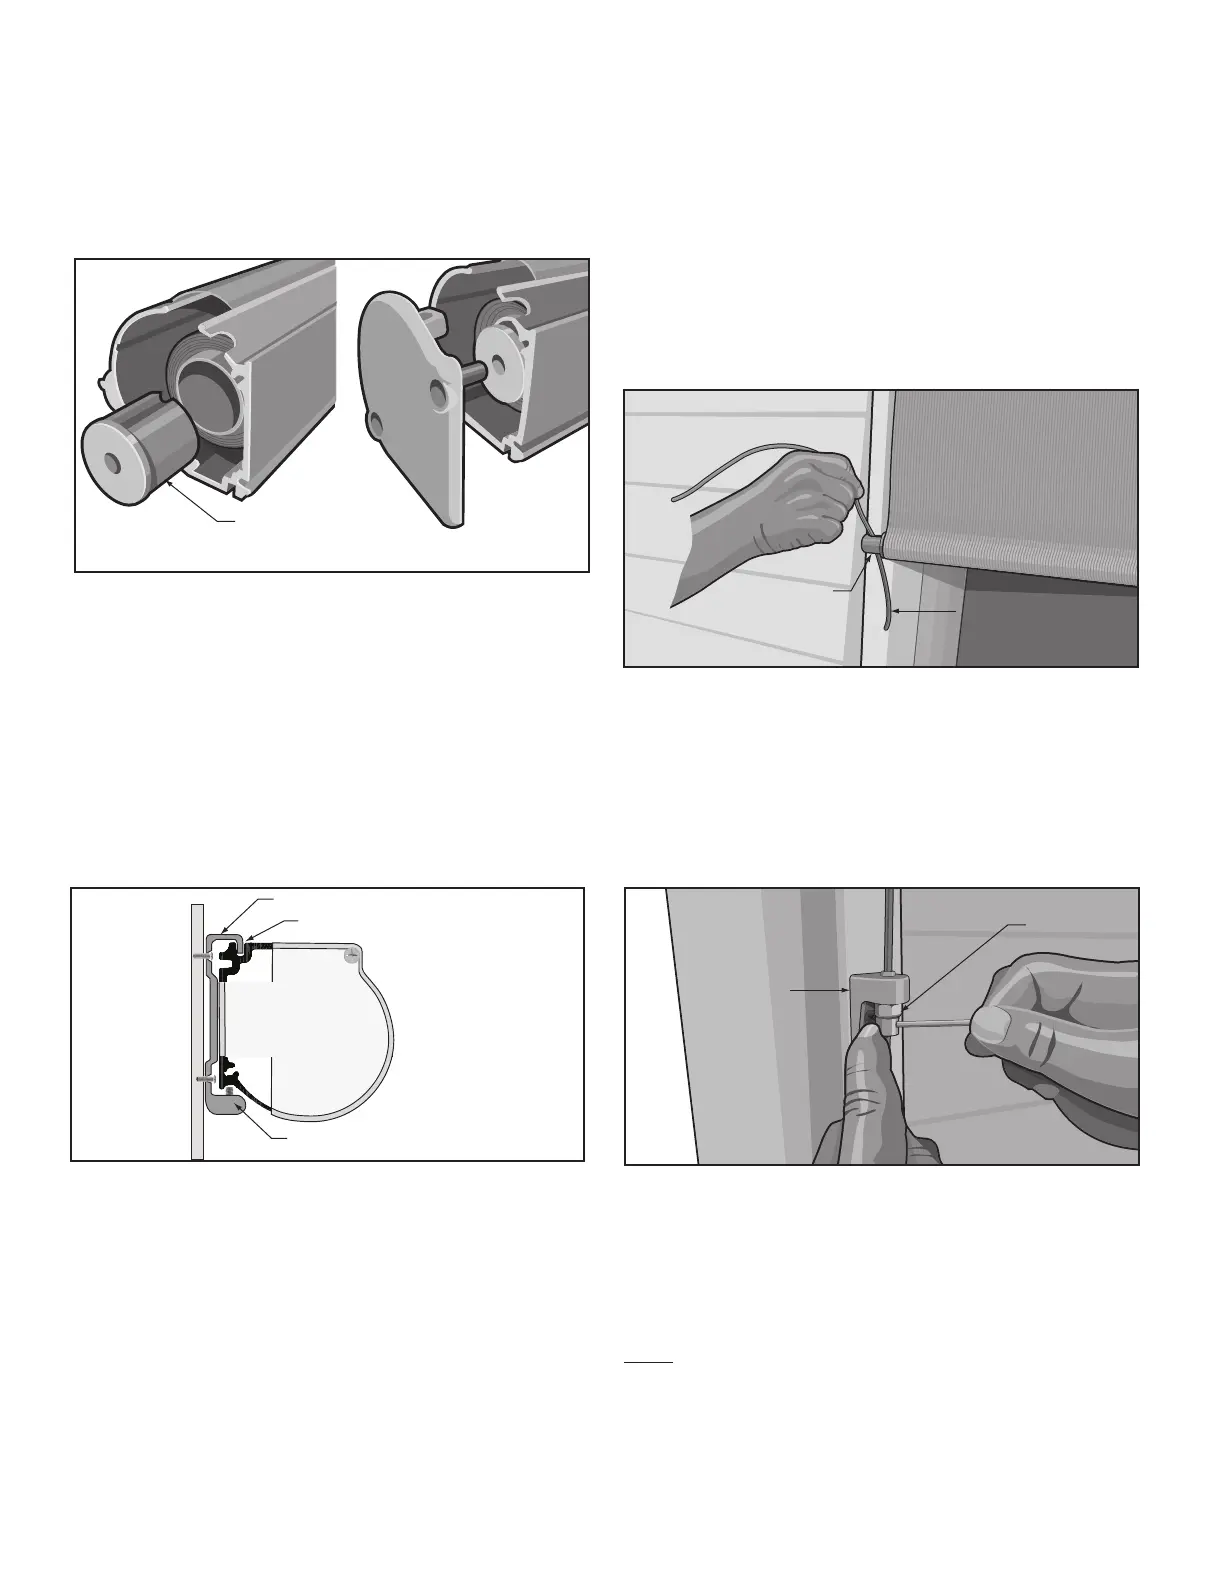
16. Slide the nylon roller bar insert into place.
Slide the end cap into the insert and make sure that
Align the end plate with the housing and install the
two Phillips head screws to secure it in place.
See Figure 9.
groove of the shade assembly onto the protruding
upward pressure to keep the top groove of the shade
be sure that the set screw is aligned in the recessed
See Figure 10.
19. Connect the Motor Power Cord to the Solar Panel.
communicate with the new replacement Motor
Appendix AStep 21.
- - - - - - - - - - - - -
- - - - - - - - - - - - - - - - -
- - - - - - - - - - - - - - - - -
- - - - - - - - - - -
Figure 9
Nylon Roller
Bar Insert
Figure 10
on your remote control. With the EasyShade open,
disconnect the Power Cord from the Solar Panel.
22. At each end of the EasyShade Housing Assembly
uncoil the Vinyl Coated Cable. Allow the coiled cable
23. Insert the Vinyl Coated Cable located at each end
of the Housing Assembly through the guide holes at
each end of the EasyShade Drop Down Fabric Panel.
See Figure 11.
24. Place the lower end of one of the Vinyl Coated
Stops onto the Vinyl Coated Cable and secure in place
of the EasyShade.
See Figure 12.
nut, by turning the nut counter clockwise you can
Note: DO NOT OVER TIGHTEN THE CABLE.
26. Connect the Motor Power Cord to the Solar Panel.
Figure 11
Guide
Hole
Vinyl Coated
Cable
Figure 12
Cable Guide
Cable Guide
Stop
Top Groove
Set Screw
EasyShade
Drop Down
Fabric Panel