2
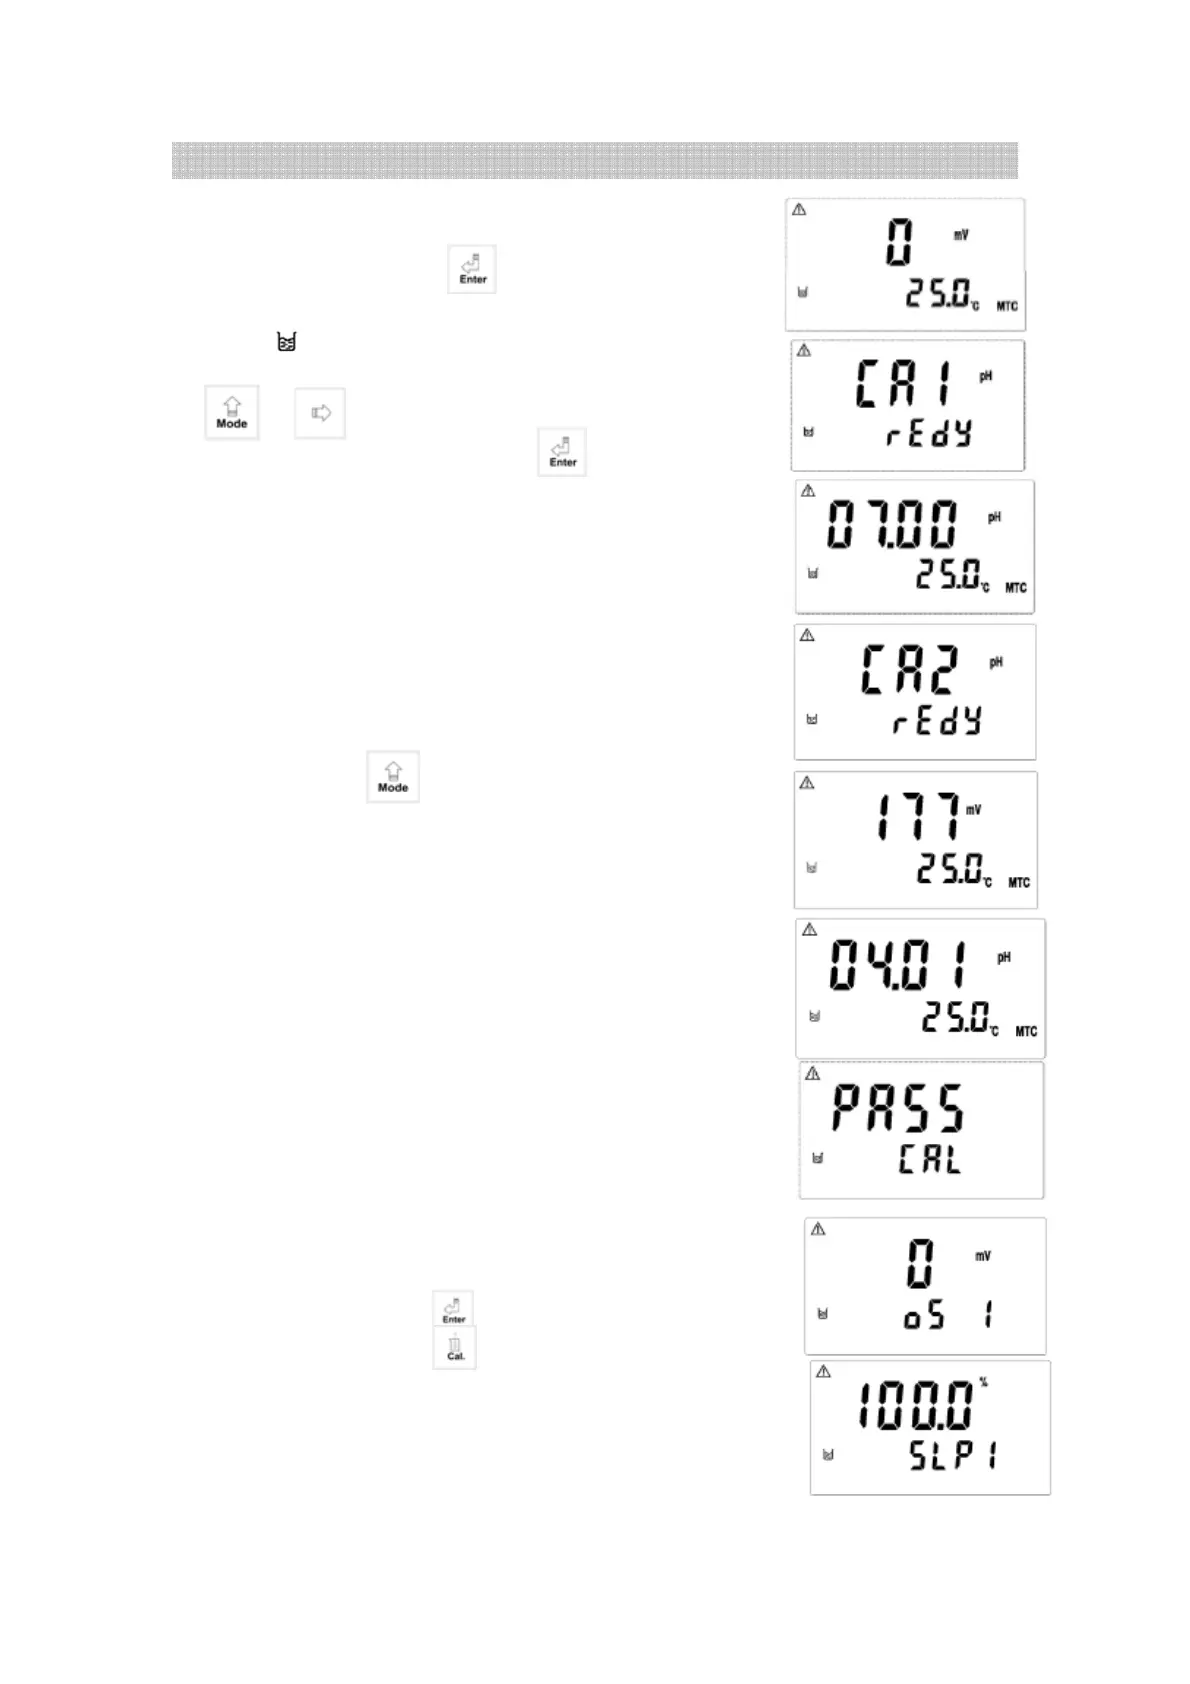
1. When entering CA1 calibration mode, clean the
electrode with distill water before putting it in the
buffer solution. Push to start the calibration.
Then display will show the mV value of the buffer
and begin to twinkle. After showing a similar
number of pH value to the buffer solution, push
or to set the digit until it is equal to the
buffer’s standard. Then, push to ensure it.
2. When the display shows “CA2”, it means that
you are now entering second point of calibration.
Process same procedures as Step 1.
Note 1: Push when showing CA2, you may
choose to make single-point calibration only.
Note 2: Single-point calibration means that you
only modify zero point (OS value) and do not
modify the slope (SLP value). The controller will
automatically adapt to the SLP value that have
been memorized the very last time.
3. The display will show “CAL PASS” when you
successfully finish calibration. In the other hand,
it will show “CAL Err” when failing calibration.
(See chapter 10 for error messages)
4. The display will show OS value (zero-point)
automatically. Push to show the SLP value
of calibration. Push to go back to
measurement mode.
Asymmetry Buffer Calibration (Single point and Dual points)
 Loading...