17
6. Operation
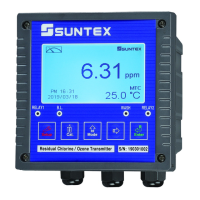
6.1 Measurement mode:
After all electrical connections are finished and tested, connect the instrument to the power supply
and start up it. Enter the Measurement mode of factory settings or final settings to begin the
measurement and monitor.
6.2 Set-up mode:
Please refer to the set-up instructions in Chapter 7, and press to back to measurement
mode.
6.3 Calibration mode:
Please refer to the calibration instruction in chapter 8, and press to back to
measurement mode.
6.4 Reset:
6.4.1 Master reset:
In the measurement mode and set-up mode, press two keys simultaneously for
five seconds, and then press until you see a clock signal appearing on the display; then loose all
keys to restore factory defaults.
Factory defaults:
Measurement mode: pH
Temperature compensation: MTC25℃
High point alarm: AUTO,SP1= 10.00 pH,db1= 0.10 pH
Low point alarm: AUTO,SP2 =04.00 pH,db2= 0.10 pH
Wash time: ON =0000 s.,OFF =000.0 H,db= 0000 s.
pH/ORP current output: 4~20 mA,02.00~12.00pH
TP current output: 4~20 mA,000.0~100.0 ℃(for PC-3100 only)
Display backlit: AUTO,b.L.= 0,SEnS =0
Code set-up: off
The followings are for PC-3100RS only:
Date and time: 2000-1-1 0Hr 0Minute 0sencond
RS-485 set-up: ID= 31,baud speed= 9600
6.4.2 Calibration reset:
In the Measurement mode, press the two keys simultaneously for five seconds,
and then press until you see a clock signal appearing on the display; then loose all keys to
restore factory default calibrations.
Factory defaults:
OS value: 0 mV
SLOPE value: 100.0 %
Calibration mode: Two-Point Calibration: Ct1
Three-Point Calibration: Ct1 (PC-3100RS only)
6.5 Time and date mode (PC-3100RS only)
In the measurement mode, press the key to check the year, date, and time. You can shift
among them sequentially by pressing the key or enter the next page by waiting for 5 seconds.
After the checkup, it will back to measurement mode automatically.
+
+