6
08:00
08:00
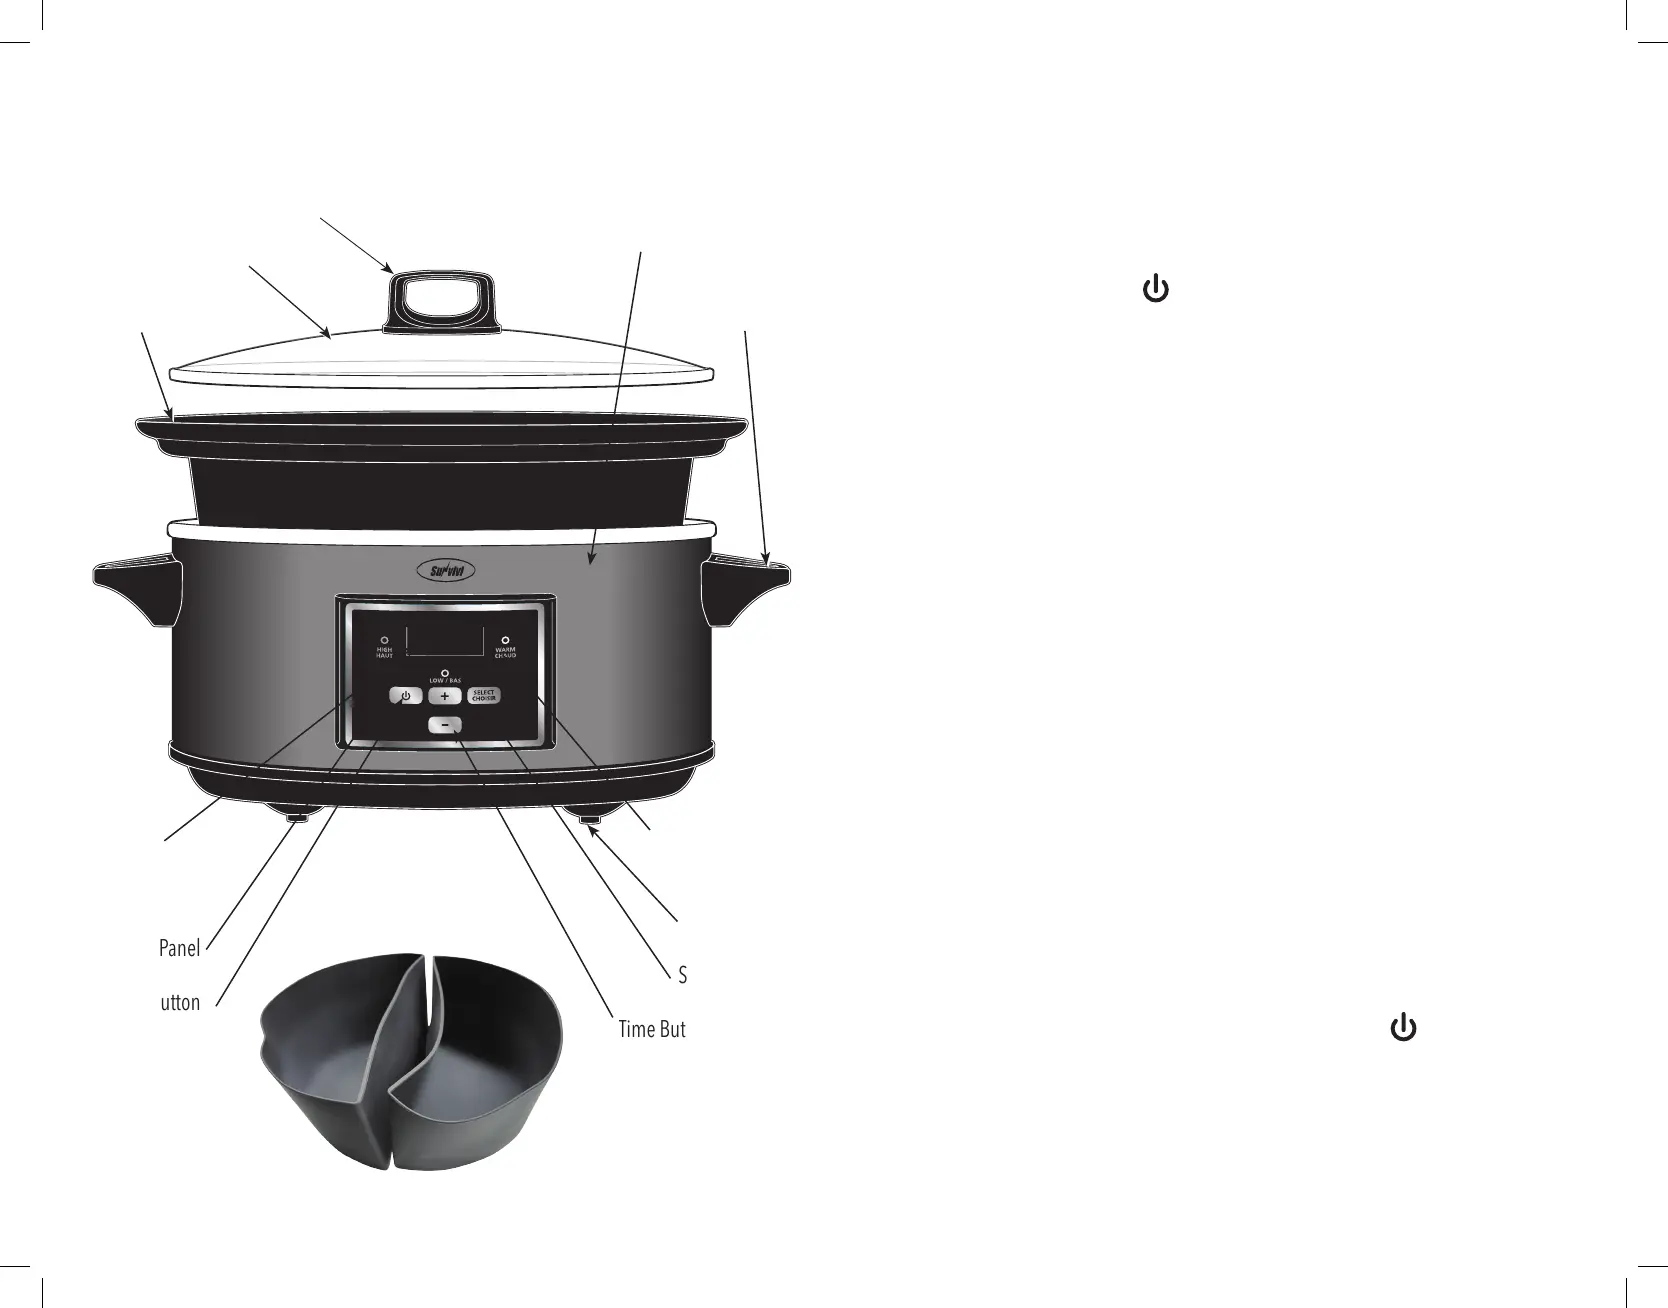
Know The Parts of Your Slow Cooker
RATING: 120V, 60Hz, 260 WATTS, AC ONLY
Indicator Lights:
High, Low, Warm
Rubber Feet
Select Button
Time Buttons:“+”, “–”
Digital
Timer Display
Digital
Control Panel
Power Button
Slow Cooker Housing
Cool Touch
Handle
Cool Touch Lid Handle
Tempered Glass Lid
Removable
Stoneware Pot
7
Programming Your Slow Cooker Maker
1. Plug your slow cooker into a 120 V~60 Hz AC-only outlet. The digital display will
flash “88:88” for 1 minute and if no settings are selected the slow cooker will
automatically shut off.
2. When the Power button ( ) is pressed, it automatically sets the slow cooker to
LOW and the default time of 8 hours. Cooking time begins immediately.
3. Press the Select button to choose between the three temperature settings – Low,
High or Warm.
4. Once you have selected your desired cooking temperature, you may set the
cooking time.
5. To set a different cooking time press the “+” or “–” buttons. The digital timer
display will advance in 30-minute increments from
8 hours - 20 hours f
or LOW and WARM, and 4 hours to 20 hours for HIGH and
then will start again from “0:30”. You may set a cooking time from “0:30” (30
minutes) to “20:00” (20 hours).
6. The slow cooker will automatically begin cooking after the desired cooking time
has been set. When the cooking cycle begins the slow cooker will begin counting
the time down to “0:00”.
7. During cooking cycle, the temperature setting can be adjusted by pressing the
SELECT button and the cooking time can be adjusted in 30-minute increments by
pressing the “+” or “–” buttons.
8. When the set cooking time has been reached, your slow cooker will automatically
switch to the WARM mode. After 4 hours in WARM mode, the slow cooker will
automatically turn off.
NOTE: We do not recommend using the Warm sett
ing for more than
4 hours at a time. Do not cook on the Warm setting.
9. To stop the cooking process at any time, press the Power ( ) button and all
indicator lights will shut off.
Inner