9.1 Default Values
DVR
Item Default Value
ADMIN Password 0000
Detection OFF
GUEST Password 1111
Detection - LS 07
Camera - BRIG 110
Detection - SS 03
Camera - CONT 128
Detection - TS 02
Camera - SATU 128
Detection - RE 10
Camera - HUE 128
Detection - Alarm OFF
Camera - COV NO
Network - IP Address 192.168.1.10
Camera - REC NO
Video Server
Item Default Value
User Name admin
Port 80
Password admin
IP Address 192.168.1.10
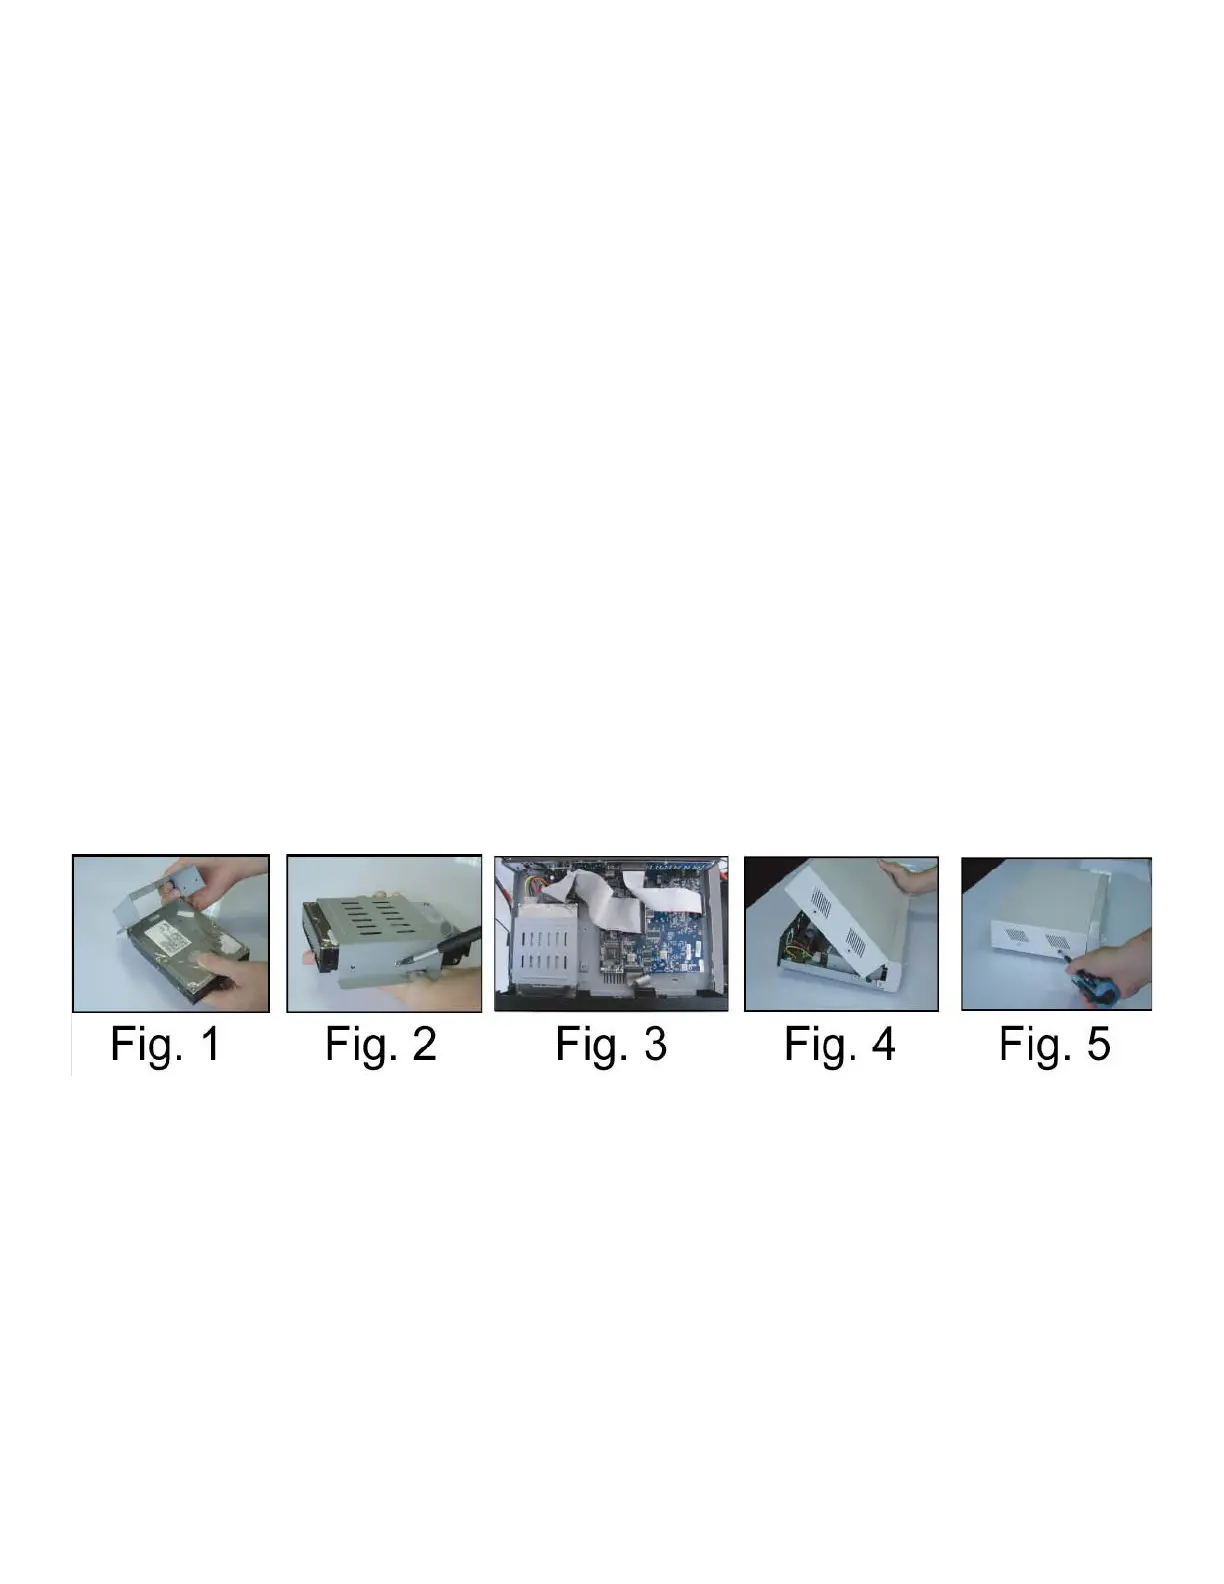
HDD Installation for Model 2, 3 and 4
Step 1: Unscrew and remove DVR top cover.
Step 2: Unscrew and remove the hard drive (HDD) bracket.
Step 3: Set the hard drive mode to master or slave.
Step 4: Screw HDD bracket to HDD, two screws for each side. Install and screw the HDD bracket back into the DVR
base. (Refer to Fig.1 & 2).
Step 5: Connect HDD power connector and IDE BUS fl at cable. IDE cable has a tab, make sure to align the tab with HDD.
The cable goes in only one way, make sure view the connector before connecting.
Step 6: Install the top cover and fasten all the screws.
Appendix 1 Install Hard Drive HDD
67