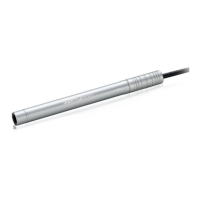
The SUPEREYES Handheld Digital Microscope (End-scope) is a versatile device designed for various inspection and observation tasks, offering both portability and ease of use. It functions as a digital microscope that can be connected to a computer or monitor, allowing users to view magnified images and perform various operations through dedicated software.
Function Description
At its core, the SUPEREYES Handheld Digital Microscope serves to magnify small objects, making them visible for detailed inspection, analysis, and recording. It is equipped with an inner optic-lens that provides a magnification range suitable for a wide array of applications. The device features inner LED illumination, ensuring that the observed subjects are well-lit for clear viewing.
The primary function of this end-scope is to capture still images and record video footage of magnified subjects. This capability is facilitated by its connectivity to a computer via a USB interface or to a monitor via an AV interface. Once connected, the accompanying software allows users to initiate previewing, picture capture, and video recording. Some models of the device also include a measurement function, enabling users to take precise measurements of the observed objects directly through the software.
The device is designed to be used in numerous fields, highlighting its broad applicability. These include:
- Skin and Hair Root Tests: For dermatological examinations and hair follicle analysis.
- Industrial Inspections: Such as examining print PCB boards and precise equipment, where detailed visual inspection is critical for quality control and fault detection.
- Printing and Textile Industries: For inspecting the quality and details of printed materials and fabric structures.
- Biologic Inspection: Useful in educational or research settings for observing biological samples.
- Antique and Jewelers Inspection: For authenticating and assessing the quality of antiques and jewelry, where fine details are paramount.
- Crime Scene Investigation: Providing a portable tool for examining minute evidence at crime scenes.
- Other Applications: Its versatility extends to any scenario requiring magnified visual inspection.
Usage Features
The SUPEREYES Handheld Digital Microscope is designed for straightforward operation, making it accessible to a wide range of users.
- Connectivity: The device offers flexible connectivity options. It can be plugged into a PC via a USB cable, allowing for software-driven control and display. Alternatively, it can connect to an AV monitor, providing a direct visual output. This dual connectivity enhances its adaptability to different work environments.
- Software Integration: The microscope comes with additional software that is essential for unlocking its full potential. This software enables users to:
- Preview: View live magnified images on the connected screen.
- Picture Capture: Easily take still photographs of the observed subjects. The software provides options to trigger capture, such as clicking a "shoot" option in the menu or selecting a dedicated "Camera" icon.
- Video Recording: Record video footage of the magnified view. Similar to picture capture, recording can be initiated through a "record start" option in the menu or a "video" icon. The software also allows for pausing and stopping recordings.
- File Management: Users can preset the allocation file path for both pictures and videos, allowing for organized storage of captured data. The default paths are typically within "Picture" and "Video" folders within the software, but these can be customized.
- Review Captured Media: The software provides a mechanism to review stored pictures and videos. This can be done by opening dedicated picture or video folders or by selecting frames within the software interface.
- Additional Functions:
- Scale Function: A scale can be applied to captured images, providing a reference for size.
- Video Format Output: Users can customize the video output format, with options such as AVI/WMV, to suit their specific needs.
- Video Player Function: The software includes a built-in video player for reviewing recorded footage.
- Language Selection: The software supports multiple languages, including Chinese, English, and German, enhancing usability for a global audience.
- Physical Operation: The device is designed to be handheld, offering flexibility in positioning. For more stable and precise operations, it can be fixed into a tripod or a professional desktop microscope stand (optional). This allows users to adjust the lens to the inspection goods and set a suitable distance between the stage and the objects, followed by adjusting the focus for clear viewing.
- Shake-Free Photo Taking: The design allows for taking photos even in moments of slight movement, which can be beneficial in less stable environments.
Maintenance Features
Proper maintenance is crucial for ensuring the longevity and optimal performance of the SUPEREYES Handheld Digital Microscope. The user manual provides clear guidelines to help users maintain their device effectively.
- Lens Care: The lens is a critical component, and users are advised to avoid touching it with fingers to prevent electrostatic damage and scratching. If the lens becomes dirty, it should be cleaned using a lens brush on a soft cloth. Harsh detergents or volatile solutions are explicitly prohibited as they can damage the camera case, painted surfaces, and the lens itself.
- Environmental Protection:
- Temperature and Humidity: The microscope should not be exposed to outdoor conditions without protection, as high temperatures or humidity can damage the lens. The recommended humidity range for operation is 45% to 85%.
- Water Exposure: In the event that water enters the device, the power must be immediately turned off, and a dryer should be used to dry it.
- Handling and Storage:
- Physical Handling: Users should avoid attempting to service the product themselves, as opening the covers may expose them to dangerous voltage points. When hands are wet, plugging in or removing adaptors or connectors is strictly forbidden.
- Cable Management: When using or storing the USB microscope, all cables should be carefully managed to prevent tripping hazards.
- Electrical Safety: To prevent electric shock, all electric PC or TV components should be removed when handling the microscope.
- Interference: When the USB microscope is in use or storage, no other cables should be plugged into it, potentially to avoid interference or damage.
By adhering to these usage and maintenance guidelines, users can ensure a reliable and enjoyable experience with their SUPEREYES Handheld Digital Microscope.