2-6
X9DRG-O(T)F-CPU/X9DRG-O-PCIE Platform User’s Manual
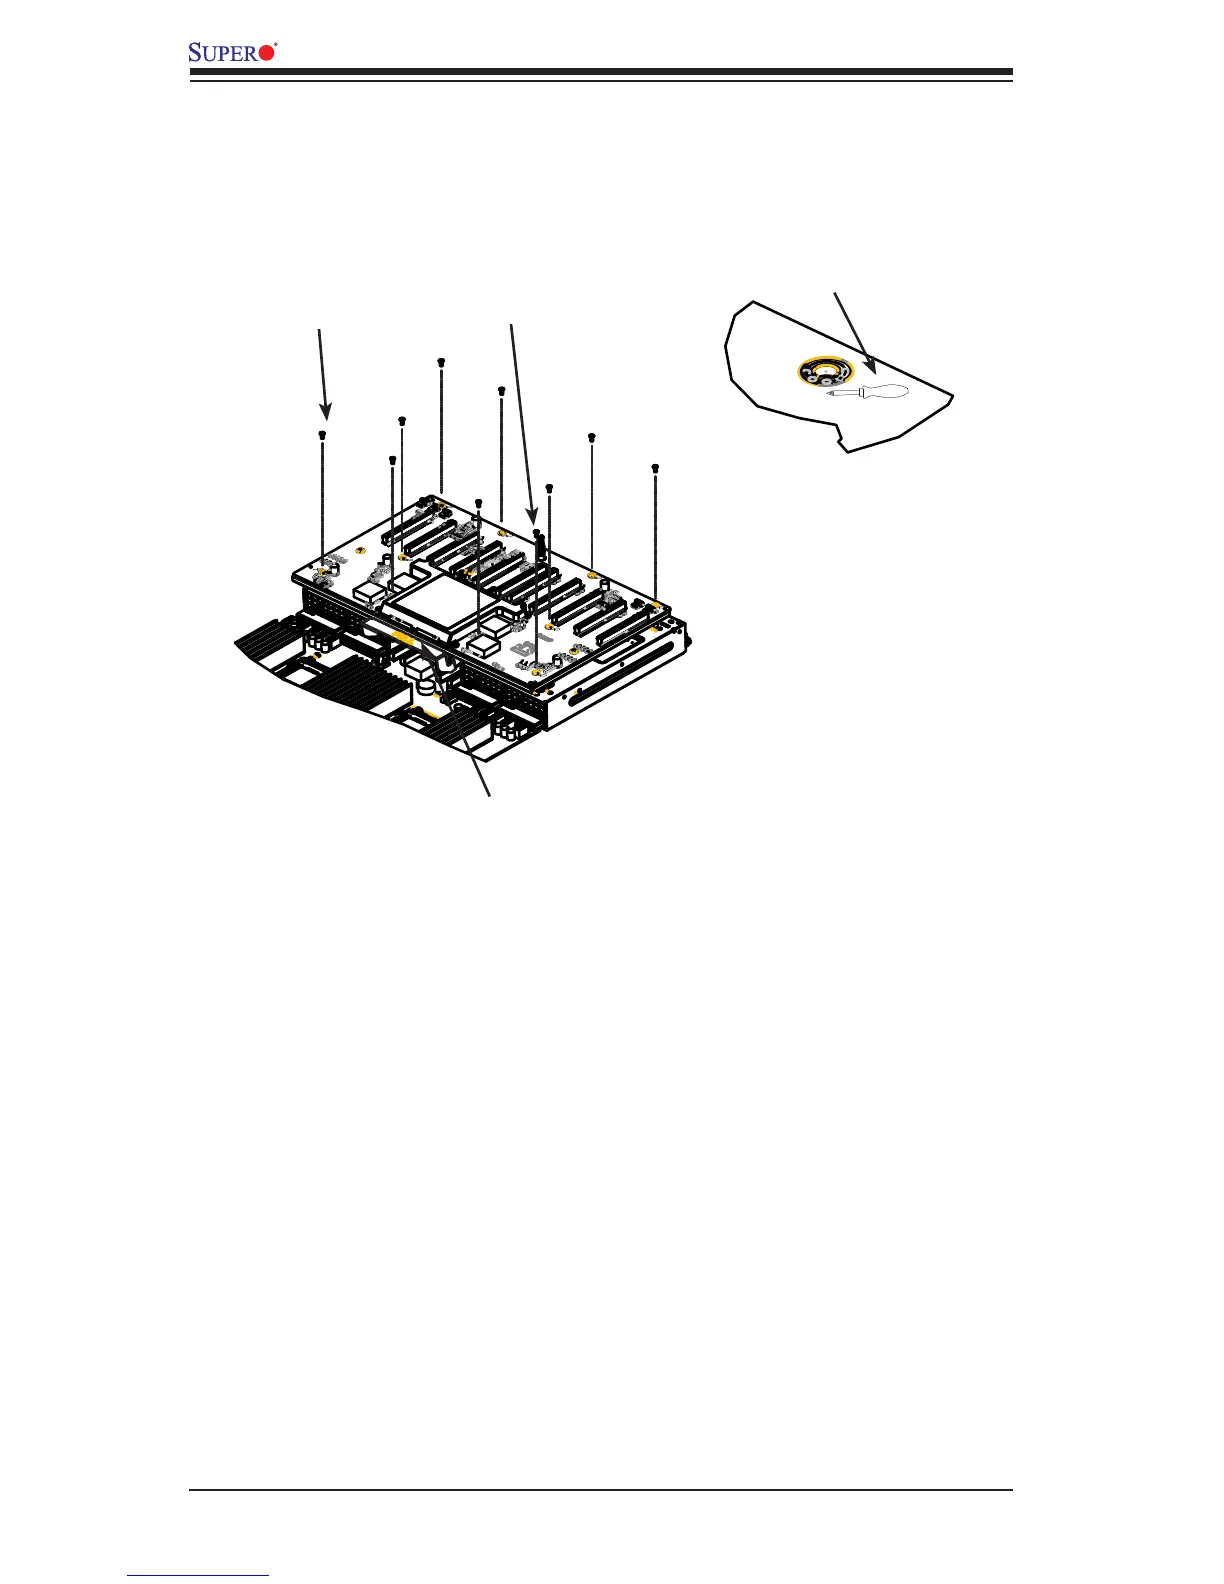
Screw
Screwdriver Icon
Thumb Grip
"PULL" Handle
Removing and Installing the PCIE Card
1. Locate the 10 screws with the screwdriver icon next to them and unscrew
them.
2. To remove the PCIE Card, place one hand on the "PULL" handle and the
other hand on the thumb grip and pull the card up until it is detached from the
board.
3. Install components on the CPU board. Refer to section 2-4 for processor
installation and section 2-5 for memory installation. After you are nished
installing the components, install the PCIE Card back on the CPU board.
 Loading...