4-26
X8DAL-3/X8DAL-i User's Manual
5. Following the instructions given on the screen to update the BIOS. These
instructions are also shown below.
a. At the prompt, press the <SpaceBar> to update the BIOS.
b. When asked to confi rm BIOS updating, press <y> to confi rm BIOS
updates.
c. Press <y> again to begin fl ashing BIOS remotely.
Note: Be sure to complete Steps a~c above quickly because
you have a second or less to do so.
6. Once you've completed the instructions given, a screen will display to indicate
that remote fl ashing is starting and the new BIOS fi le is being uploaded.
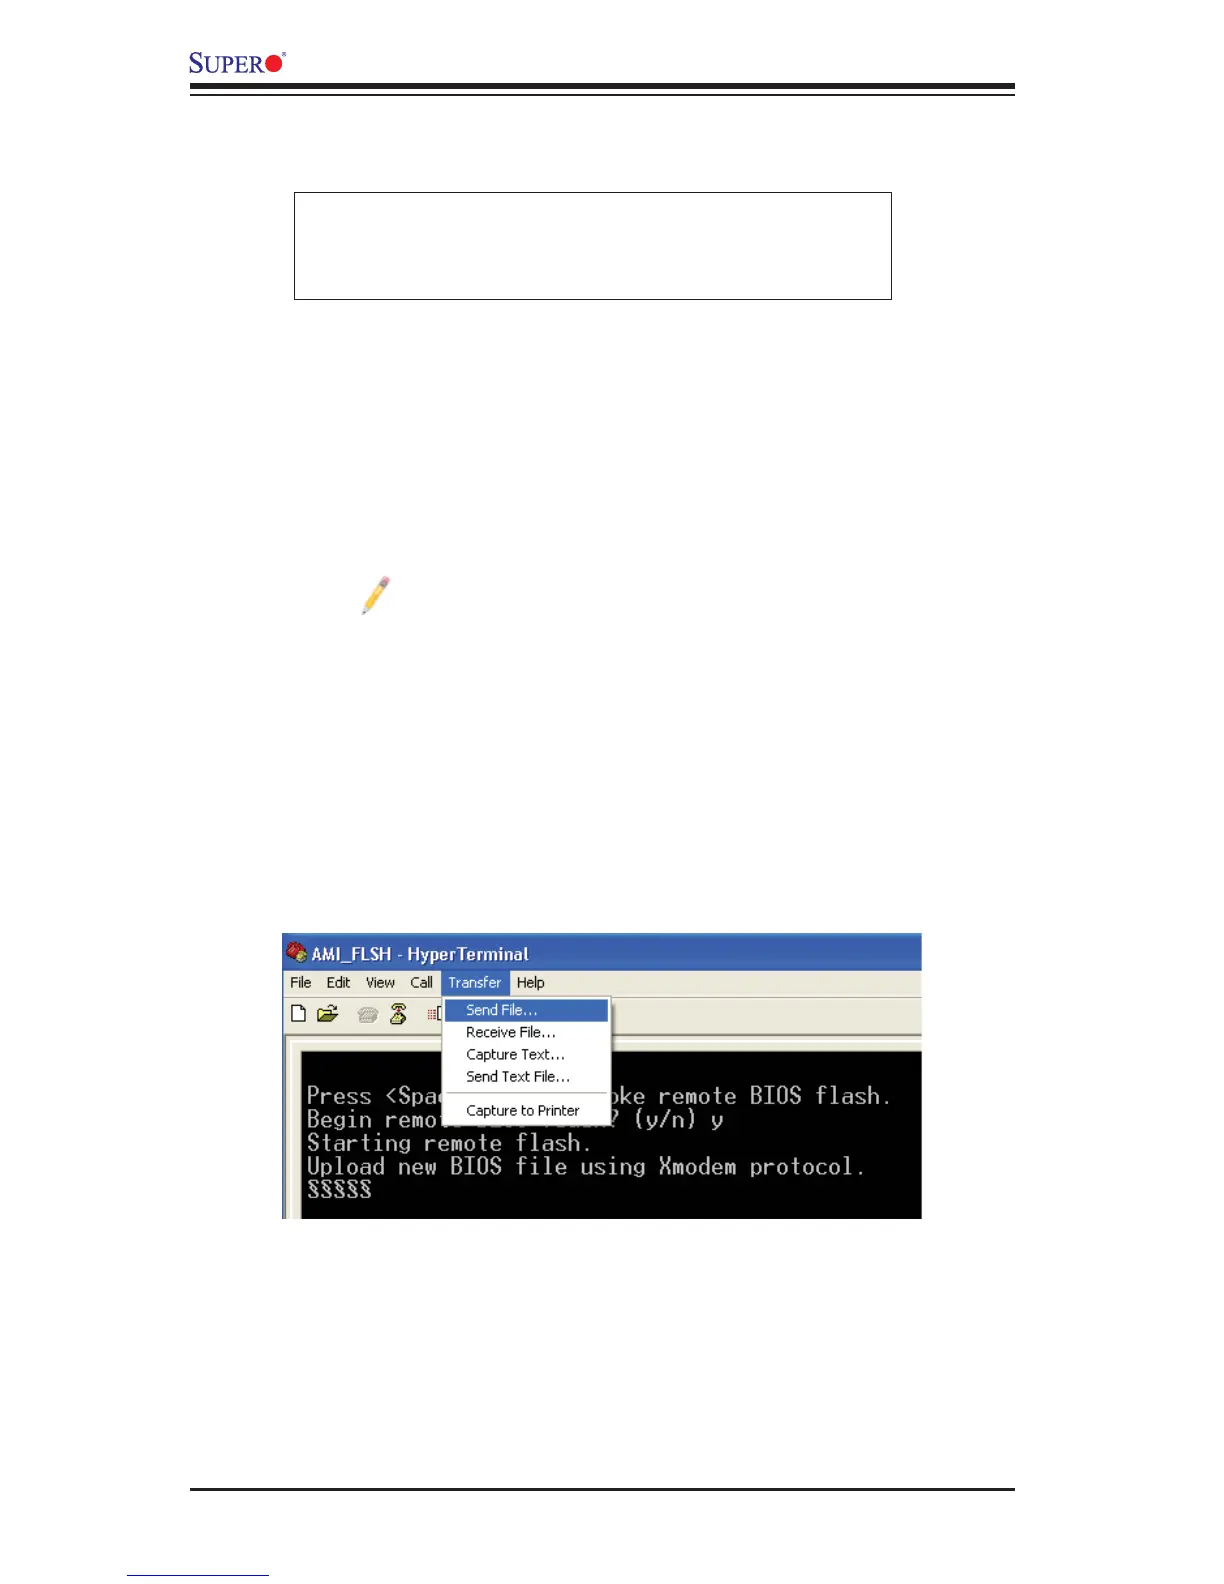
7. To use Hyper Terminal to transfer the XModem protocol by using the "Send
File" dialog under the "Transfer" menu, follow the instructions below to com-
plete XModem transfers.
a. Select the "Transfer" menu and enter <Send>.
4. Power on your system and click the <Connect> button in the Hyper Terminal.
The terminal screen will display the following messages.
b. Specify the location of the ROM fi le and select the proper protocol (XMo-
dem).
c. Press <Send> to start ROM File extraction. (See the picture below.)
Press <SpaceBar> to update BIOS.
Confirm update BIOS? (y/n) y
Begin remote BIOS flash? (y/n) y
Starting remote flash.
Upload new BIOS file using Xmodem protocol.
 Loading...