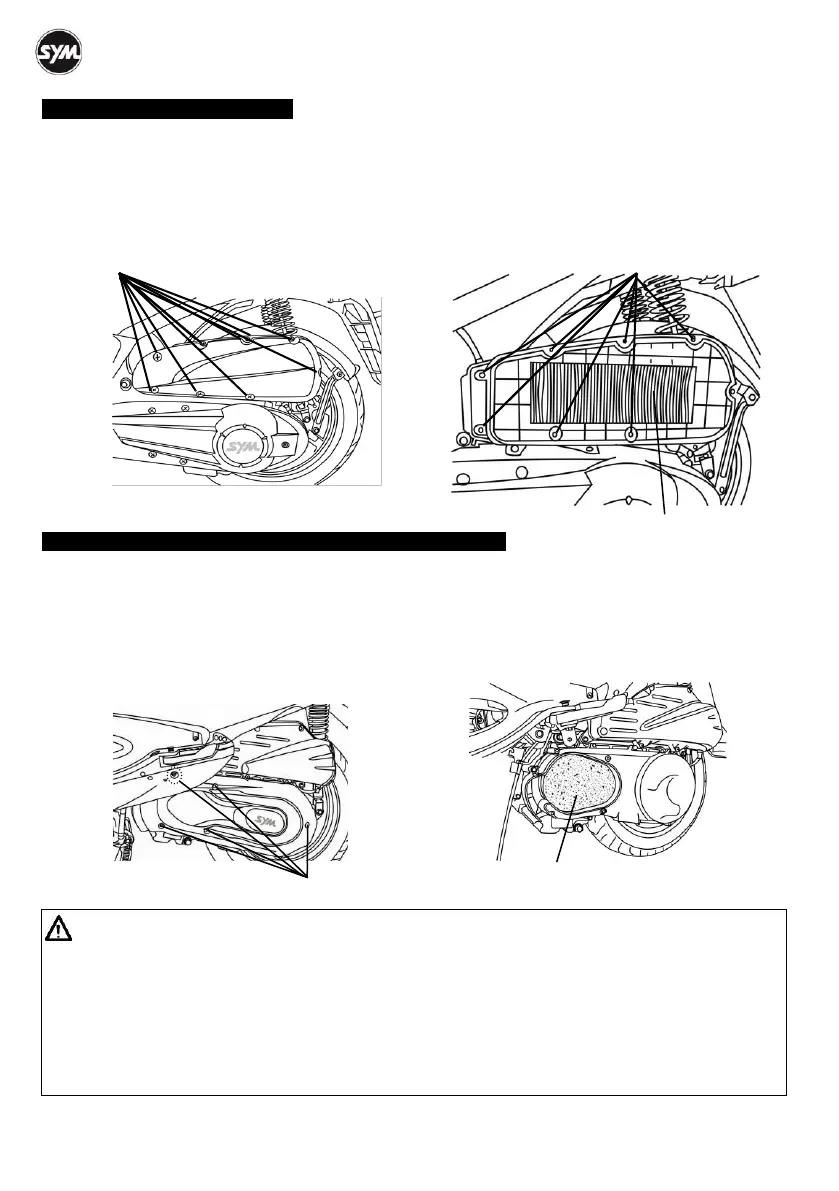
CHECKING THE AIR CLEANER
《DISASSEMBLE PRCEDURE》
1. Remove mounting screws from air cleaner cover.
2. Remove the air cleaner cover, then remove filter element.
3. Take the element out and clean it. (Refer to maintenance schedule.)
《ASSEMBLE PRCEDURE》
Assemble the air cleaner in reverse order of disassemble.
CHECKING THE LEFT CRANKCASE COVER AIR CLEANER
《DISASSEMBLE PRCEDURE》
1. Remove mounting screws from left crankcase cover.
2. Remove the left crankcase cover, then remove filter element.
3. Take the element out and clean it. (Refer to maintenance schedule.)
《ASSEMBLE PRCEDURE》
Assemble it in the reverse order of disassemble.
CAUTION:
Dust deposit is one of the major causes of reducing output horsepower and increasing fuel
consumption.
Change the air cleaner element more frequently to prolong the engine’s service life if the scooter is
driven on dusty roads very often.
If air cleaner is installed improperly, dust will be absorbed into cylinders, which may cause a
premature wear and reducing output power and engine’s life.
Be careful not to soak the air cleaner when washing the scooter. Otherwise, it will cause the
engine hard to start.