- 15 -
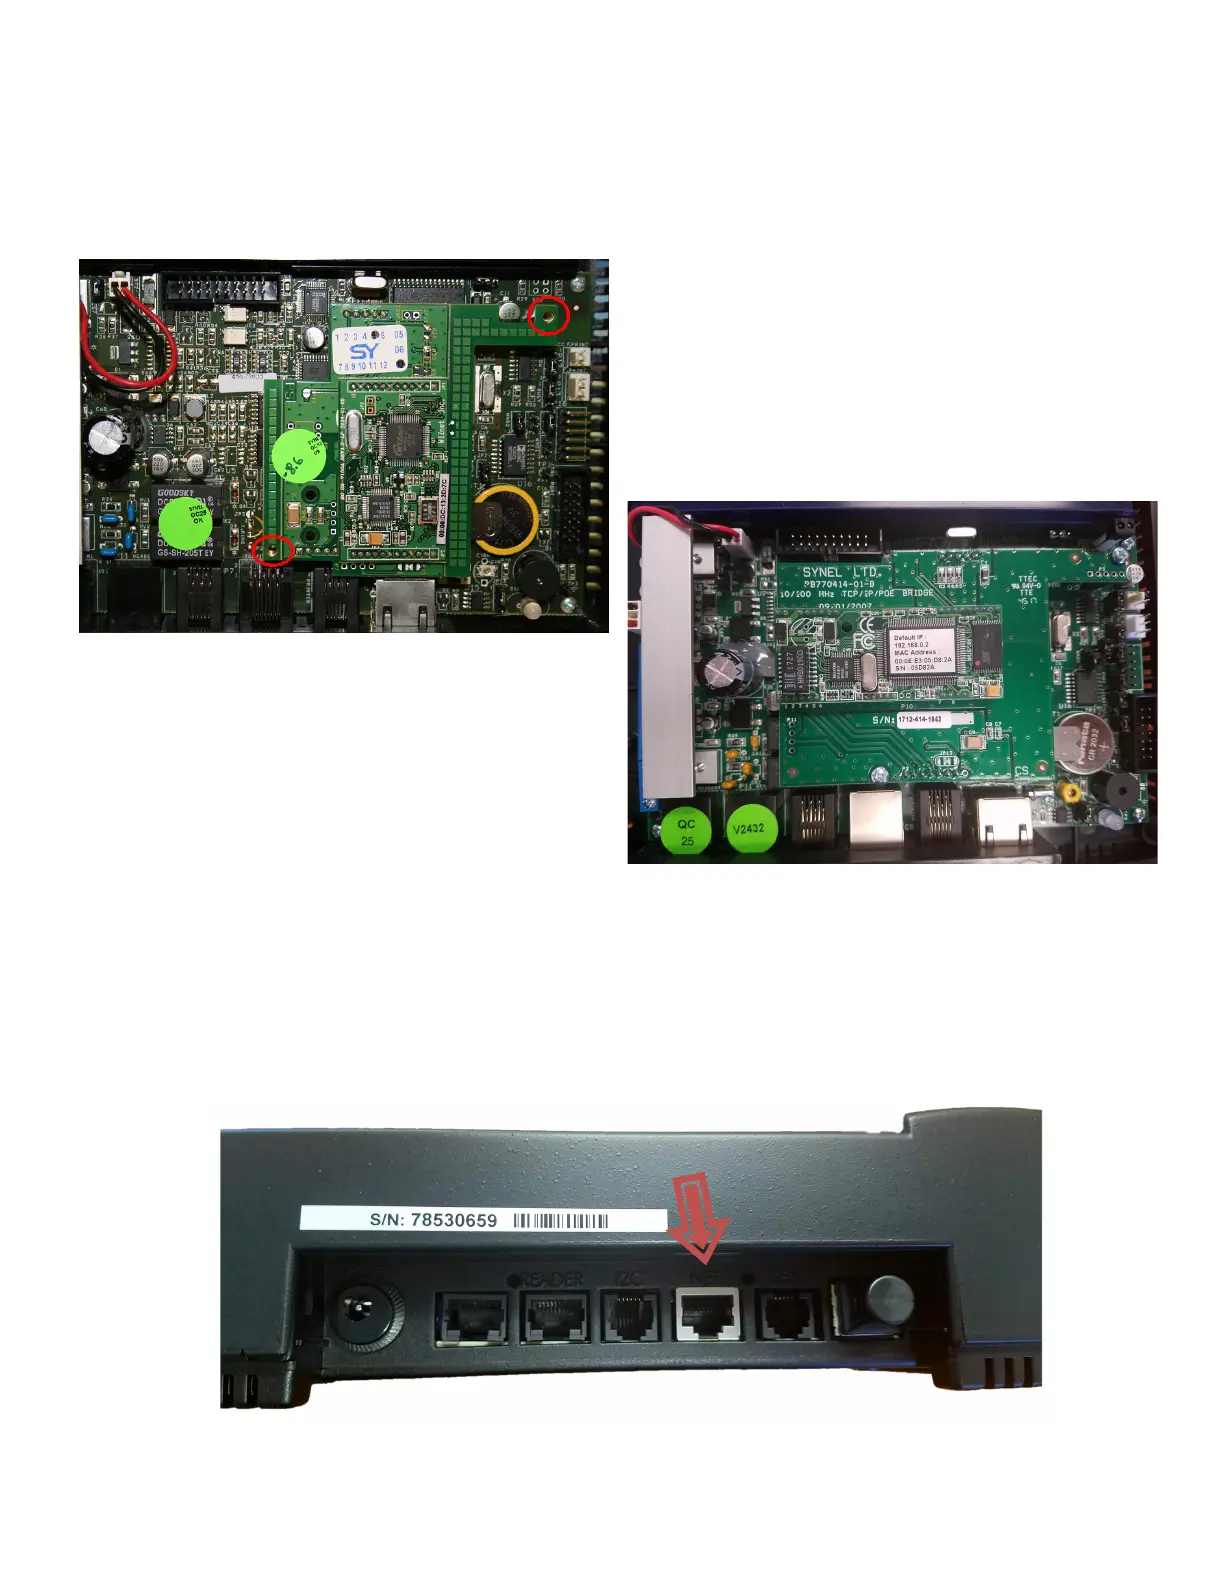
4. Line up the pins to the connectors on the board. Slide the pins into the connectors until the board rests on
the two screw mounts. Use the image below as a reference for proper card placement.
5. Insert the two screws for the Ethernet card.
6. Replace the front panel, inserting the 5 screws and being careful not to over tighten them.
7. Plug the Terminal back into a power source and make sure that the date/time appears in the terminal
display.
8. Plug the Ethernet cable into the NET port at the bottom of the terminal.
Type B
Type F


 To Next Page