- 16 -
5.3 Procedure – Internal Wi-Fi Card Installation
NOTE: Refer to the section 3.3.4 for additional information on configuration settings for this option.
1.
Unplug the power cord from the bottom of the Terminal and allow the unit to shut down after the battery
backup takes over. This will last about 20 seconds.
Unscrew and remove the front panel; there are 5 screws on the back side of the terminal.
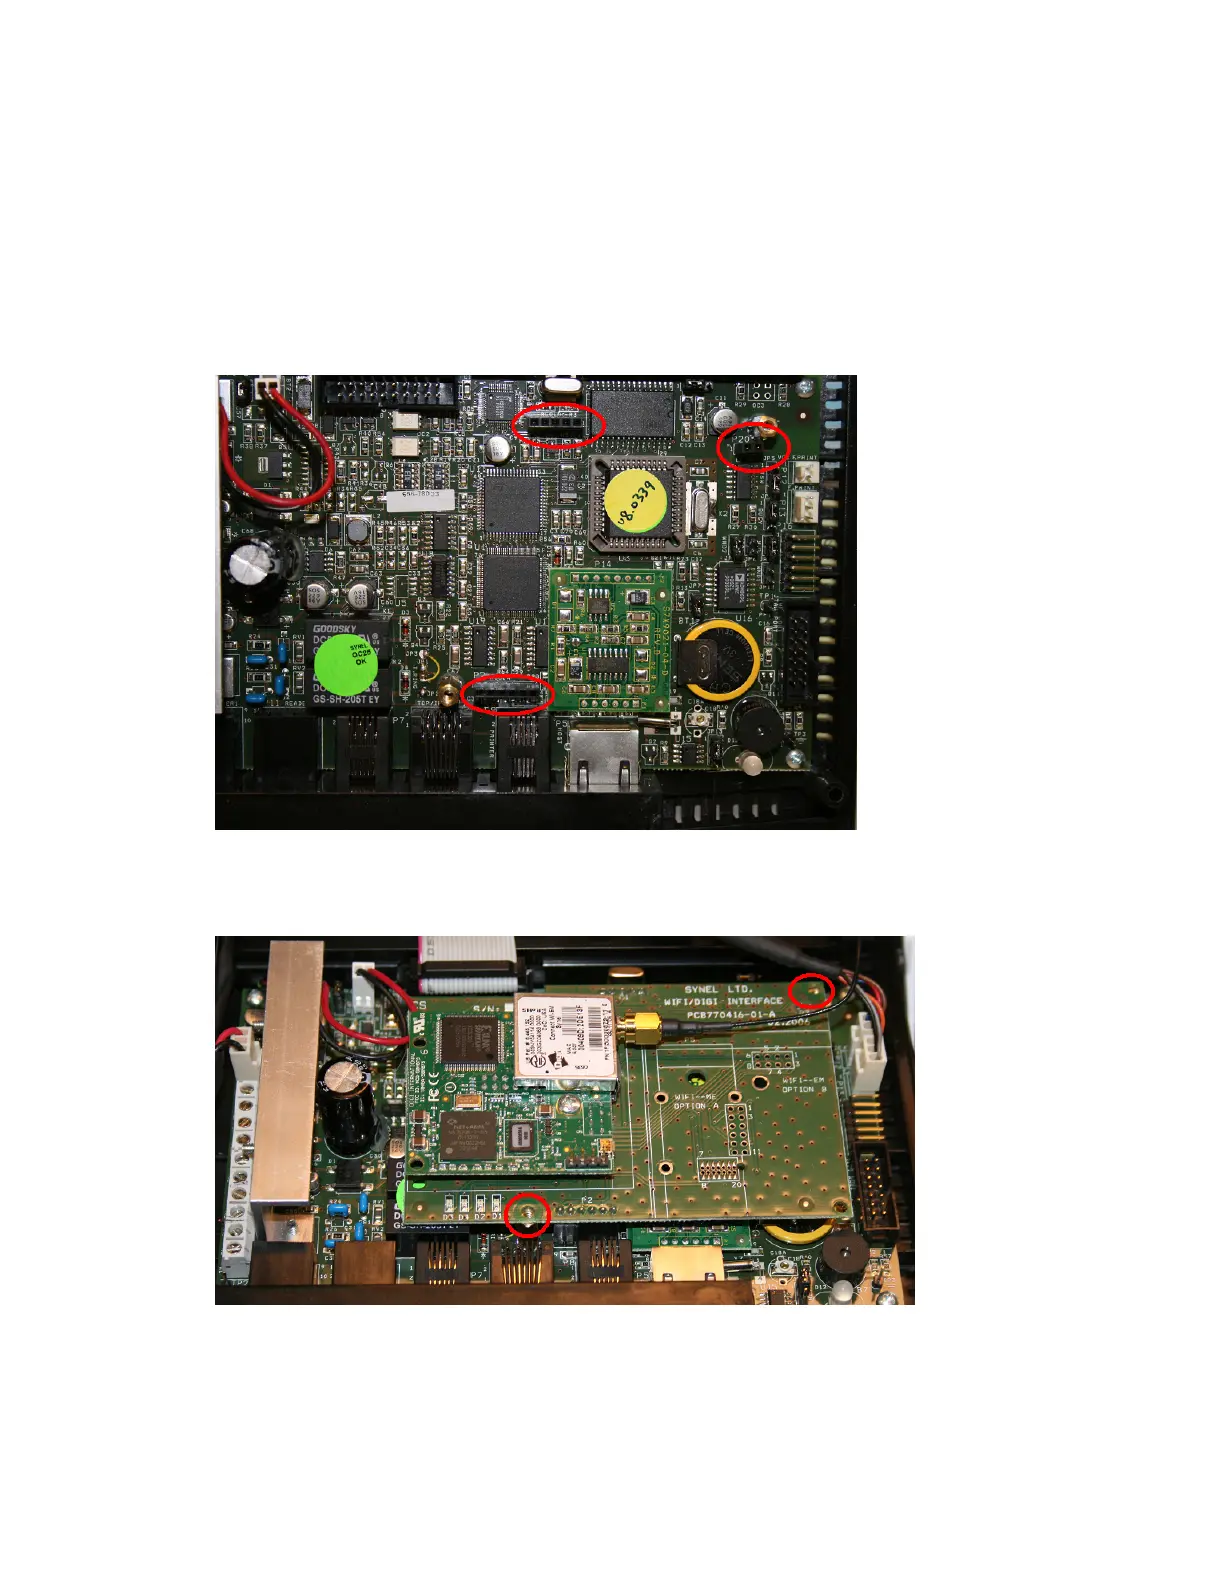
Locate the connectors that the Wi-Fi card will be plugging into using the follow image as a reference.
Line up the pins to the connectors on the board.
Slide the pins into the connectors until the board rests on
the two screw mounts. Insert the two screws that came with the card into the two screw mounts. Use the
image below as a reference for proper card placement.
Using the mounting piece and the zip tie that came with the Wi-Fi card, secure the Antenna to the interior of
the front panel.
Replace the front panel, insert the screws inserting the 5 screws and being careful not to over tighten them.
Plug the Terminal back into a power source and make sure that the date/time appears in the terminal
display.


 To Next Page