6 p250 Laser Quick Start Guide Version 3.1
p250 Quick Start Guide
Mounting (Continued):
Note notch
location.
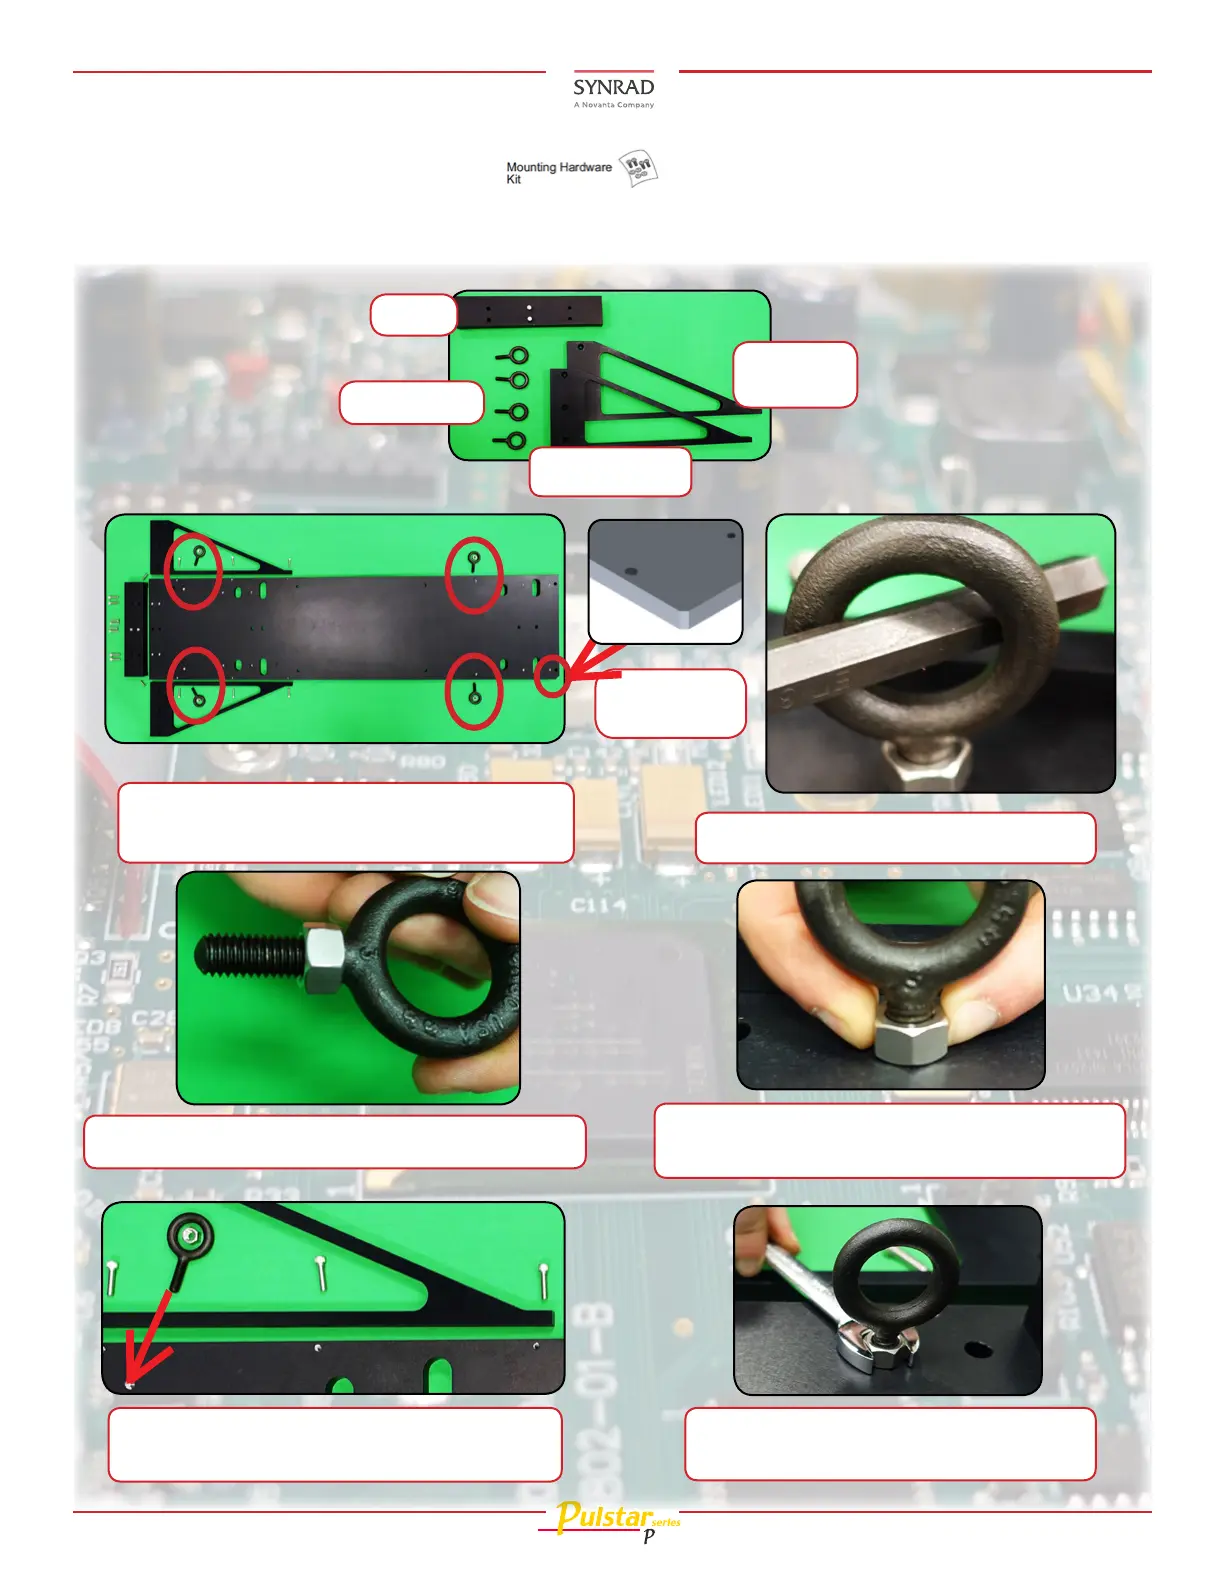
8.2 Four (4) eye bolt locations on the rail
and associated hardware.
8. Locate the Mounting Hardware Kit ( ( ) for the rail. Remove the rail & hardware from
the packaging. Ensure the notch is facing down and to the left. Assemble the eye bolts rst, the bar
second, then the triangle bars third.
Eye bolts
8.3 Ax the bolt onto the eye bolt as shown.
8.4 Assemble the 4 eye-bolts/nuts onto
the rail as shown above in 6.2.
Triangle
bars
Bar
8.1 Rail Kit.
8.5 Tighten the eye bolt to the rail.
8.7 Assure the bolt is snugged ush
with the rail as shown above.
8.6 Detach the bolt on the eye-bolt
so that it moves down toward the rail.