CONTENTS
Introduction.......................................1
Wiring up a FAAST LT unit ..........................1
Power connections and supervision 1
Sounder EOLs 1
Programmable input (Reset) 2
Front panel LEDs – what they show...................2
Front panel buttons – what they do ...................4
Reset 4
Test 4
Disable 4
Password access to Maintenance mode ...............5
FAAST LT Device operation.......................... 5
Power on sequence 5
Normal operation 5
Troubles 5
Operating modes 5
Factory default settings (‘out-of-the-box’) .............6
Connecting to a PC ................................6
Remote Maintenance mode 6
First time connection. 6
Communicating with a FAAST LT Device. 7
Disconnecting a FAAST LT device from a PC 7
FAAST LT
FIRE ALARM ASPIRATION SENSING TECHNOLOGY
®
SET-UP AND TROUBLESHOOTING GUIDE
INTRODUCTION
The purpose of this document is to help installers and technicians
connect, commission and check out a FAAST LT system in the
eld.
It includes information on wiring and setting up, what the indicators
and switches do, the device operating modes and factory default
settings and how to connect a unit to a PC. It highlights common
mistakes that can be made during an installation and provides a
useful section of dos and don’ts to ensure a successful application.
This document is not a substitute for the comprehensive information
contained in the current installation manual or the advanced setup
and control guide.
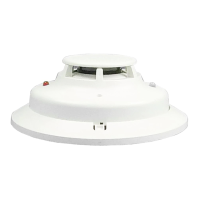
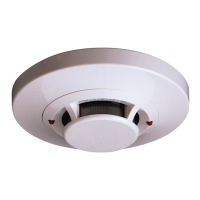
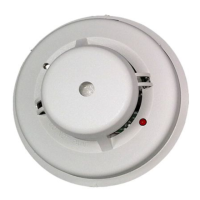
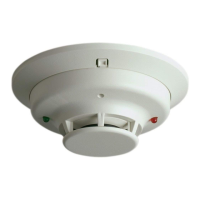
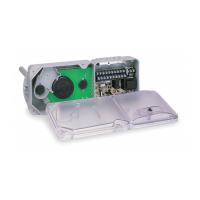
WIRING UP A FAAST LT UNIT
Figures 1A and 1B show the terminal connections for FAAST LT
devices. The stand-alone units (FL0111E, FL0112E and FL0122E)
are slightly different from the loop based devices (FL2011E,
FL2012E and FL2022E - Note: Other OEM Brands may use
different model numbers).
Power connections and supervision
The primary 24V power supply to the unit should be connected
to terminals 1 & 2. Terminals 3 & 4 are available for a secondary,
standby power unit if required. Terminals 1 & 2 have supervision
monitoring set as a factory default (terminals 3 & 4 are not
supervised as a default). With default settings, connecting power
to T3 & T4 without connecting T1 & T2 will give a power fault.
Sounder EOLs
The sounder output circuits have supervision monitoring and
should be tted with 47K EOL resistors. Without the EOL resistors,
the device will give a sounder fault.
Setting the Fan speed ..............................7
Auto mode 7
Manual mode 7
Fan Speed Indication 7
FAAST LT Alerts and Faults..........................7
Fault delay 7
Flow Fault Delay 7
Events log 8
Relay Outputs .....................................8
Resetting a detector from alarm or fault. 8
General reset of a detector. 8
Password recovery.................................8
DOs and DON’Ts with FAAST LT Devices .............. 9
Pipe network and device installation. 9
Device operation and maintenance 9
Actions that could affect the operability of the detector: 9
Figure 1A:
Stand-alone connections
Figure 1B:
Loop-based connections