EasyManua.ls Logo

System Sensor FAAST LT-200 - User Manual

System Sensor FAAST LT-200
22 pages
To Next Page IconTo Next Page
Loading...
D200-100-01 1 I56-3888-010
CONTENTS
Introduction........................................1
The FAAST LT-200 Functional State Diagram .............1
Password Procedure (to enter Maintenance Mode) 2
An Introduction to PipeIQ™ ...........................2
Using PipeIQ™ to Congure and Monitor FAAST LT-200 ....2
Connecting a PC to a FAAST Device for the First Time 2
Preparing to Congure or Monitor a FAAST LT-200 Device 3
Monitoring a FAAST LT-200 Device 3
Important Notes on Altering FAAST LT-200 Settings 3
Conguring a FAAST LT-200 Device 3
Sending a Conguration to a FAAST LT-200 Device 4
Time and Date: Setting the Real Time Clock 4
Setting the Alarm Level (Stand Alone Versions Only) 4
FAAST LT-200 Alarm Mode (Loop Based Versions Only) 4
Setting the FAAST LT-200 Device Fan Speed 4
FAAST LT-200
FIRE ALARM ASPIRATION SENSING TECHNOLOGY
®
ADVANCED SET-UP AND CONTROL GUIDE
INTRODUCTION
The FAAST LT-200 aspirating smoke detector is an advanced
smoke sensing system for use in early warning and very early
warning applications. The system continuously draws air from
the controlled environment through a series of sampling holes to
monitor the environment for smoke particulate. A range of sensing,
operating and output facilities can be congured in the FAAST LT-
200 unit by the end user. This is accomplished by programming
and downloading control parameters from a PC running the
proprietary software application, PipeIQ™. Note: Only PipeIQ™
version 2.9.1 or higher can be used with a FAAST LT-200. Other
versions of PipeIQ will not work with this detector. (See Appendix E
for PipeIQand PipeIQdownload and set-up details.)
Further PipeIQ™ Capabilities..........................5
Creating a Project 5
Designing a Pipe Layout 5
Creating Reports 5
PipeIQ™ Help 5
Appendices
A: FAAST LT-200 Cong. Parameters and Default Set-Up Values . 6
Conguration Parameters 6
Default Set-Up Values - Stand Alone Versions 10
Default Set-Up Values - Loop Based Versions 12
B: FAAST LT-200 Fault Codes .........................14
C: Example Pipe Congurations........................16
D: Which PipeIQ™ Software to Use.....................19
E: Accessing, Installing and Running The Latest PipeIQ™ ...20
F: PipeIQ™ and Pipe System Design ...................21
THE FAAST LT-200 FUNCTIONAL STATE DIAGRAM.
In operation, the device can be in one of 6 possible states:
Initialization
Normal
Maintenance
Remote Maintenance
Service Mode
Power Out Of Range state
The routes in and out of these states are shown in the diagram
below.
MAINTENANCE
REMOTE
MAINTENANCE
SERVICE
MODE
POWER OUT OF
RANGE STATE
Power < 18V
Power > 32V
(Power-ON)
INITIALIZATION
NORMAL
DISPLAY
FAN
SPEED
USB
Disconnected
+ Cover Close
Cover Open +
USB
Connected
RESET +
DISABLE
RESET +
Password Enter
Cover
Open
Cover
Close
RESET + Password Enter (During Auto Speed Procedure)
Maintenance Timeout or after TEST + RESET + DISABLE (When Device Configuration has been Changed)
Maintenance Timeout or after
TEST + RESET + DISABLE
(No Need for Device to Initialize)
Power in Correct Range
Keep this document for future reference

Other manuals for System Sensor FAAST LT-200

Question and Answer IconNeed help?

Do you have a question about the System Sensor FAAST LT-200 and is the answer not in the manual?

System Sensor FAAST LT-200 Specifications

General IconGeneral
TypeAspirating Smoke Detector
Sampling MethodContinuous air sampling
Power Supply24 VDC
Operating Temperature32°F to 120°F (0°C to 49°C)
Air Flow MonitoringYes
Coverage AreaUp to 2, 000 sq ft
CompatibilityCompatible with fire alarm control panels
TechnologyLaser-based smoke detection
Alarm RelayForm C relay output
Fault RelayForm C relay output

Summary

Introduction

The FAAST LT-200 Functional State Diagram

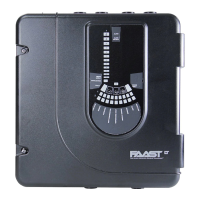
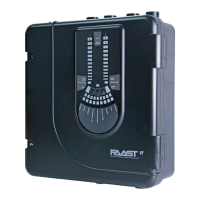
Explains the operational states and transitions of the FAAST LT-200 device.

Password Procedure (to enter Maintenance Mode)

An Introduction to PipeIQ

Overview

Provides a general overview of the PipelQ software and its capabilities.

The PipelQ User Interface

Describes the graphical user interface elements of the PipelQ software.

Using PipelQ to Control or Monitor FAAST LT-200

FAAST LT-200 USB Connection

Explains how to establish a USB connection between a PC and the FAAST LT-200 device.

Connecting a PC to a FAAST LT-200 Device for the First Time

Details the minimum system requirements for connecting a PC to the FAAST LT-200 for the first time.

Preparing to Configure or Monitor a FAAST LT-200 Device

Outlines the steps to prepare for connecting and communicating with the FAAST LT-200 via PC.

Monitoring a FAAST LT-200 Device

Describes how to monitor the FAAST LT-200 device using PipelQ software.

Configuring a FAAST LT-200 Device

Details how to use the PipelQ configuration interface to set device parameters.

Sending a Configuration to a FAAST LT-200 Device

Explains how to send saved configuration settings from a PC to a FAAST LT-200 device.

Time and Date: Setting the Real Time Clock

Describes how to set the internal real-time clock of the FAAST LT-200 device.

Setting the Alarm Level (Stand Alone Versions Only)

Details how to set the 9 sensitivity levels for alarm and pre-alarm in stand-alone versions.

FAAST LT-200 Alarm Mode (Loop based version only)

Explains how the alarm decision is made at the panel for loop-based units.

Setting the FAAST LT-200 Device Fan speed

Describes how to set the fan speed control mode for the FAAST LT-200 device.

Important Notes on Altering FAAST LT-200 Settings

Air Flow Settings

Discusses the importance of PipelQ for verifying air flow settings and EN54:20 compliance.

Delay Settings

Explains the critical nature of delay settings for EN54:20 compliance and cautions against changes.

Further PipelQ Capabilities

Creating a Project

Guides the user through the process of creating a new PipelQ project file.

Designing a Pipe Layout

Outlines the knowledge required for creating an effective pipe layout using PipelQ.

Creating Reports

Lists the types of reports that can be generated using PipelQ software.

PipelQ Help

Explains how to access and use the PipelQ online help system for assistance.

Appendix A: FAAST LT-200 Configuration Parameters and Default Set-Up Values

A1: FAAST LT-200 Configuration Parameters

Lists and describes all configurable parameters for the FAAST LT-200 device.

Table A2: Stand Alone Versions

Lists the default set-up values for stand-alone FAAST LT-200 units across different configurations.

Table A3: Loop Based (Addressable) Versions

Lists the default set-up values for loop-based FAAST LT-200 units across different configurations.

Appendix B: FAAST LT-200 Fault Codes

FAAST LT-200 Fault Codes

Lists and describes fault codes generated by the FAAST LT-200 unit for event logging.

Appendix C: Example Pipe Configurations - 1 Channel (can be duplicated for 2 channel units)

Example Pipe Configuration 1 Channel Single Pipe 100 m x 18 Holes - Class C

Provides a specific pipe layout example for a 100m Class C single-channel configuration.

Example Pipe Configuration 1 Channel Single Pipe 80 m - Class B

Provides a specific pipe layout example for an 80m Class B single-channel configuration.

Example Pipe Configuration 1 Channel Single Pipe 80 m - Class A

Provides a specific pipe layout example for an 80m Class A single-channel configuration.

Example Pipe Configurations - Maximum 1 Channel with Branch: 2 X80 m = 160 m Class C

Illustrates a maximum 1-channel configuration with a branch for Class C.

Example Pipe Configurations Using External Filter

Example Pipe Configuration 1 Channel Single Pipe With Filter - Class C

Shows a pipe configuration example with an external filter for Class C.

Example Pipe Configuration 1 Channel Single Pipe With Filter - Class B

Shows a pipe configuration example with an external filter for Class B.

Example Pipe Configuration 1 Channel Single Pipe With Filter - Class A

Shows a pipe configuration example with an external filter for Class A.

Appendix D: Which PipelQ Software to Use?

Table D1: Correct software to connect with the different versions of FAAST LT

Compares FAAST LT versions with compatible PipelQ software versions.

Table D2: Device part numbers vs FAAST LT versions

Lists part numbers associated with different FAAST LT device versions.

Appendix E: Accessing, Installing and Running the Latest Version of PipelQ

To Download PipelQ

Guides the user on how to download the latest PipelQ software from the manufacturer's website.

To Install PipelQ

Provides step-by-step instructions for installing the downloaded PipelQ software on a PC.

To Run PipelQ

Explains how to launch the PipelQ application after installation.

Appendix F: PipelQ and Pipe System Design

Suggested Design Methodology

Outlines a methodology for creating EN54 compliant pipe layouts using PipelQ.

Tips to Achieve an Adequate Design

Offers practical advice for optimizing air flow and pipe system design in PipelQ.
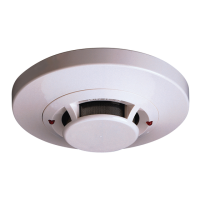
Related product manuals