D200-100-01 5 I56-3888-010
Auto Mode
In automatic fan speed mode, the unit will automatically initialise
to the best fan speed to achieve the conguration reference ow
value at power ON. Auto fan mode is the detector’s default setting.
Manual Mode
In manual fan speed mode, the unit uses the congured fan speed,
and does not initialise the ow relative to the pre-set reference ow
value. The fan speed can be set to operate in the range between 1
and 10 (highest speed). Manual mode is typically used for set-up
and test purposes only.
Fan Speed Test
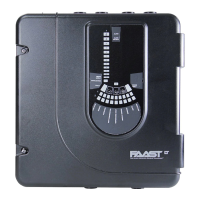
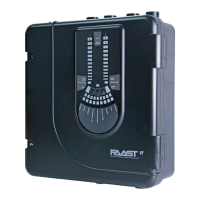
It is possible to test the fan speed setting using PipeIQ™.
The FAAST LT-200 device must be connected and communicating
with the PC.
Select the Monitoring tab in the left pane and highlight the FAAST
LT-200 device to be tested; the Actions tab will appear in the right
pane. In the Test Fans Speed box, select the desired fan speed
against the required channel with the slider. Click Test Fan; after
a short period the Flowrate will be displayed. To terminate the test,
click Stop.
FURTHER PIPEIQ™ CAPABILITIES
Creating a Project
To create a project select New from the File menu or click on the
toolbar.
The New Project dialog box appears.
In the File Name box, type the name of the project, and then click
Save.
The PipeIQ™ project le is created.
A project can comprise a site, buildings, oors, and devices. When
creating a project, these items are created by default; they must
be dened before designing the pipe layout. For information on
conguring elements on a site, see the PipeIQ™ Help (select
PipeIQ™ Help from the Help menu.
Note: It is possible to add new buildings, oors and devices to
a project after the initial site conguration is complete. Editing or
modifying a project is carried out in the Conguration mode; for
more information on adding elements to a project, refer to the
PipeIQ™ Help Menu.
Designing a Pipe Layout
To create an eective layout, the designer must have knowledge
of the following:
Local codes and standards for the site
Pipe network design
Creating layouts using drawing packages (e.g. AutoCAD
®
software)
and similar tools producing DXF format les.
For more information on using the Pipe Design Application Tools,
see the PipeIQ™ Help Menu.
Creating Reports
PipeIQ™ can generate the following reports.
Conguration Reports
Event Log Report
Pipe Layout
Bill of Materials.
For more information on using the Report options, see the PipeIQ™
Help Menu.
PipeIQ™ Help
The online help is a guide through the PipeIQ™ application. The
Help opens in a separate window where it is possible to search
and navigate to information on dierent topics.
Select PipeIQ™ Help from the Help menu or press F1. When you
press F1 the help topic for the active window is invoked.
Using Help - Navigation Pane (Left Pane)
This pane includes Contents, Search and Index tabs. Click on the
tab to access the content of each.
Index: This tab contains a multilevel list of keywords and keyword
phrases. To open a topic in the Display pane (Right pane) associated
with a keyword, double click the keyword. If the keyword is used in
more than one topic, a dialog box is displayed so you can select
the topic to view, and then click Display or double-click the topic.
Search: This tab helps you to search for a topic or content. Type
the word to search and press Enter on the keyboard. The list of
topics is displayed below. Double click the topic to show it in the
Display pane.
Contents: This tab lists the Table of Contents that contains
categorized books and pages. When you double click a closed
book it opens to display its topics, and when you click an open
book it closes. Double click a topic to show it in the Display pane.
Using Help - Display Pane (Right Pane)
The Display pane on the right of the online help displays the
content for the selected topic.
Blue Underlined Text Indicates a link to a dierent topic.
Green Italicized Text Indicates a link to more information or
images in the same topic. Re-click the link to hide the information
or image.

 Loading...
